To process a receipt in the SphereWMS system, an ARN must first be created.
To enter a new ARN:
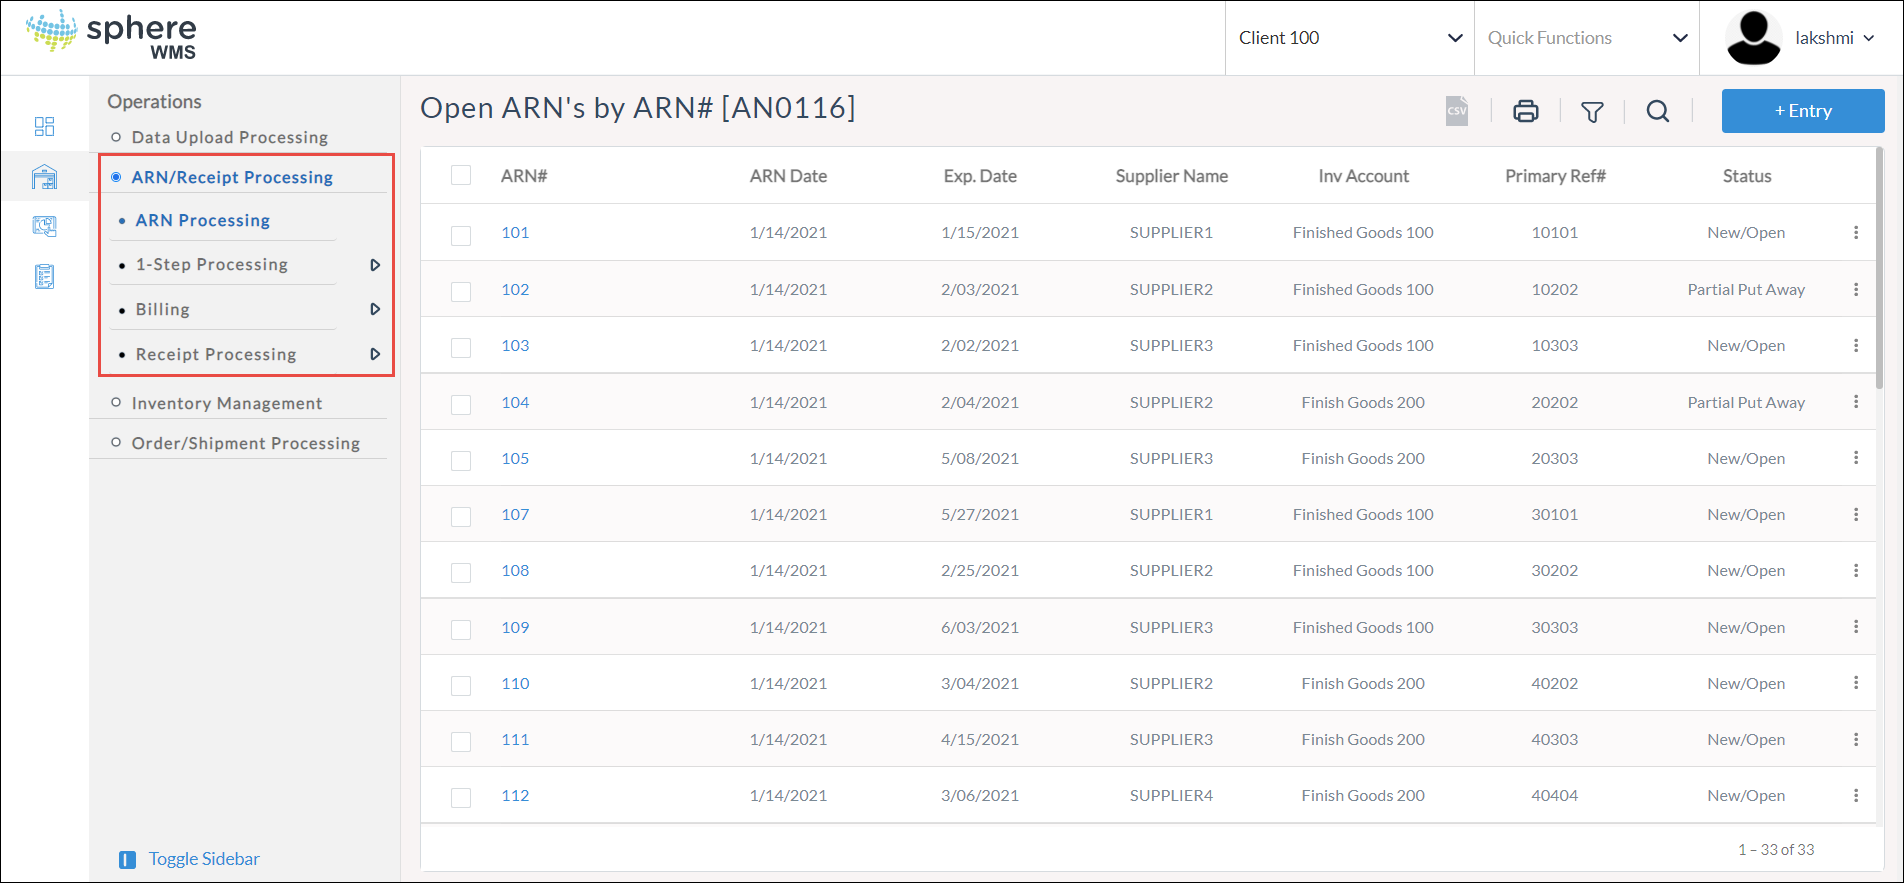
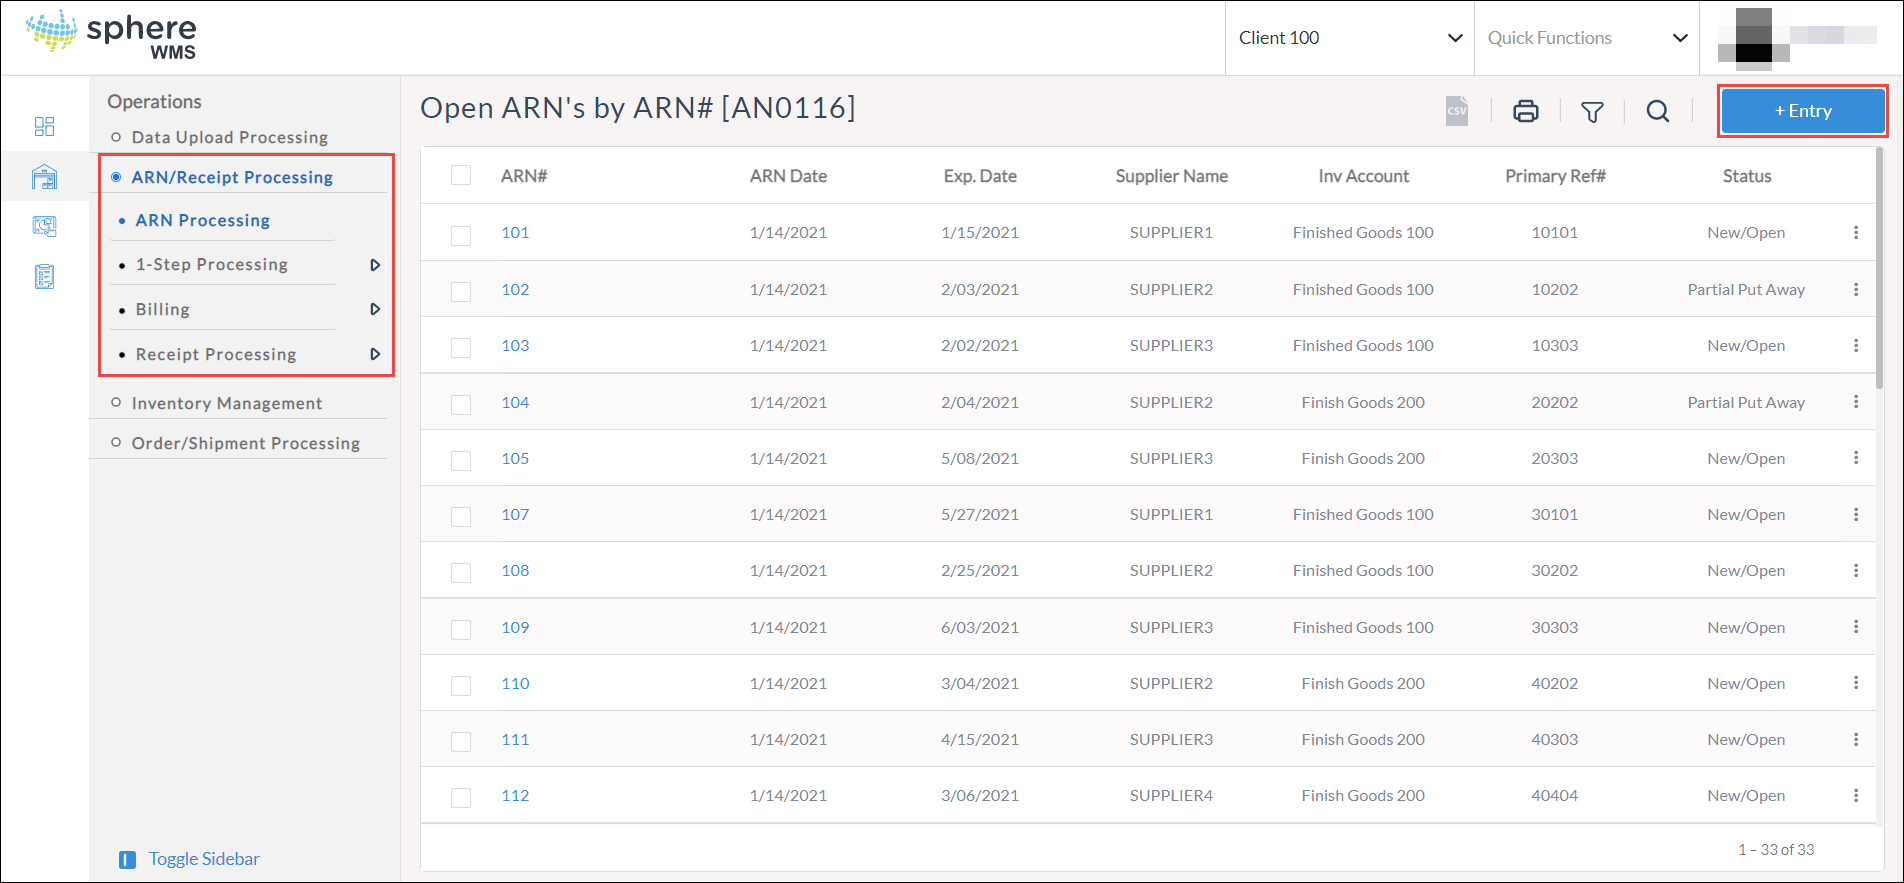
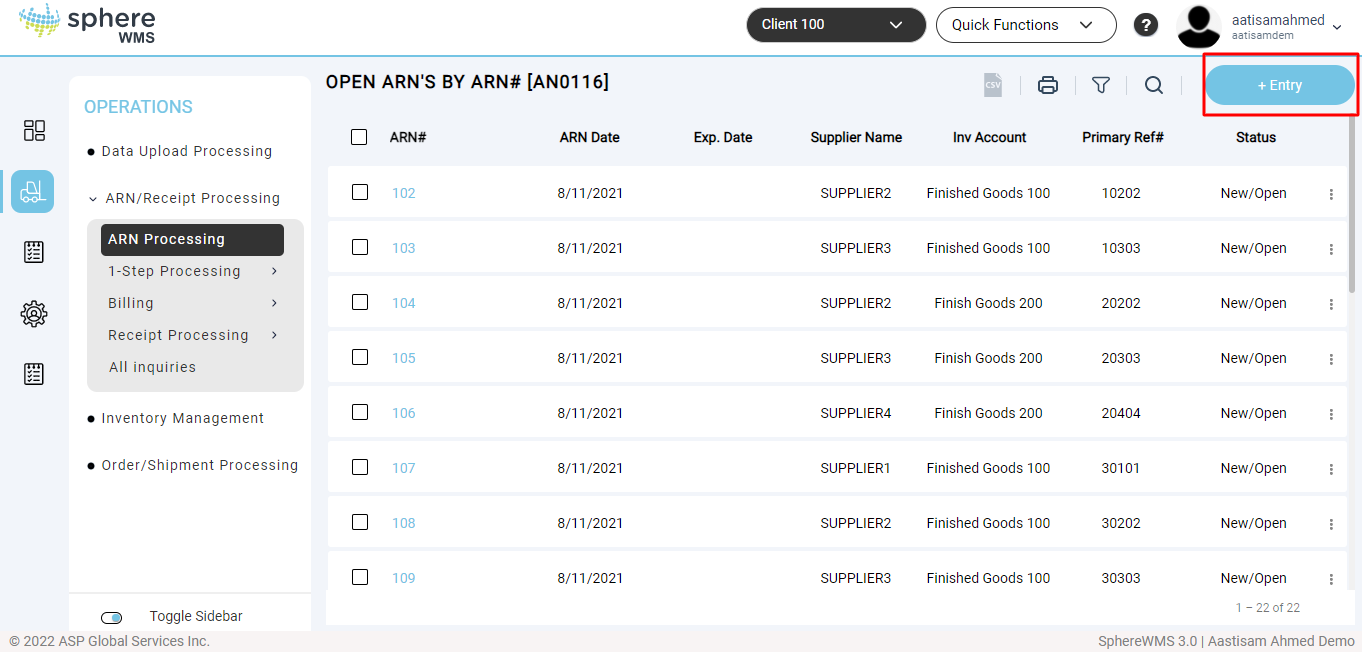
1. Navigate to Operations > ARN/Receipt Processing > ARN Processing.
The Open ARN’s by ARN# page will display.

2. Click +Entry.
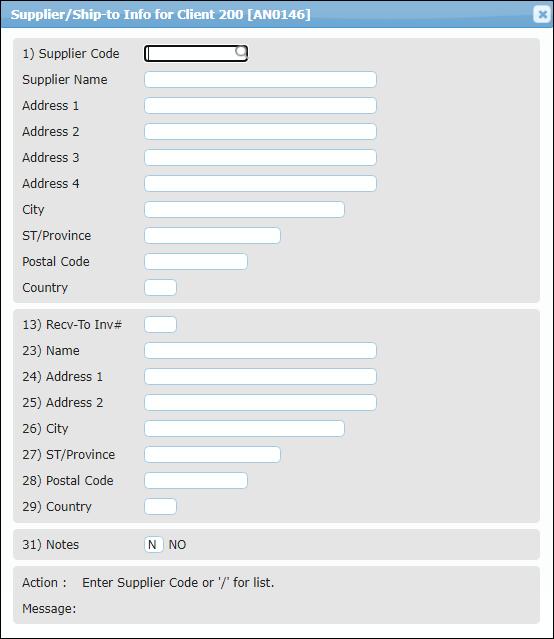
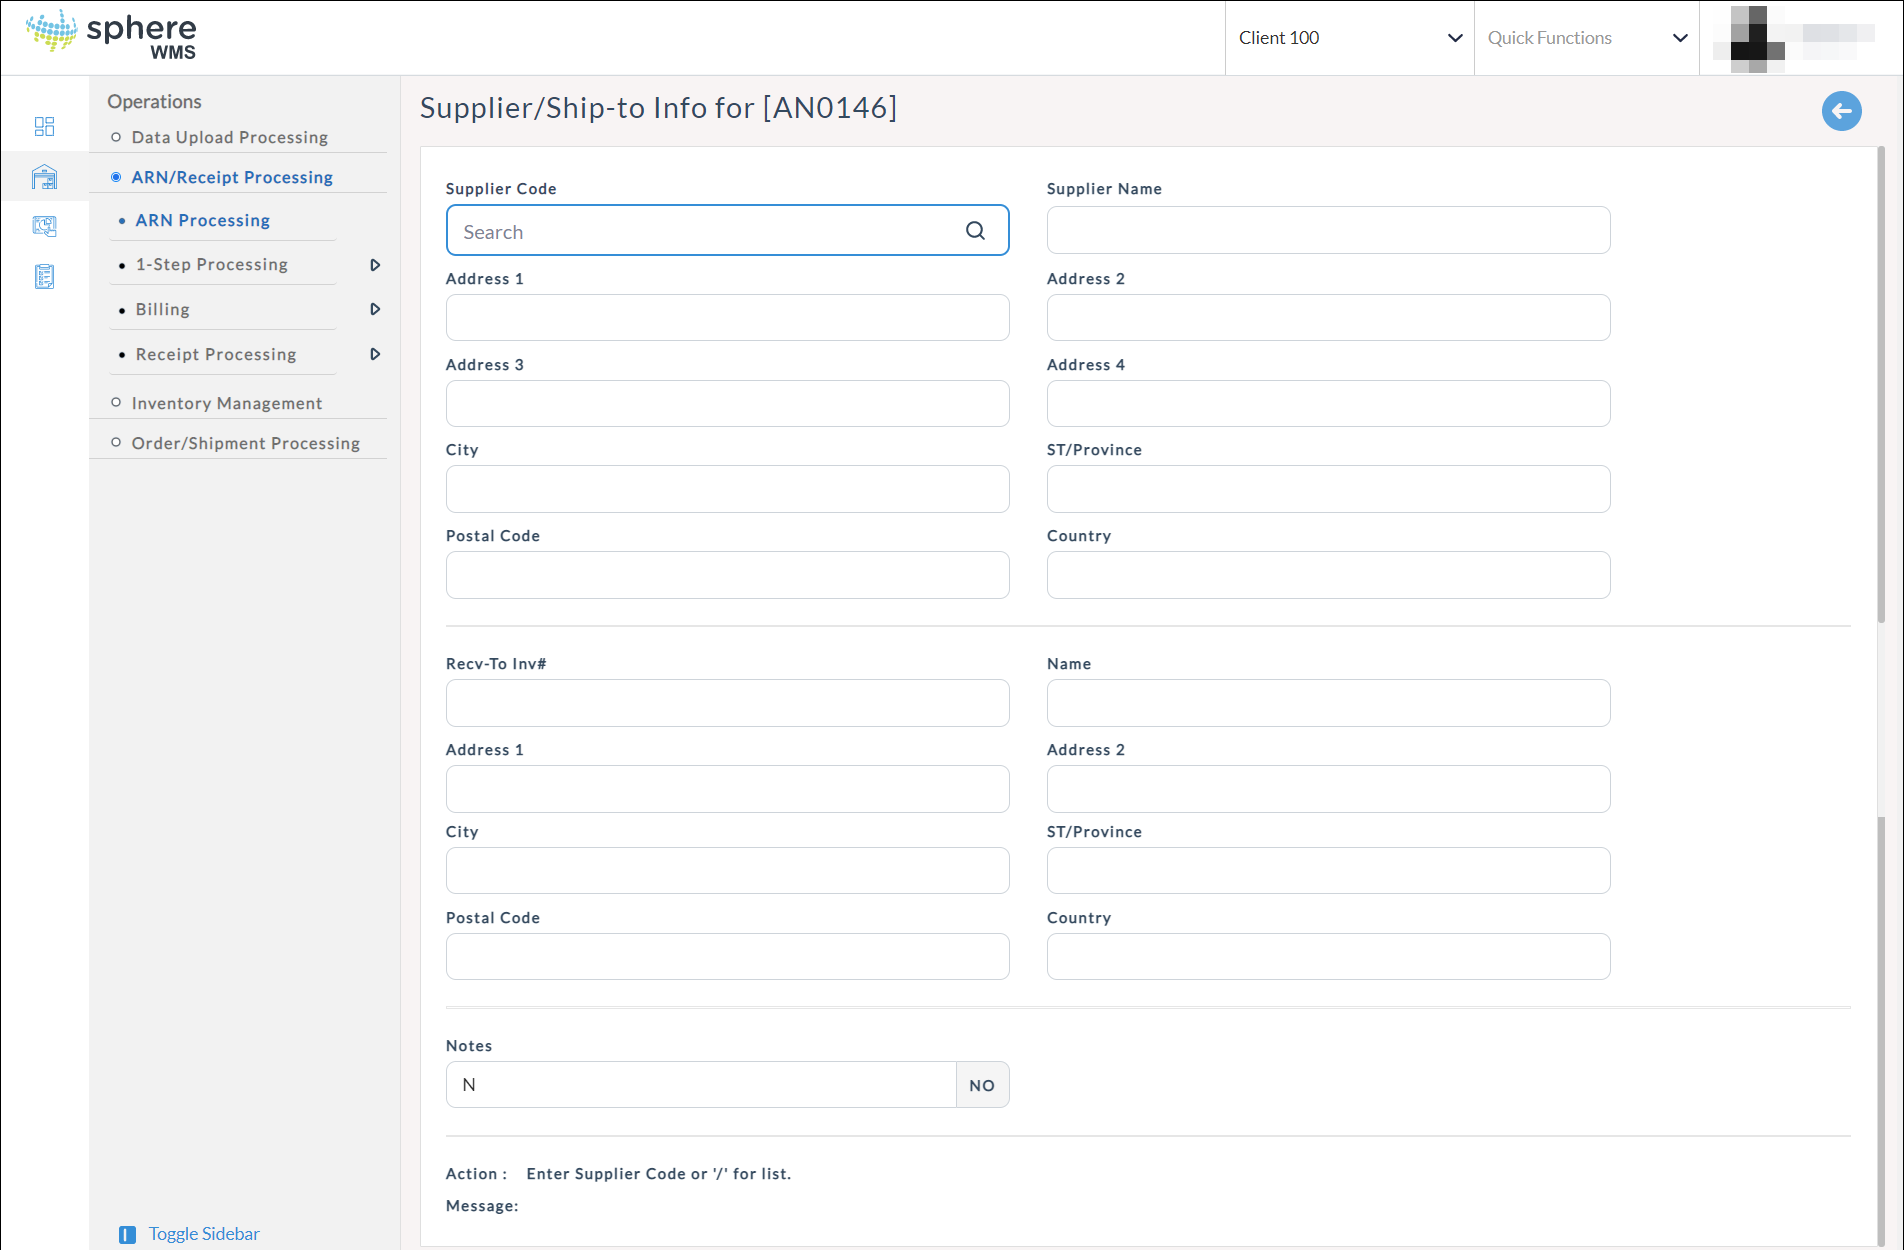
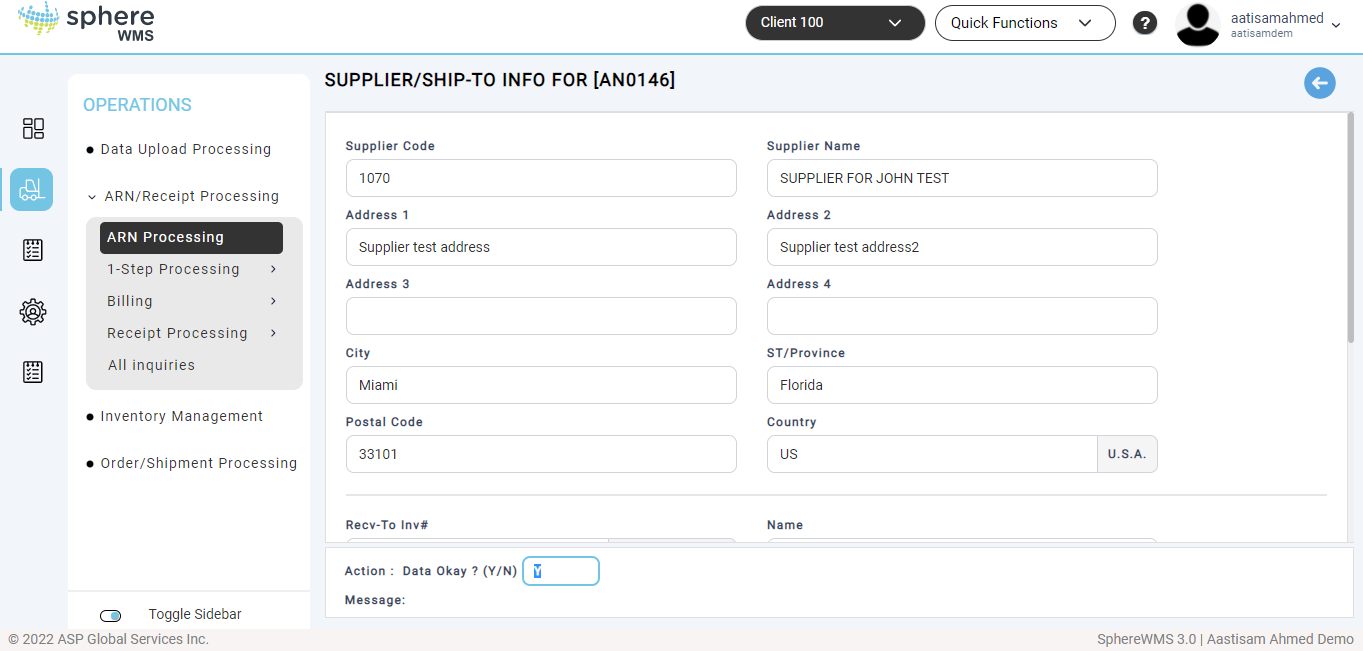
The Supplier/Ship-to Info for page will display. This is where the Suppliers, or "Ship-From" party, are identified.

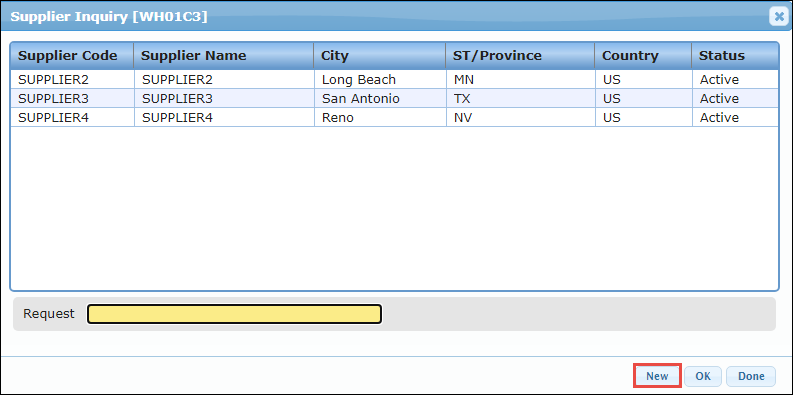
3. Select a valid Supplier by typing in the Supplier Code and press Enter. Or, to select from a list click the lookup icon. The active Suppliers defined in the Supplier Master will display for selection.
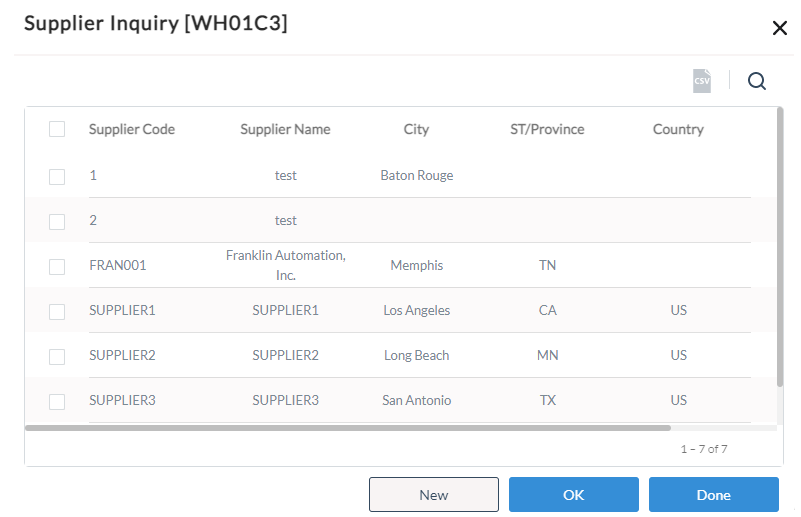
The Supplier Inquiry dialog showing all the active suppliers will be displayed.

To add a new supplier, click New and refer to https://spherewms.atlassian.net/wiki/x/dQLVXQ.
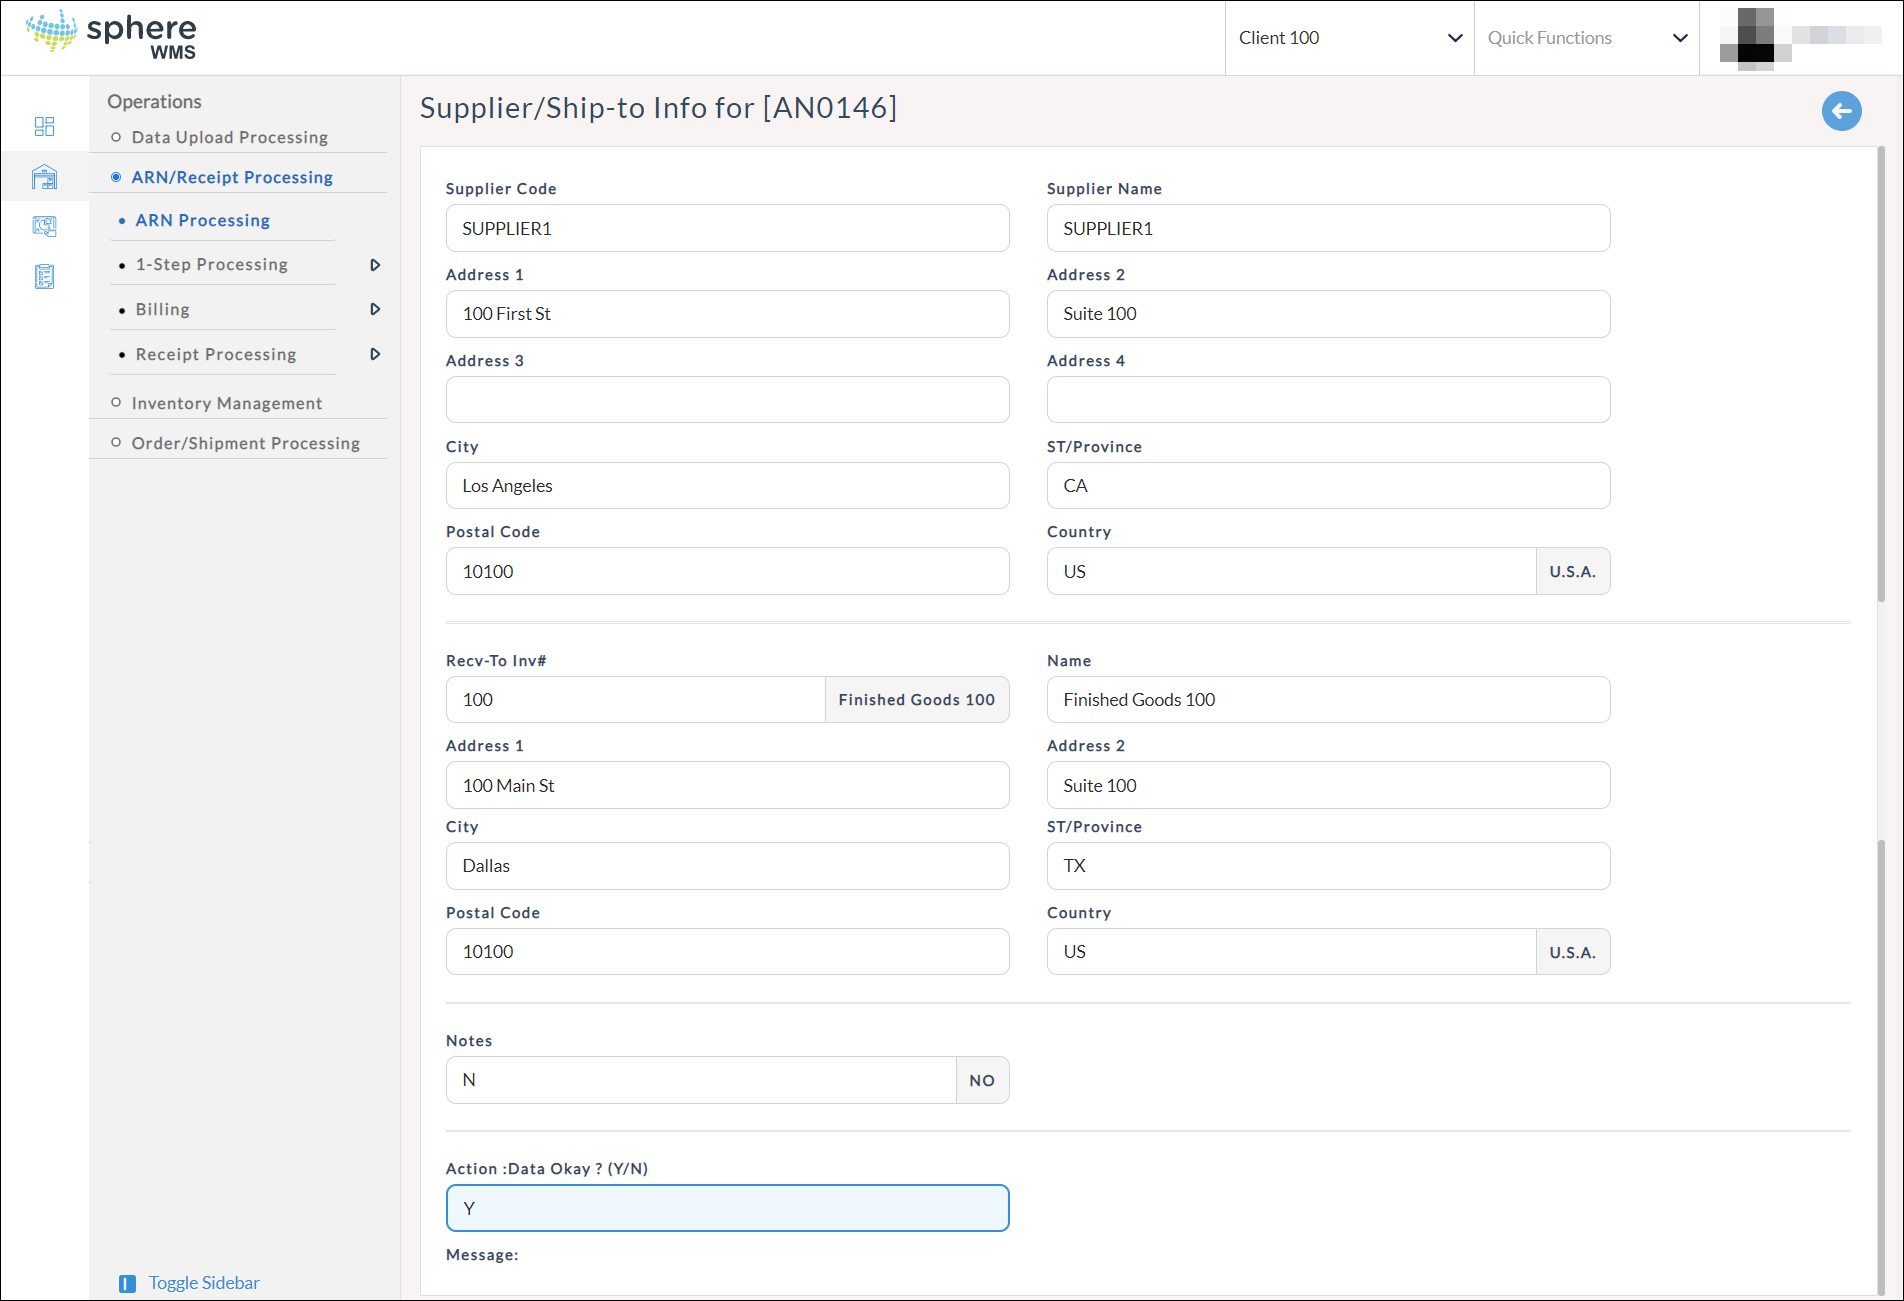
The Supplier name and address fields will be auto-populated.
4. Search and select Recv-To Inv# from the Inventory Account/Location list.
The inventory account name and address fields will be auto-populated.
5. Enter Y in Data Okay? field and press Enter.
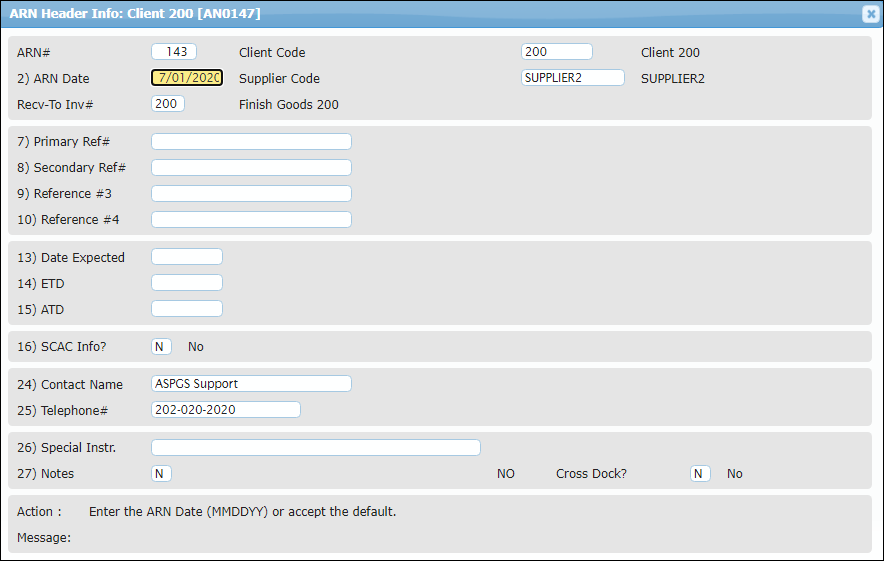
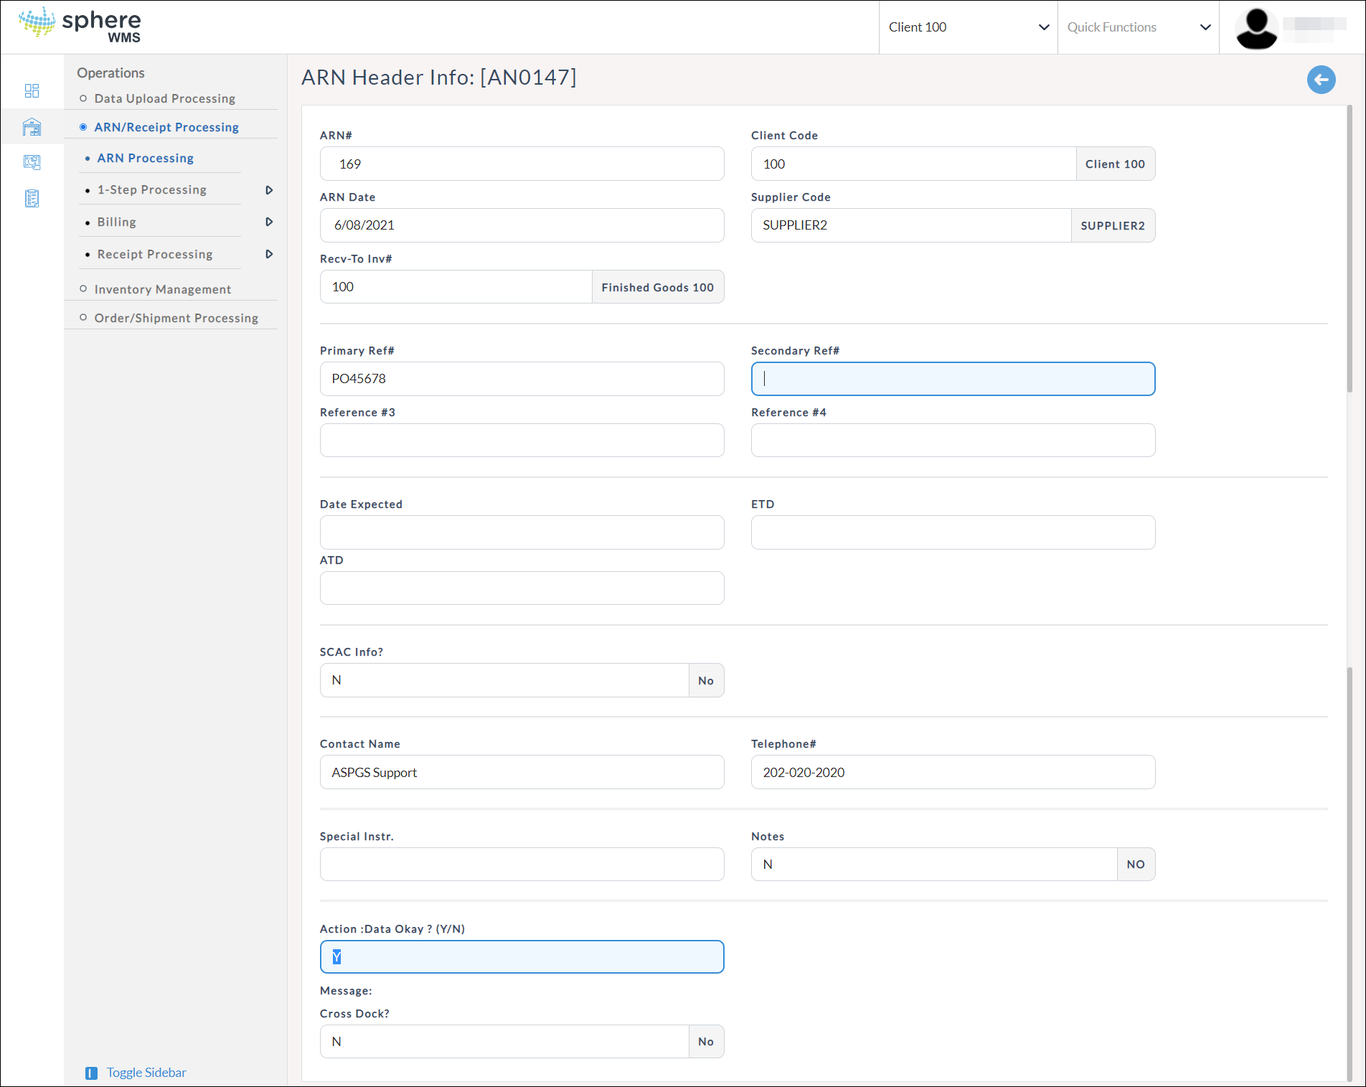
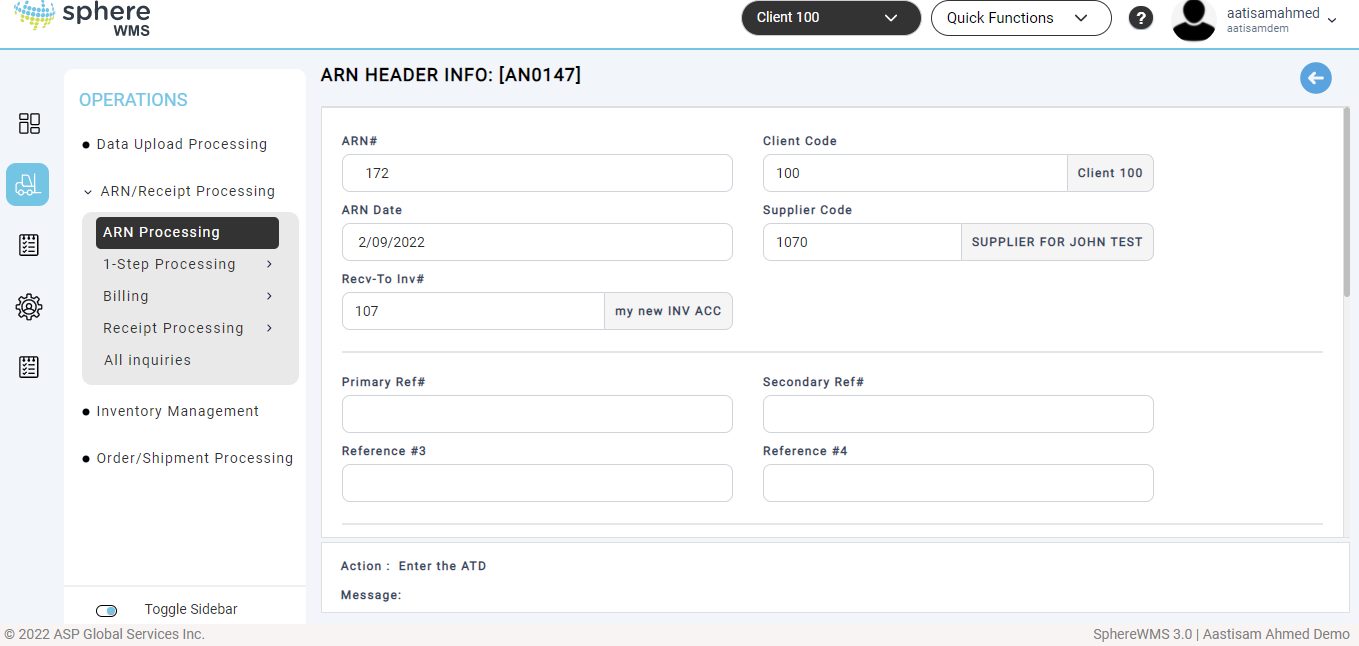
The ARN Header Info page will display.

If you do not want to save the entries, type "N" Enter.
6. Enter the ARN Date. By default, the current day’s date will be displayed. You can edit this field. However, if you press ESC in the ARN Date field, the form will exit and the current ARN will be void.
You will be prompted to enter values for four custom fields. These field titles and usage will vary based on different SphereWMS system installations.
CustomField1 and CustomField2 are ‘key fields'. The system comes standard with Inquiries and
Reports "by CustomFIeld1" and "by CustomField2", so it is important that
these fields are populated with data that would be used to search for a specific ARN or Receiver
in history.
To apply titles to the system's Custom Fields, contact support@spherewms.com for assistance.
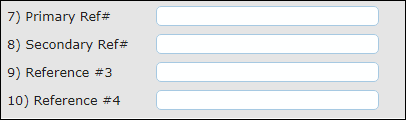
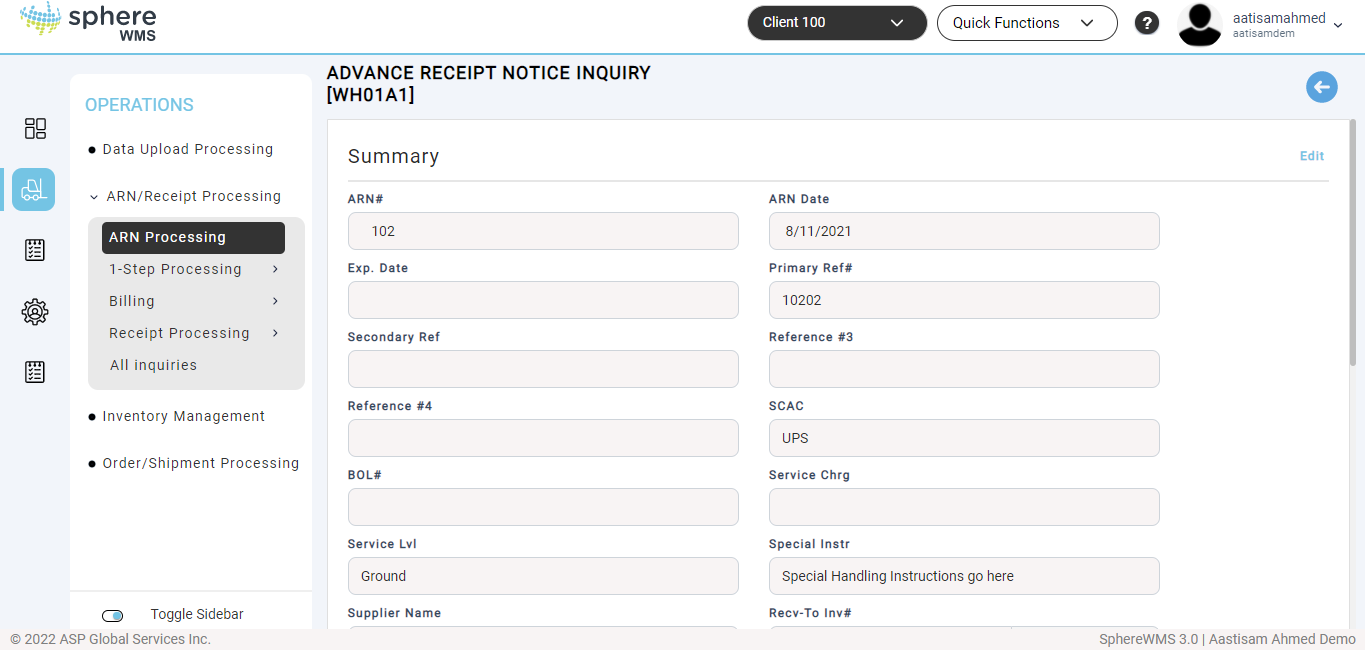
7. Enter primary reference number in Primary Ref# field. All the other fields are optional.
8. Enter the date on which the shipment is expected to arrive at the warehouse in the Date Expected field.
9. Enter the date on which the shipment is expected to leave origination in the ETD (Estimated Time of Departure) field.
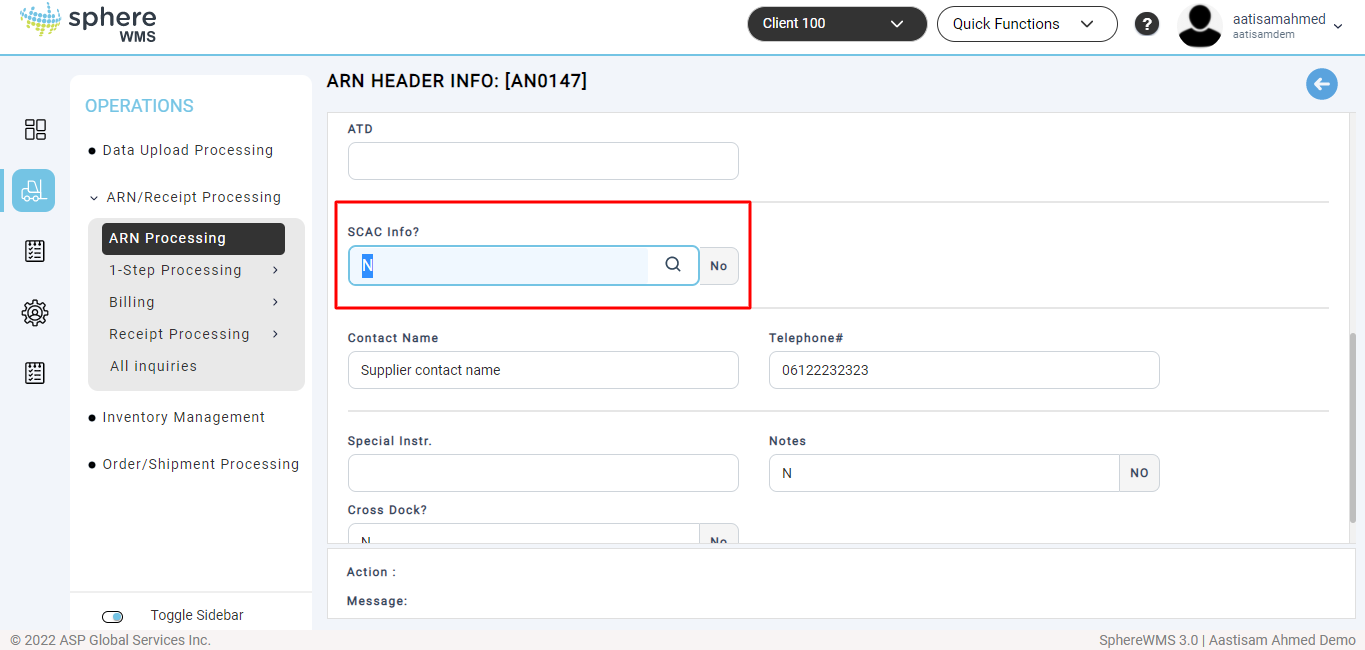
10. Enter the date on which the shipment actually left origination in the ATD (Actual Time of Departure) field.
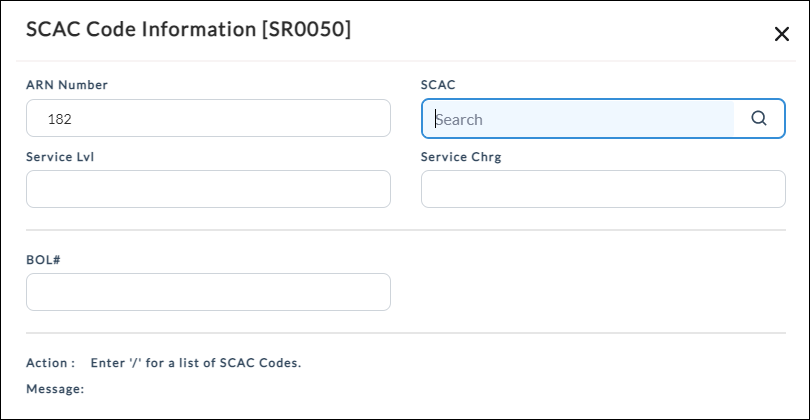
11. If you want to enter SCAC information, enter Y in the SCAC Info? field and press Enter.
The SCAC Code Information dialog will be displayed.
12. Search and enter the SCAC code associated with the Carrier delivering the shipment. To select from a list, click the lookup icon to open the SCAC Inquiry. To create a new SCAC Code, click the New button.
13. At the "BOL#" prompt, enter the Tracking# for the inbound shipment that corresponds with the SCAC Code.
14. Enter Y in Data Okay? field and press Enter.
You will be redirected to the ARN Header Info page.
15. Enter the shipment's Contact Name and Telephone #. These two fields will default from the Supplier Master if populated and may be overwritten.
16. At "Special Instructions" enter any pertinent information related to the shipment in this field. It will appear on the Receiver document and be retained in history for future reference.
17. At the "Data OK?" prompt, type "Y" Enter.
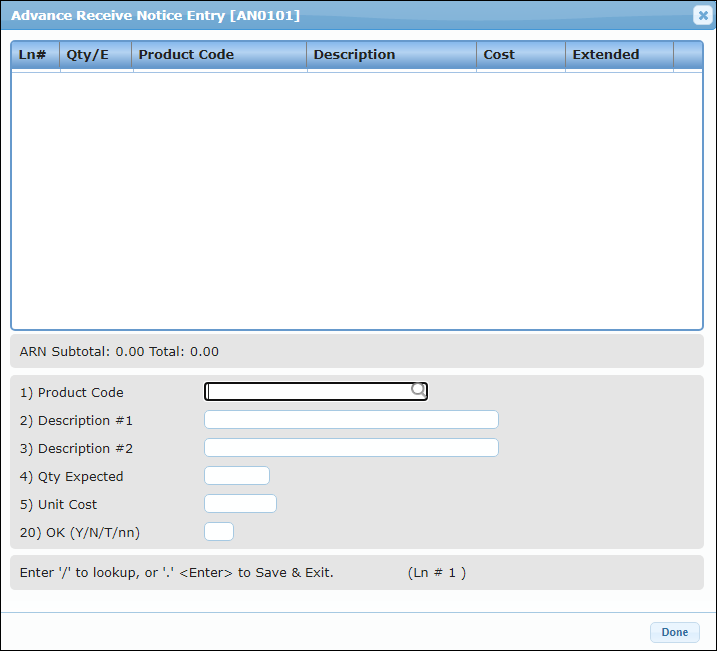
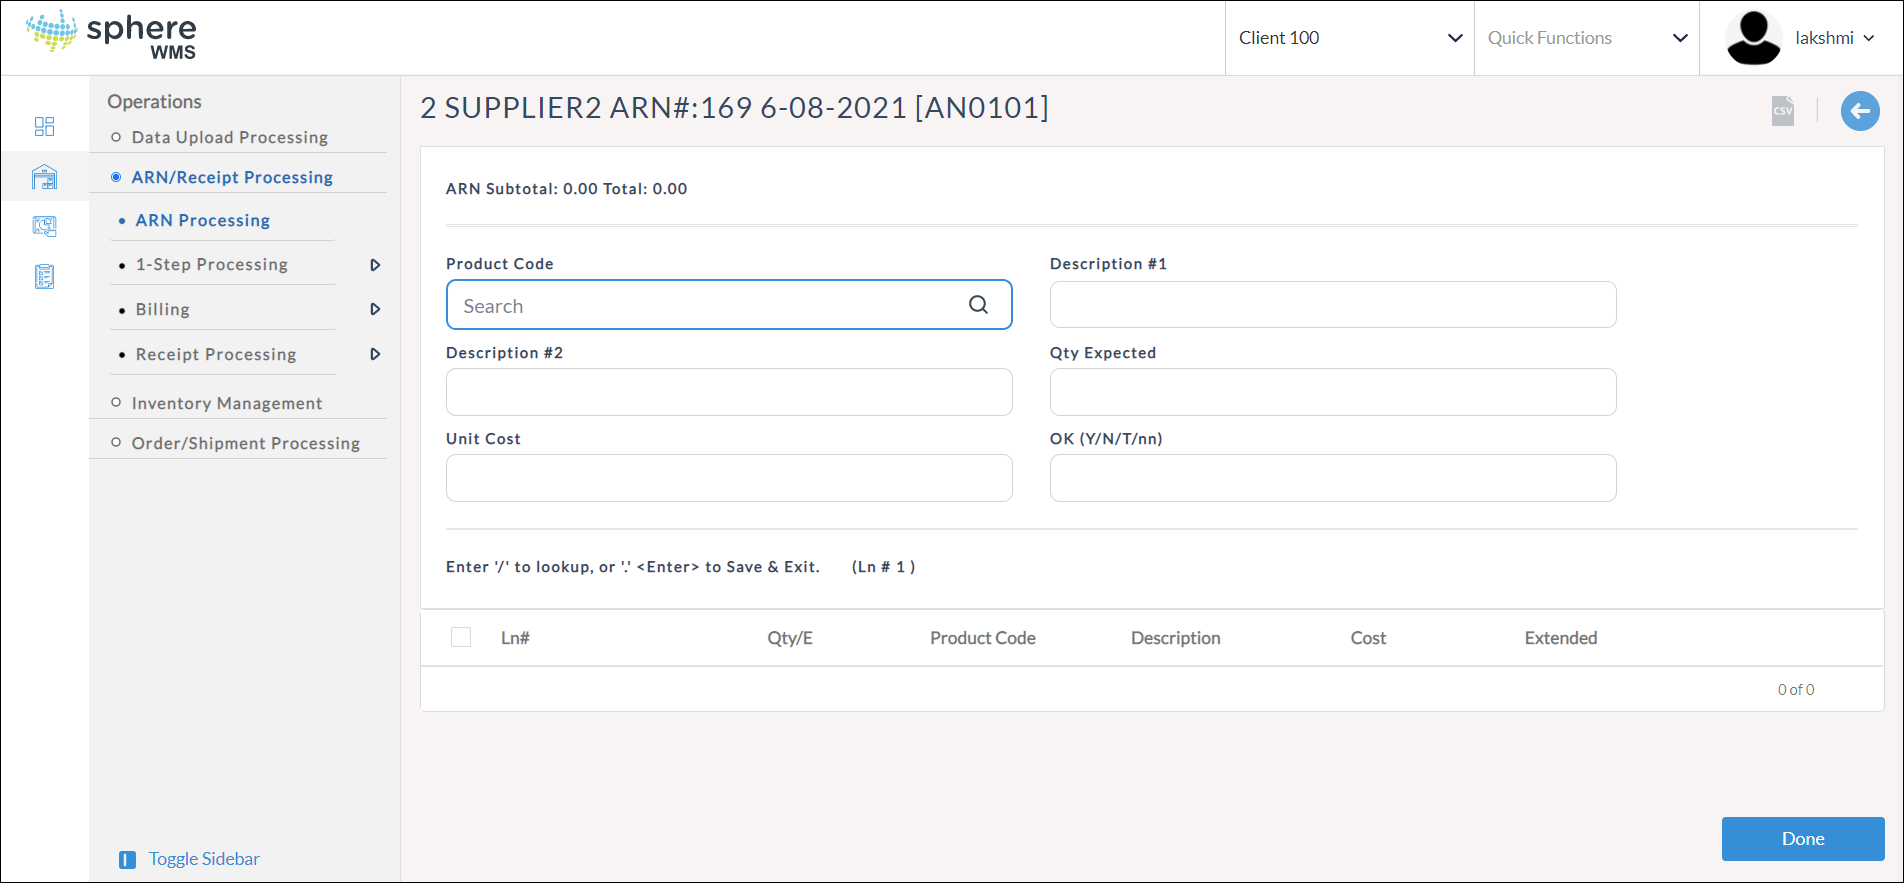
The ARN line entry screen will display.
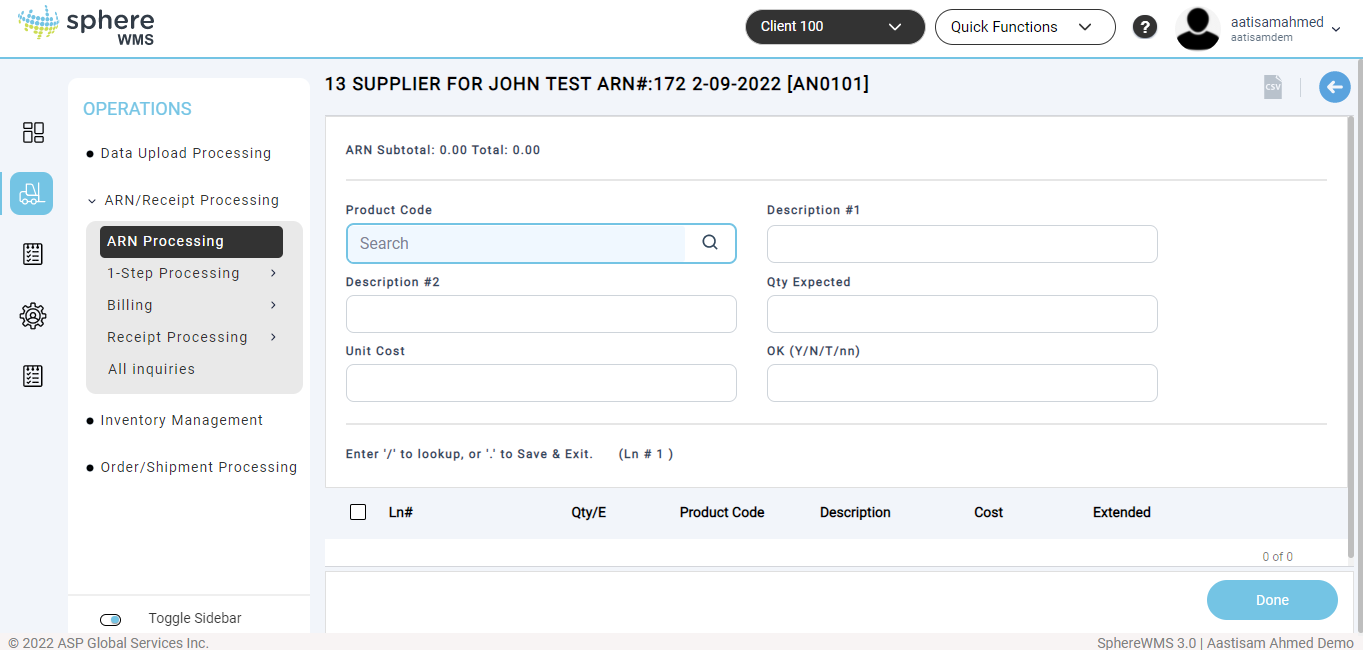
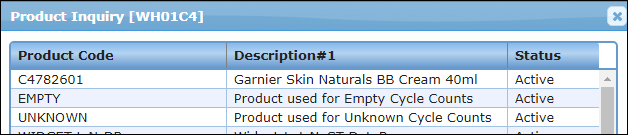
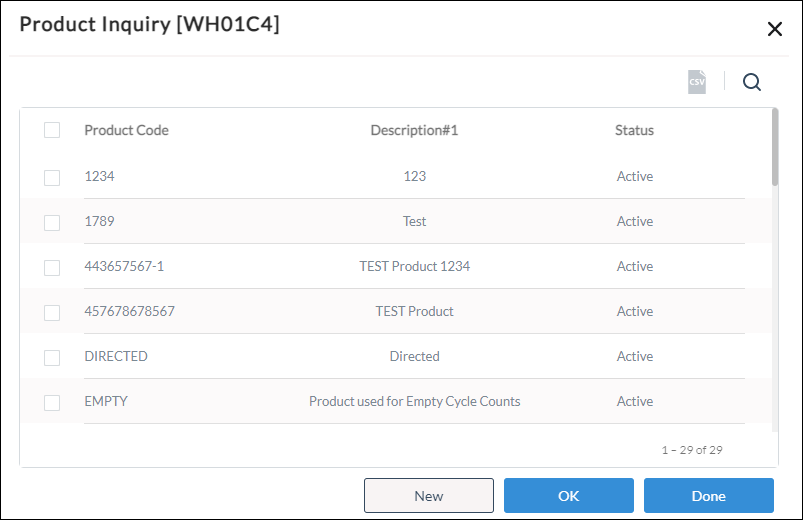
18. At the "Product Code" prompt, type a valid Product Code and press Enter. Or, click the lookup icon to select from a list.
Pressing ESC at the "Product Code" prompt will NOT exit the line entry. To exit without saving, click the "Done" button and select "Void".
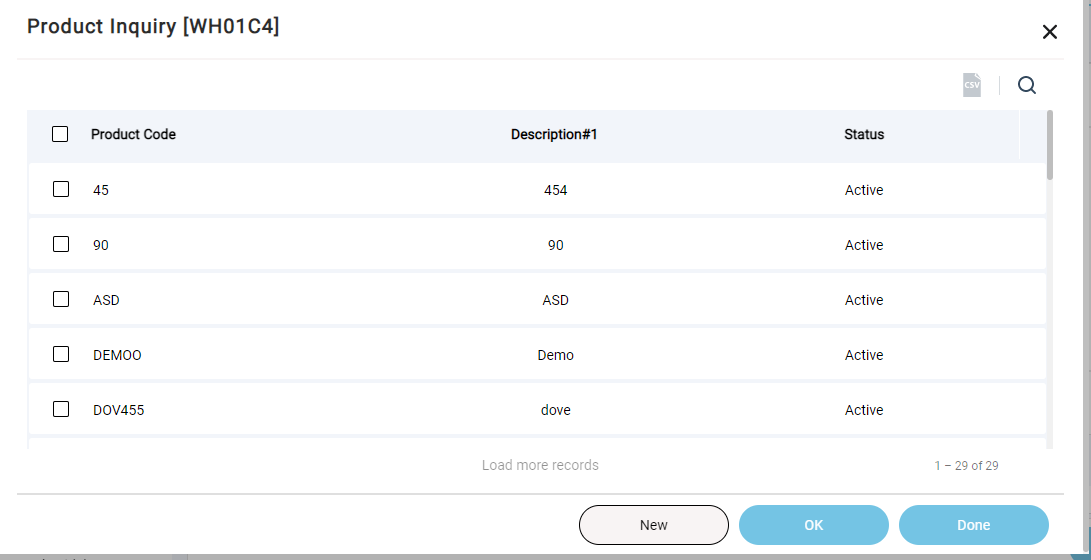
The Product Inquiry showing the product codes in alphabetical order will display. To search for a Product by Description, use the Keyword feature.

Notice that the keyword "arm" did not need to occur as the beginning of a Product Description to be included in the results.
To narrow down the results further, more than one keyword may be used if separated by commas. For example, typing "/arm, cord" Enter in the sample system returned the following results: If the Product cannot be found, click the "New" button to create a new Product Code.
See Products for details on how to create a new Product Code. After creating the new Product Code, search for it and to select, either double-click or single-click to highlight and press OK.
19. Enter the "Qty Expected" and press Enter. For Direct Receipts, enter the Qty Expected as the Quantity Received.
20. If a Unit Cost has been entered in the Product Master it will display automatically. Otherwise, enter a Unit Cost.
21. At the "OK (Y/N/T/nn)" prompt, the following options are available:
-
Enter the number of a Line Entry Question and press Enter to access the field again to edit its data (if permitted); to change a Product Code, you must delete the line and re-enter.
-
Click on a Line Entry Question to access a field again to edit its data.
-
Type "T" Enter to access "Notes".
-
Type "N" Enter to not save the entries and return to the topmost question.
-
Type "Y" Enter to save the entries and be prompted for the next Product Code.
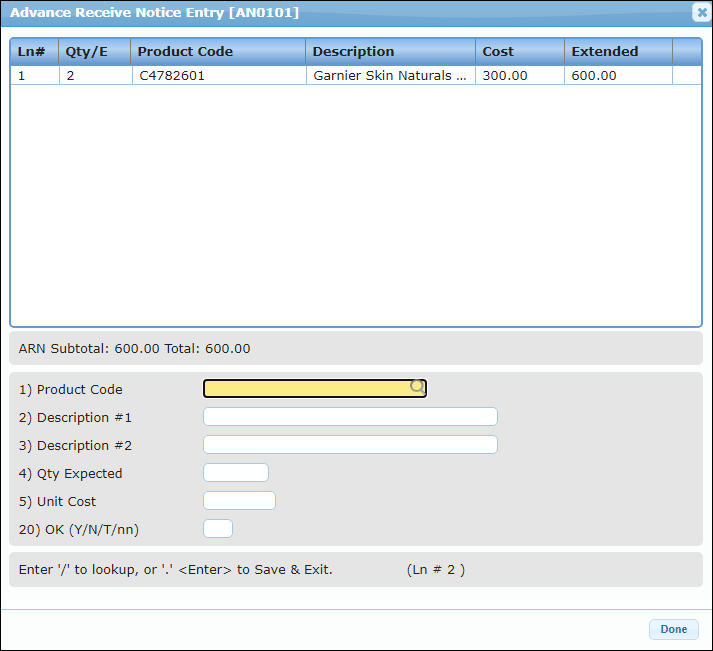
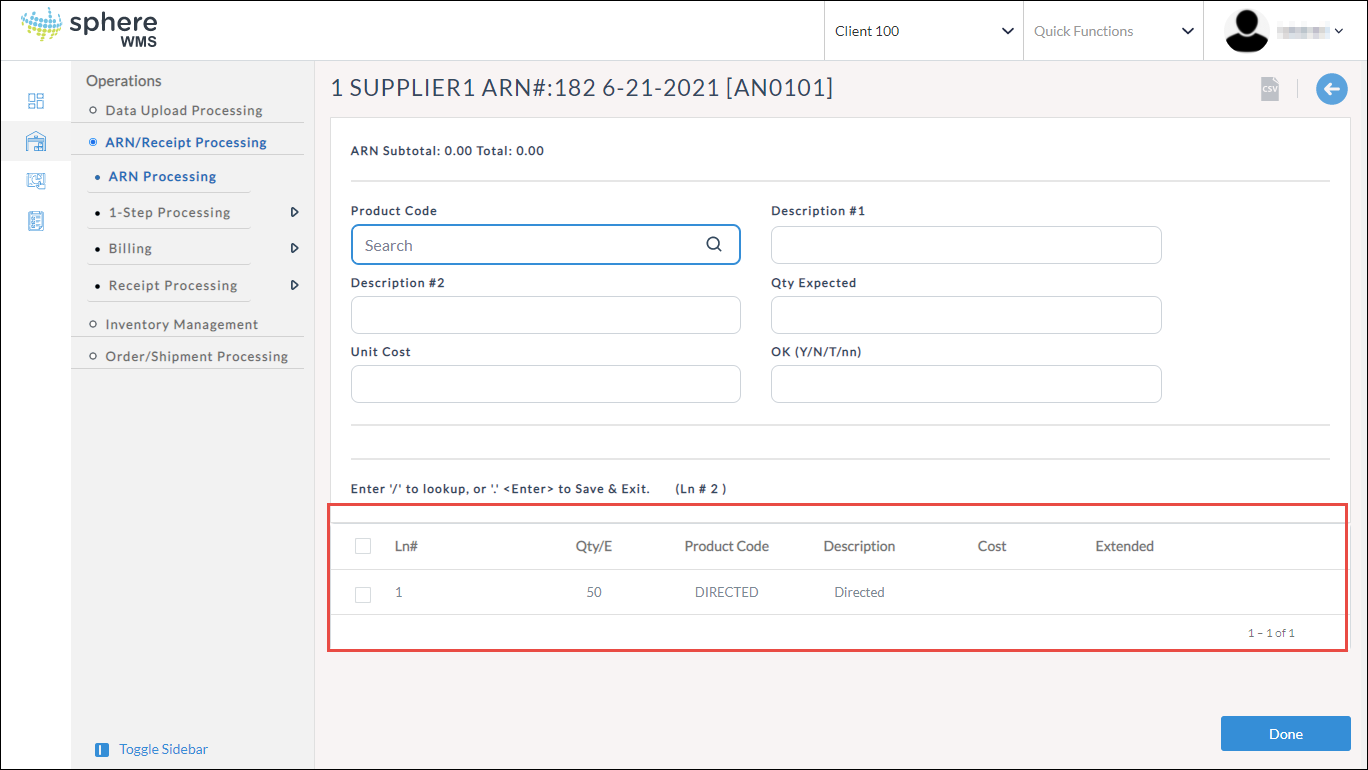
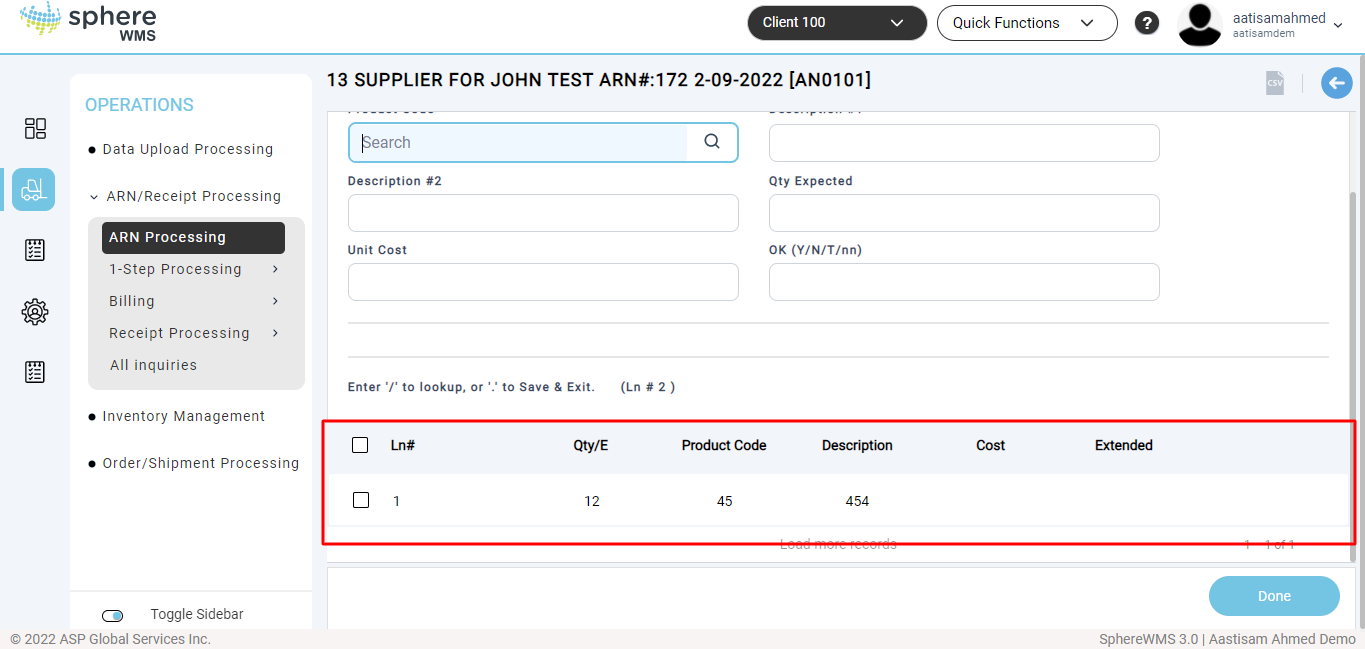
22. By typing "Y" Enter the newly created Line Item displays at the top of the form. A Running Total of the ARN's cost value is also displayed.

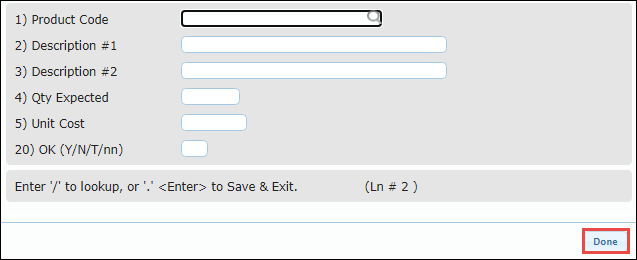
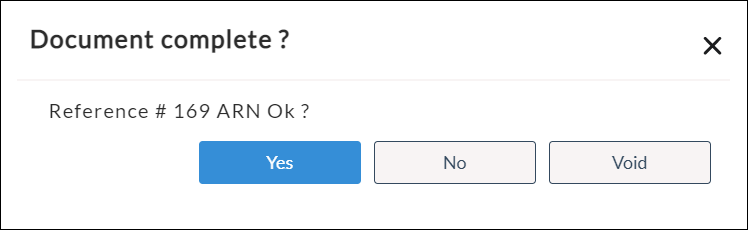
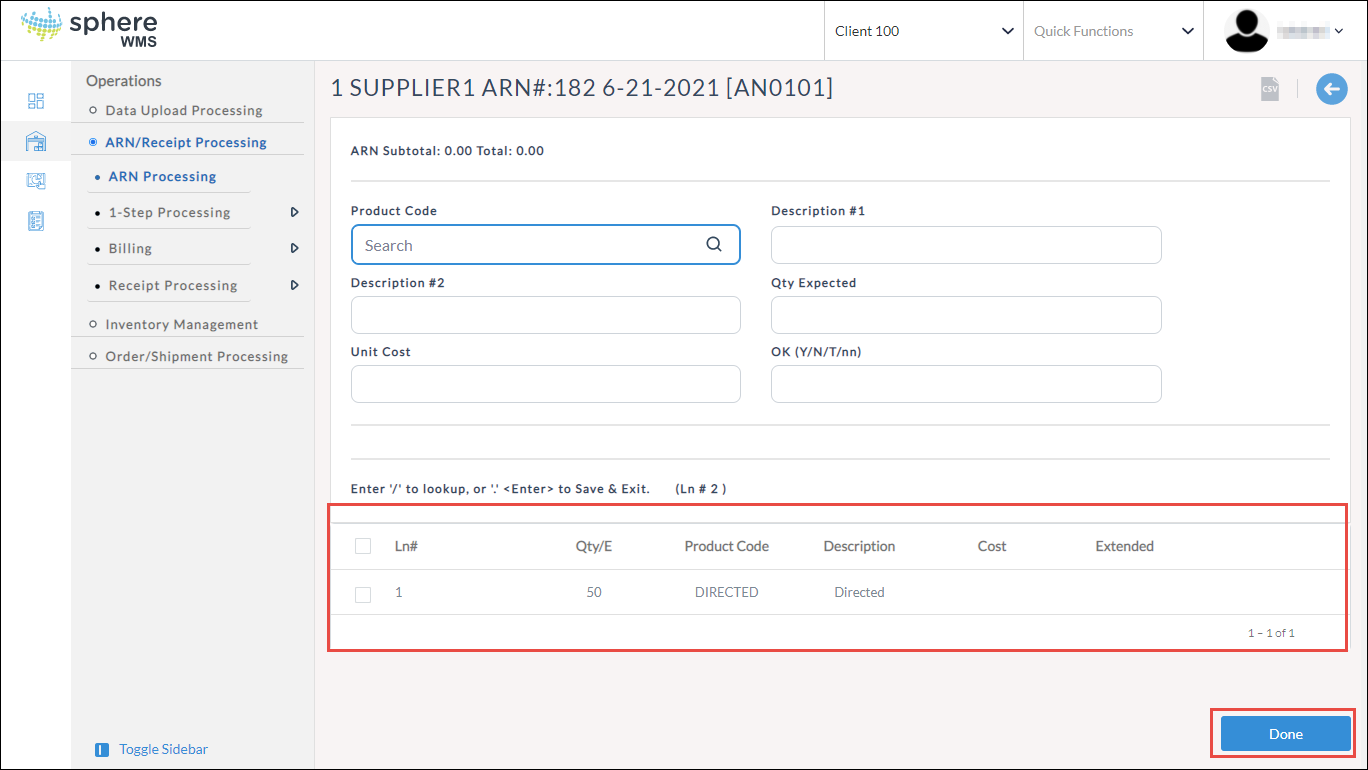
23. To Save & Exit an ARN, click the "Done" button.
24. After clicking the "Done" button, the following options display.
-
Click "Yes" to save the new ARN and exit.
-
Click "No" to return to Line Item Entry.
-
Click "Void" to NOT save the new ARN and exit.
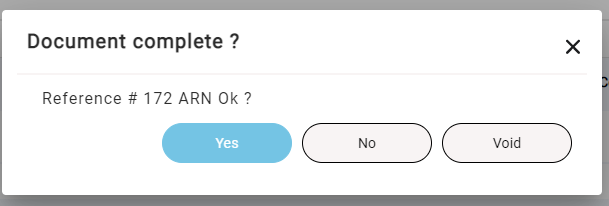
27. Clicking "Yes" returns you to the first header screen where the next ARN may be entered. If done, press ESC to exit back to the ARN/Receipt Processing Menu.