To process a Stock Transfer in the SphereWMS system, a control document must first be created.
To enter a new Stock Transfer:
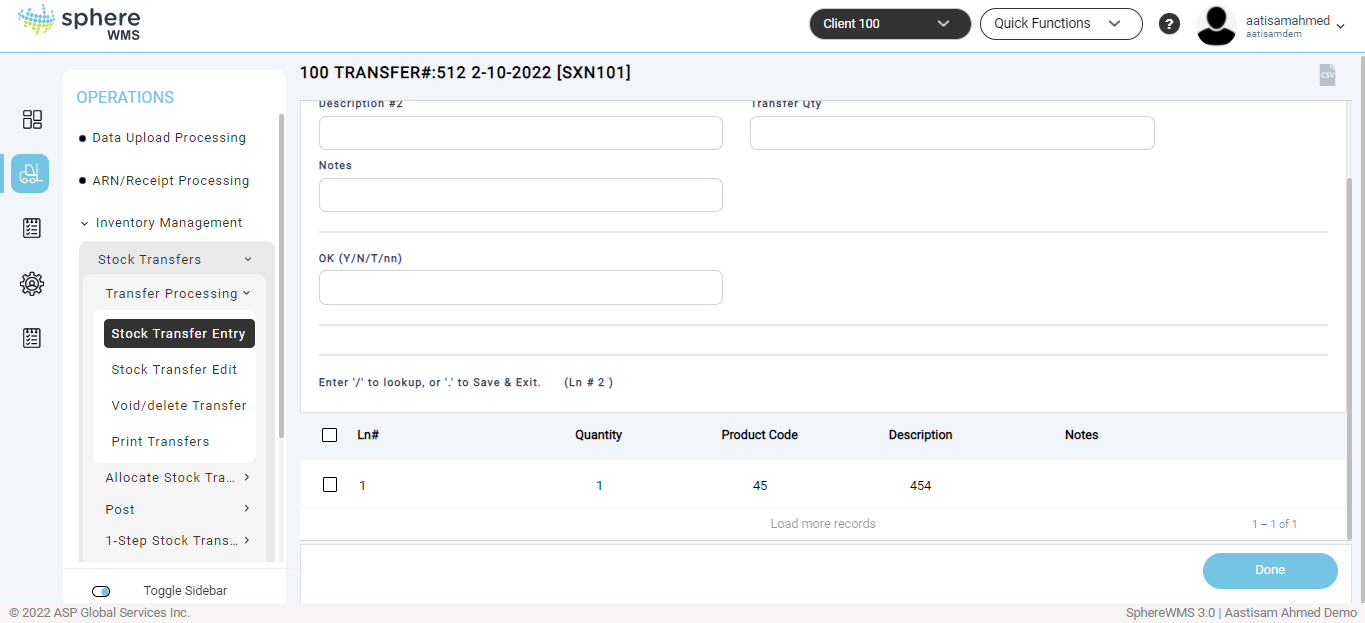
1. Navigate to Operations > Inventory Management > Stock Transfers > Transfer Processing > Stock Transfer Entry.
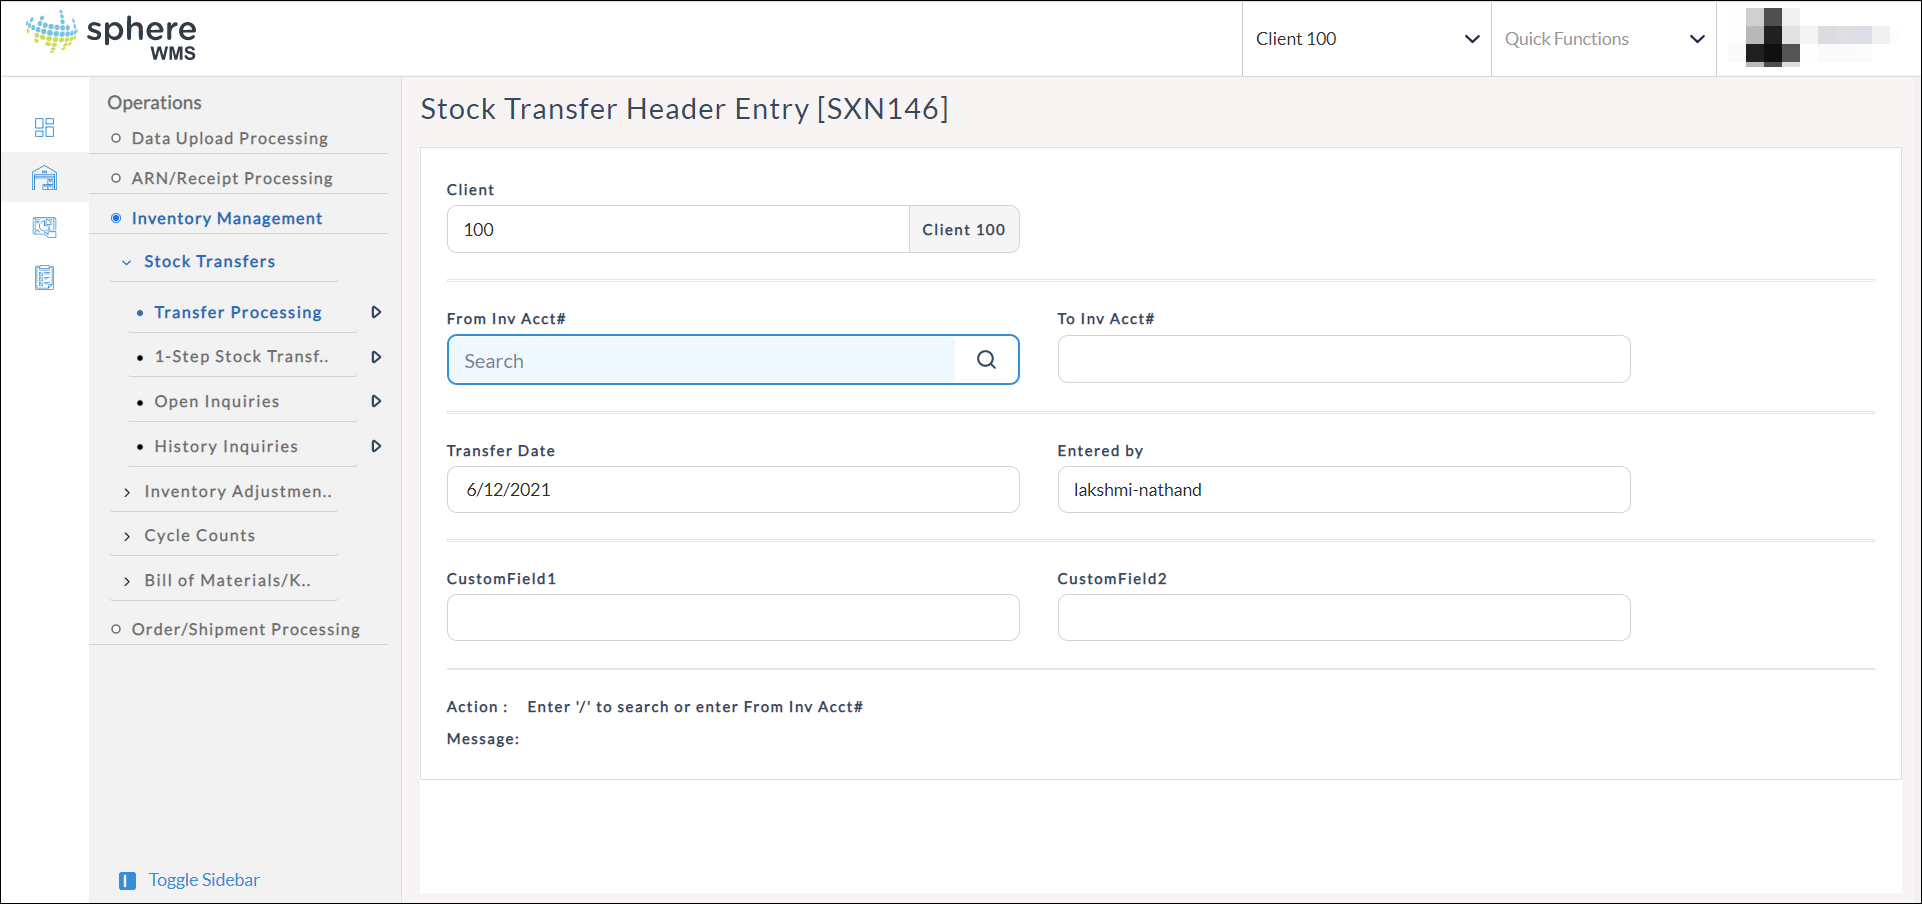
The Stock Transfer Header Entry page will display. This is where the From and To Inventory Accounts are defined. For Bin-Only Transfers, the From/To Inventory Account will be the same.
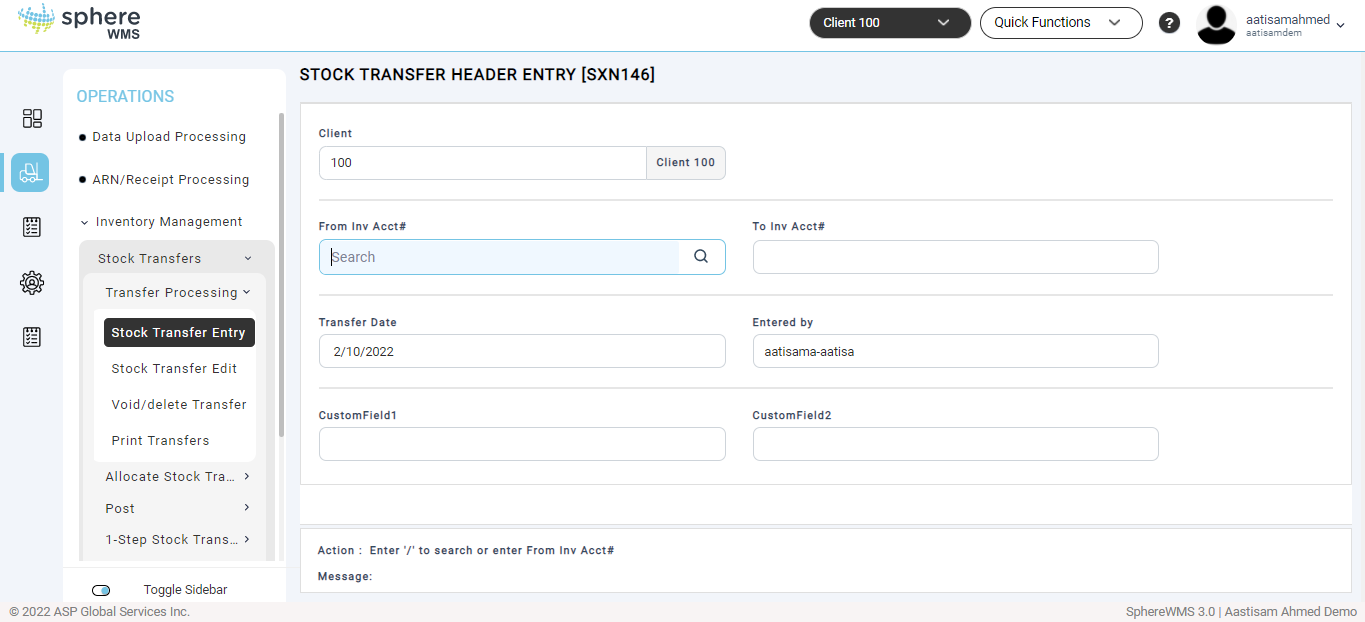
2. Select a valid "From Inventory Account" by typing in the From Inv Acct# field and press Enter. Or, to select from a list use the search button. The valid Inventory Accounts defined in the Inventory Account Master will display for selection. Select the appropriate Inventory Account and press OK.
Pressing ESC at the "From Inv Acct#" prompt will exit the form.
3. Select a valid “To Inventory Account” by typing in the To Inv Acct# field and press Enter. Or, to select from a list use the search button. Select the appropriate Inventory Account and press OK.
4. Enter the "Transfer Date". By default, the current day’s date will be displayed in this field. You can edit it.
CustomField1 and CustomField2 are ‘key fields'. The system comes standard with Inquiries and Reports "by CustomFIeld1" and "by CustomField2", so it is important that these fields are populated with data that would be used to search for a specific ARN or Receiver in history.
5. Enter a valid input in the CustomField1 and CustomField2 fields and press Enter.
6. Enter Y in the "Data Okay ? " field and press Enter.
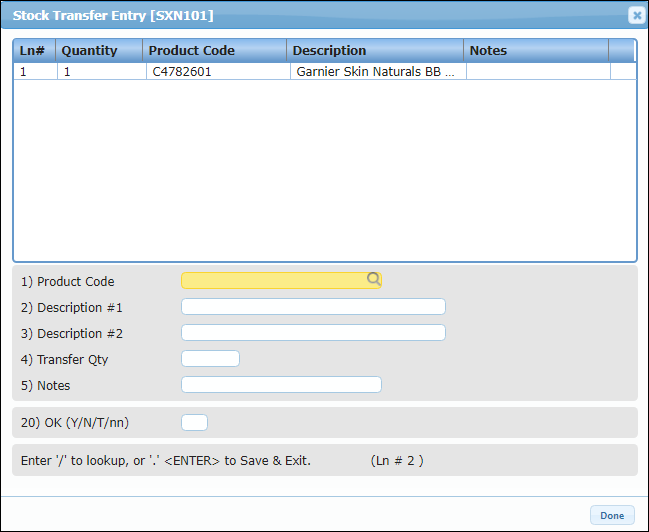
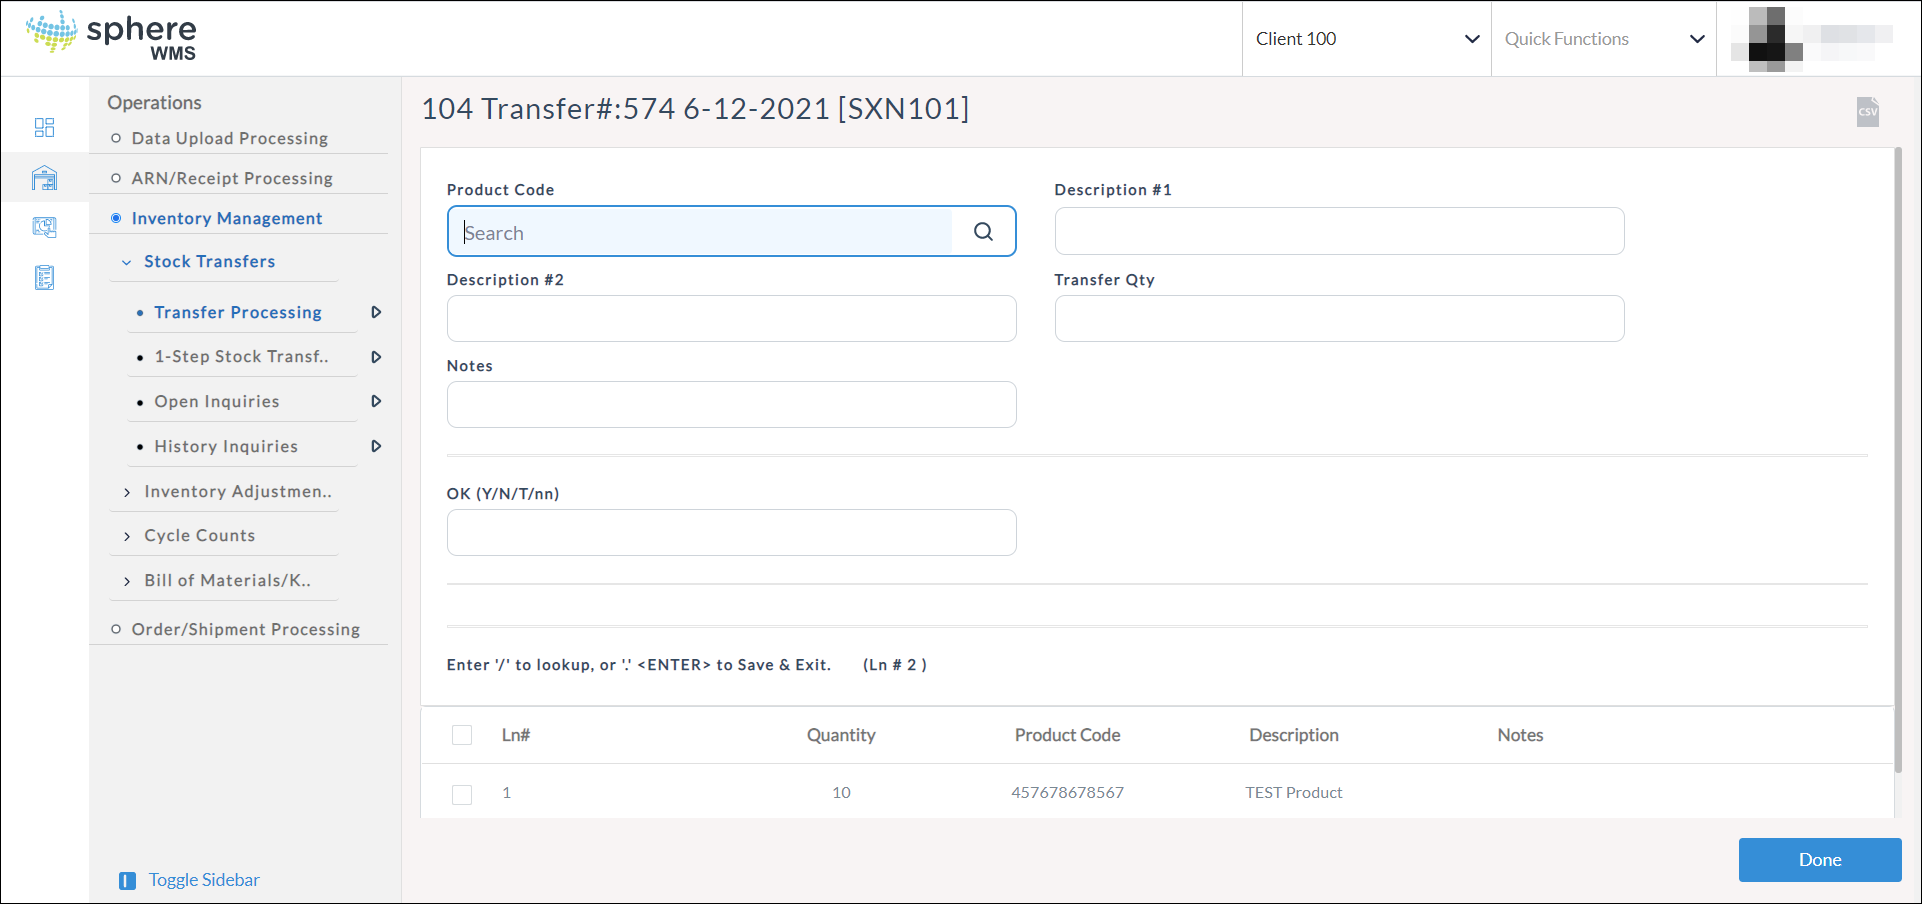
The Transfer# page will display.

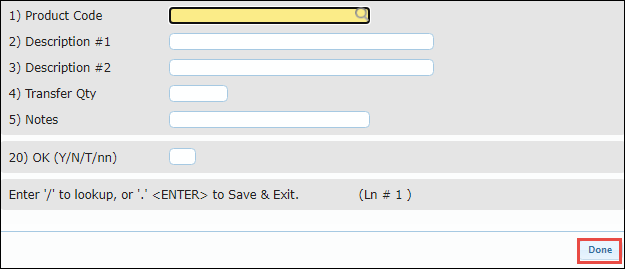
7. At the "Product Code" field, type a valid Product Code and press Enter. Or, to select from a list use the search button. The active Products defined in the Product Master will display for selection.
Pressing ESC at the "Product Code" prompt will NOT exit the line entry. To exit without saving, click the "Done" button and select "Void".
8. Type the total quantity to transfer in the Transfer Qty{EA} field and press Enter.
The Transfer Qty can be the grand total of transfers across multiple Bin locations provided the transfers all pertain to the same "From Inventory Account" established in the first header entry screen.
9. At the "OK (Y/N/T/nn)" field, the following options are available:
Enter the number of a Line Entry Question and press Enter to access the field again to edit its data (if permitted); to change a Product Code, you must delete the line and re-enter.
Click on a Line Entry Question to access a field again to edit its data.
Type "T" Enter to access "Notes"; see Entering Notes.
Type "N" Enter to not save the entries and return to the topmost question.
Type "Y" Enter to save the entries and be prompted for the next Product Code.
10. By typing "Y" Enter the newly created Line Item displays at the top of the form.
11. Repeat entering Transfer Line Items as needed.

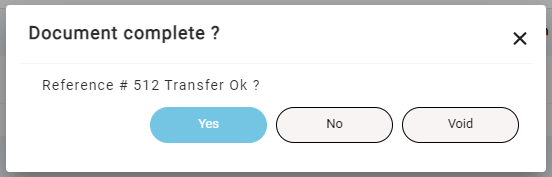
12. To Save & Exit a Stock Transfer, click the "Done" button.
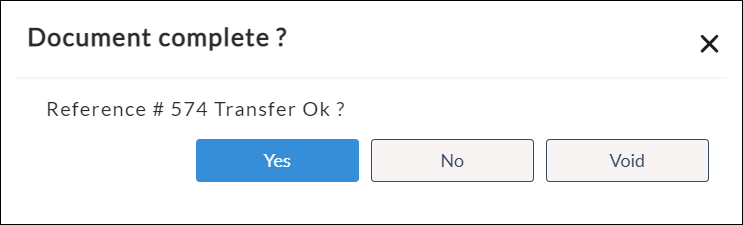
A confirmation dialog will display.
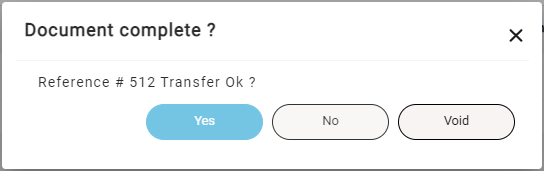
Click "Yes" to save the new Stock Transfer control document and exit.
Click "No" to return to Line Item Entry.
Click "Void" to NOT save the new Stock Transfer and exit.
After clicking Yes the new Stock Transfer is entered.