The Ship Integration option allows you to integrate shipments by an individual order number or by a wave ID, and any issues related to a wave ID. It allows you to integrate packages for shipping, generate and print shipping labels. In this article, integrating shipment by an order number is explained in detail. You can follow the same procedure to integrate shipments by a wave ID or an issue related to a wave ID.
To integrate a shipment by an order number:
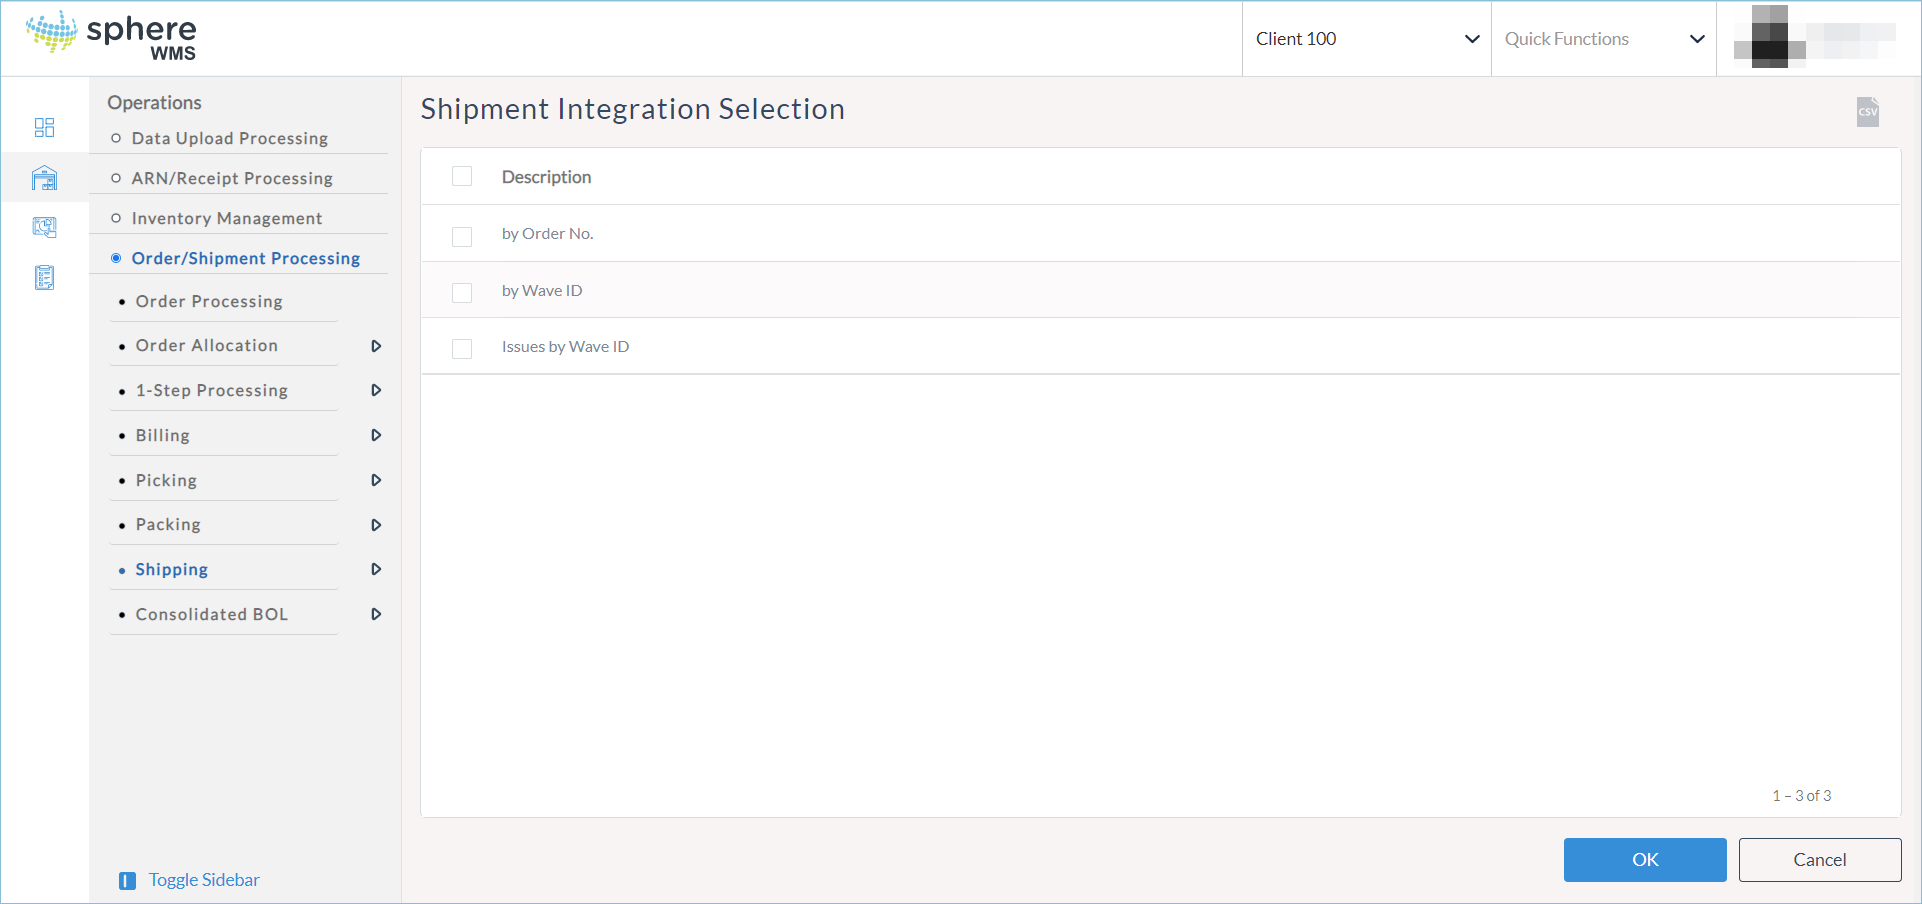
1.Navigate to Operations > Order/Shipment Processing > Shipping > Ship Integration.
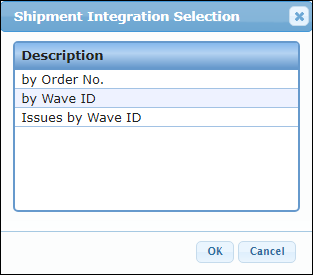
The Shipment Integration Selection page will display.
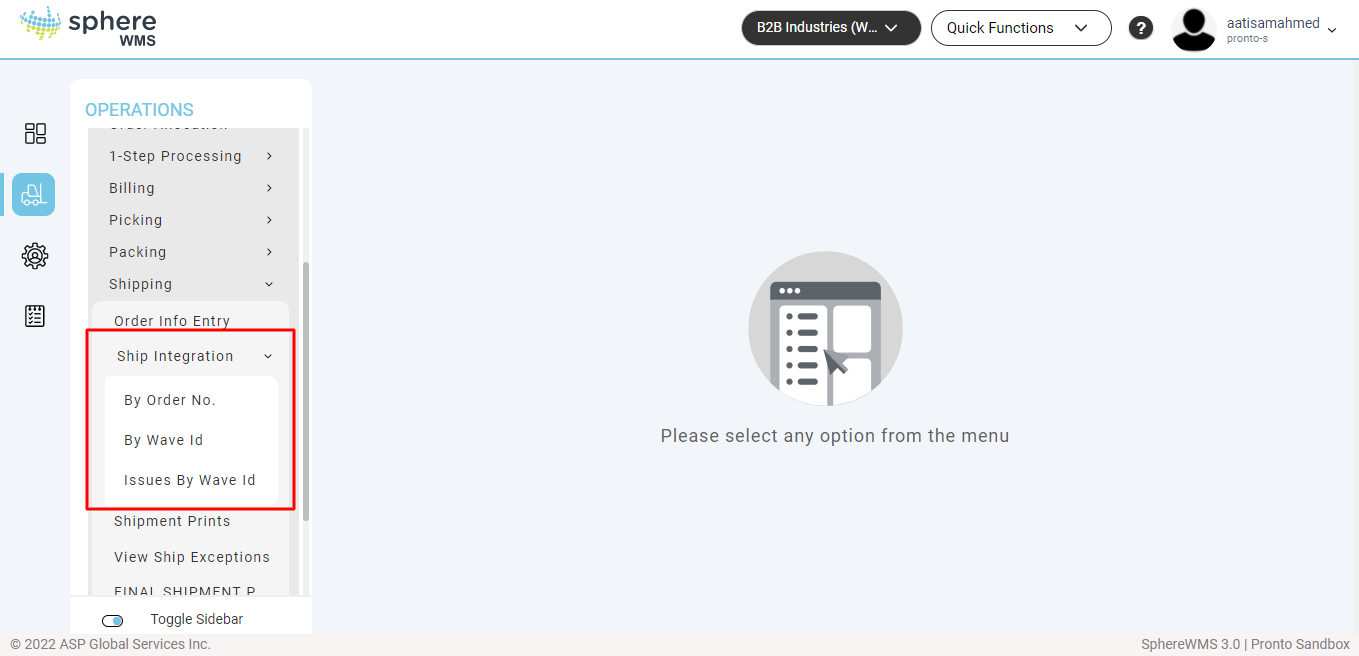
2. Click by Order No.
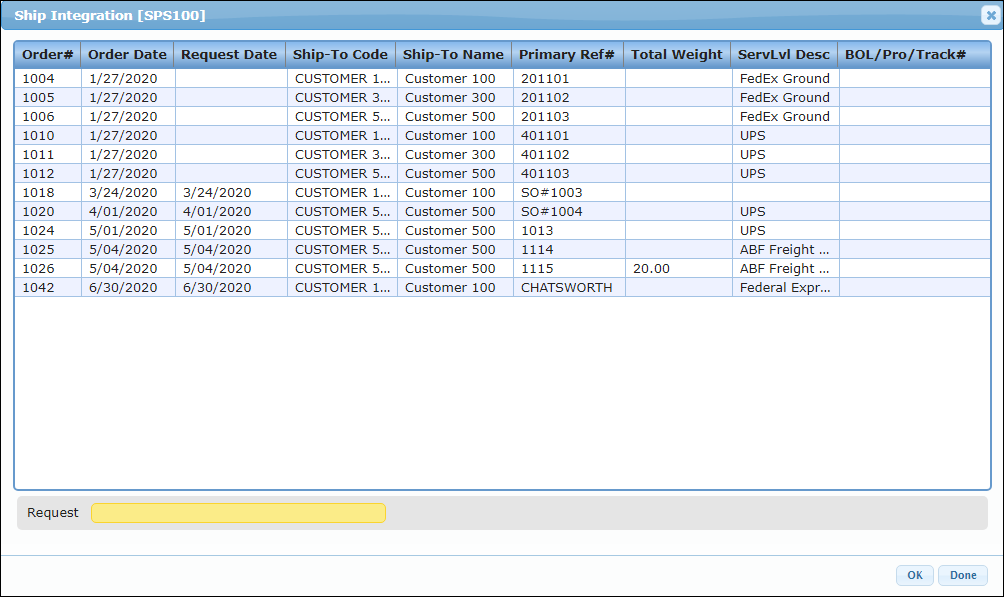
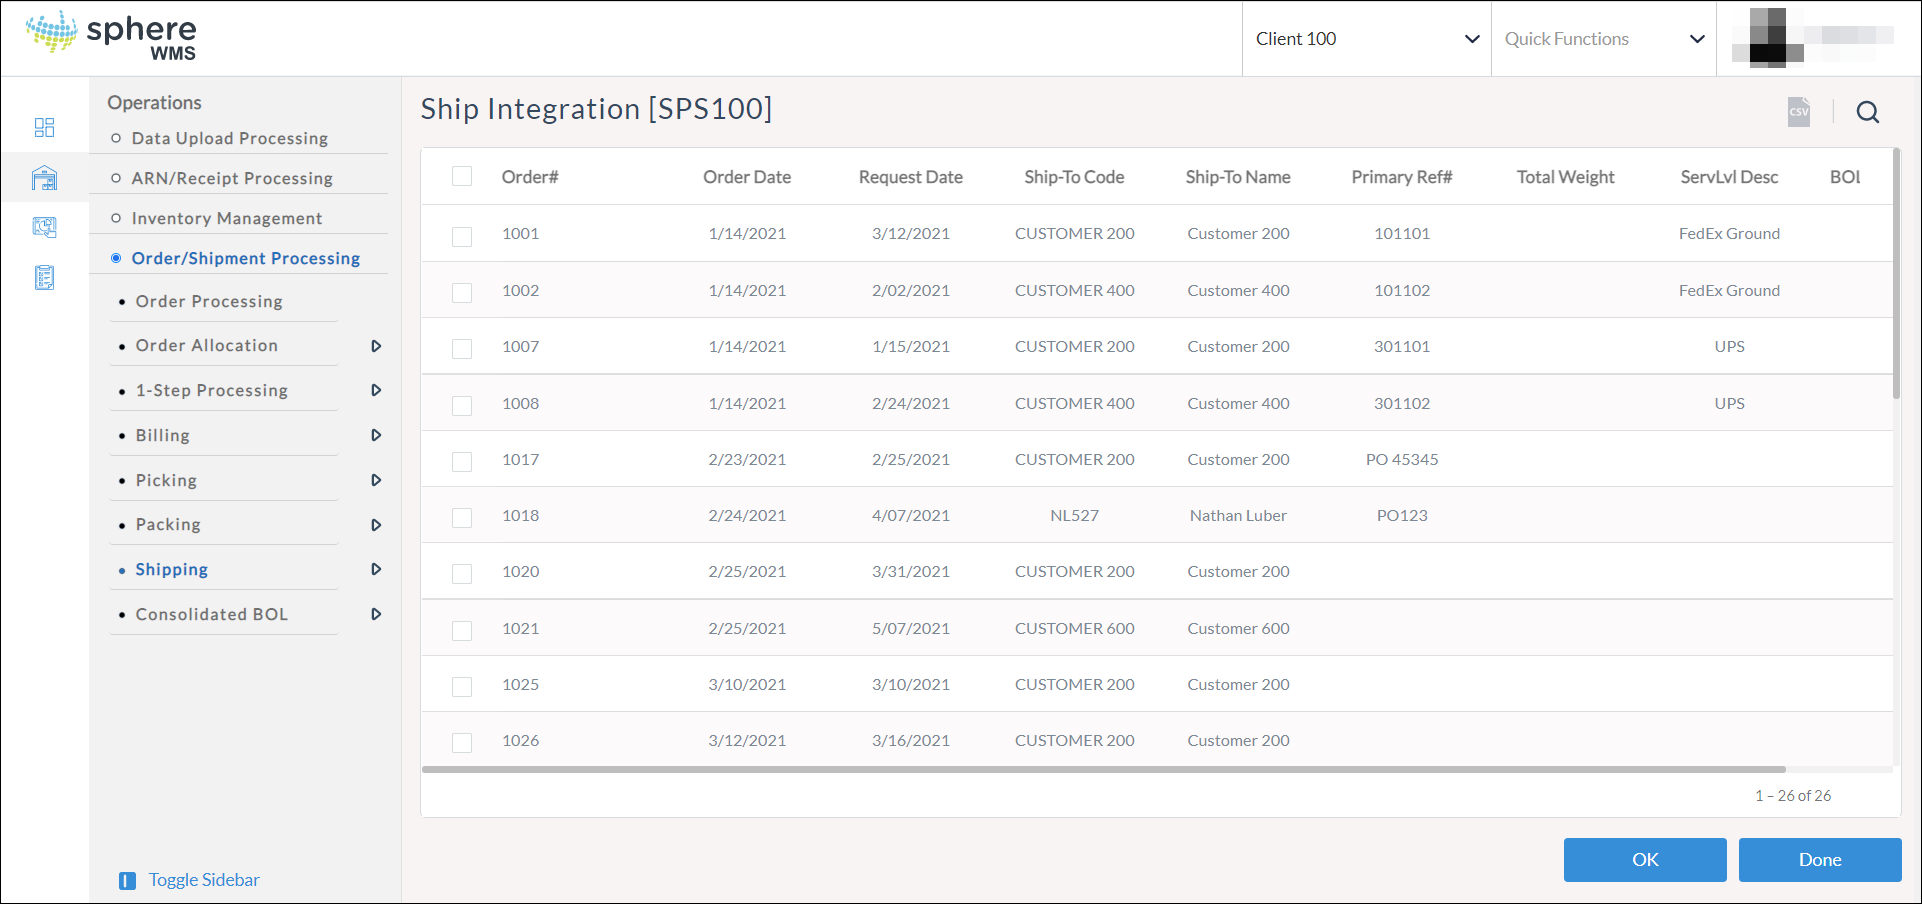
The Ship Integration page will display.
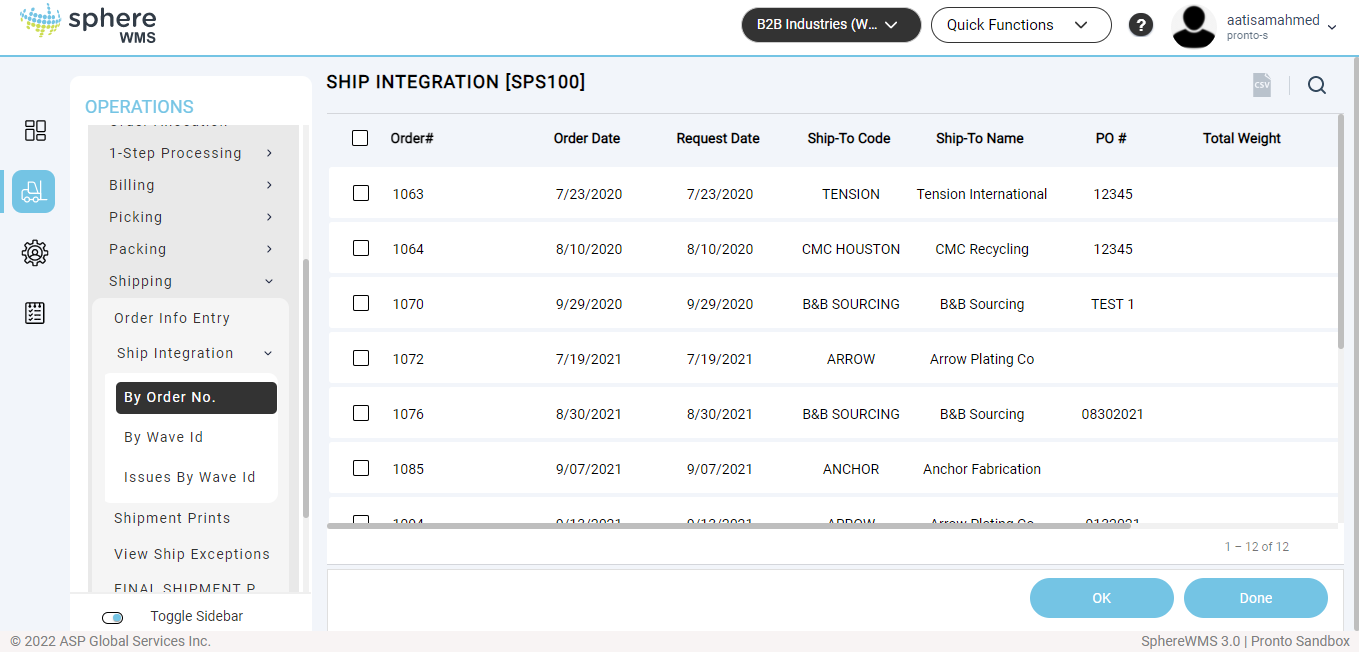
3. Click the Order# by which you want to integrate the shipment and click OK.
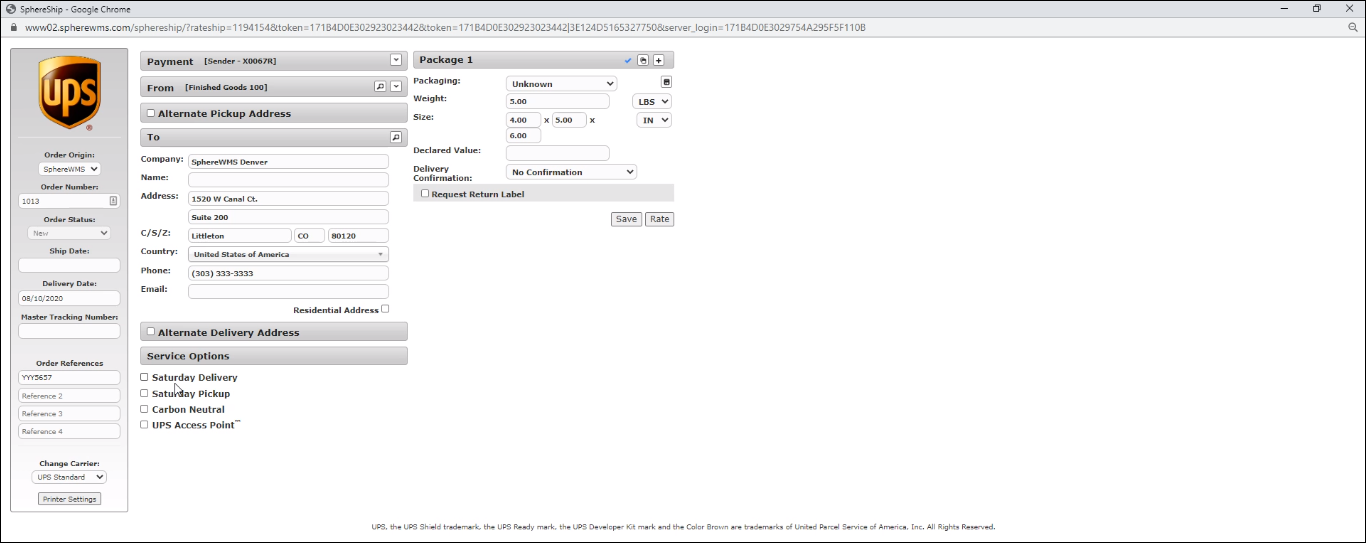
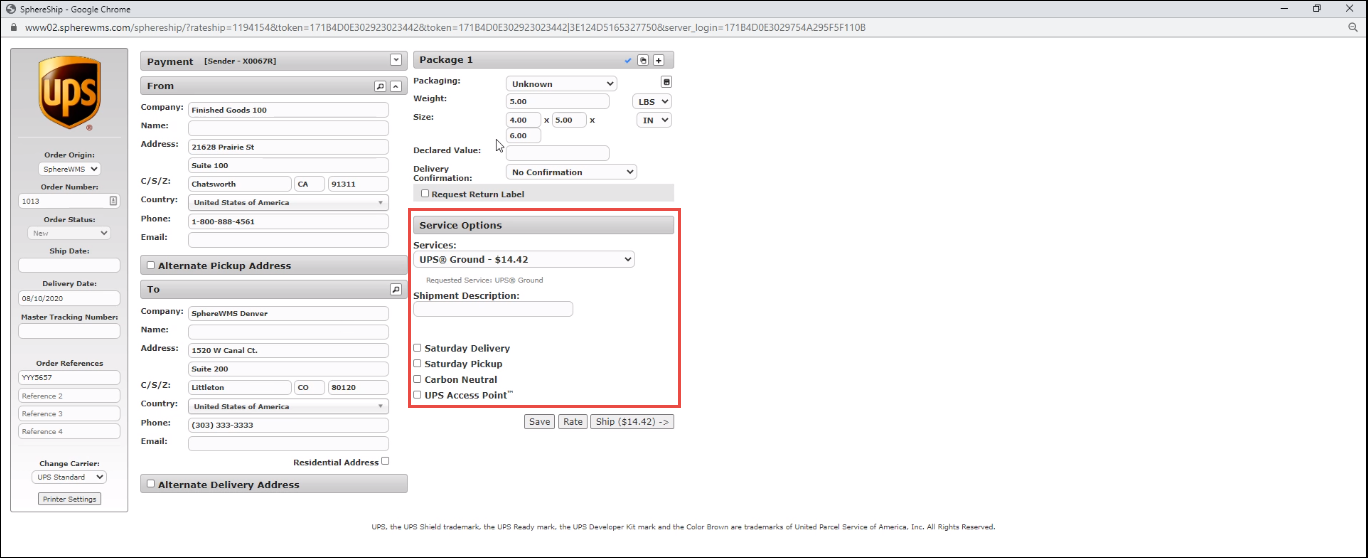
The SphereShip page will display.

4. The Payment field will be populated from the sales order. If you want to change it, select the required option depending on whom you want to bill it to from the drop-down list.
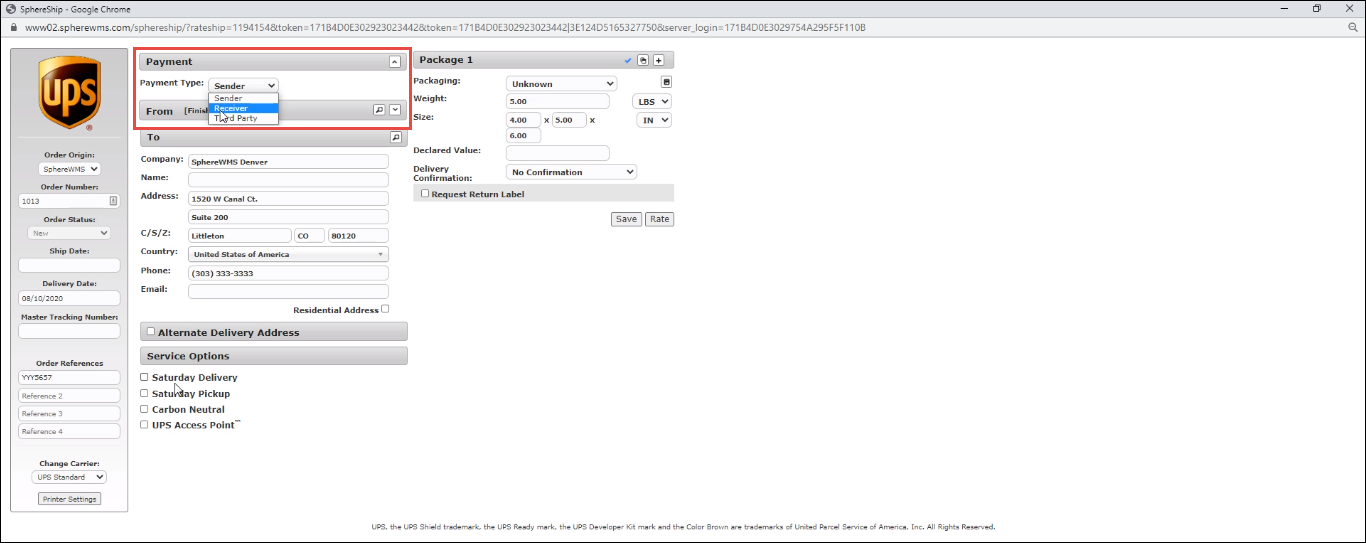
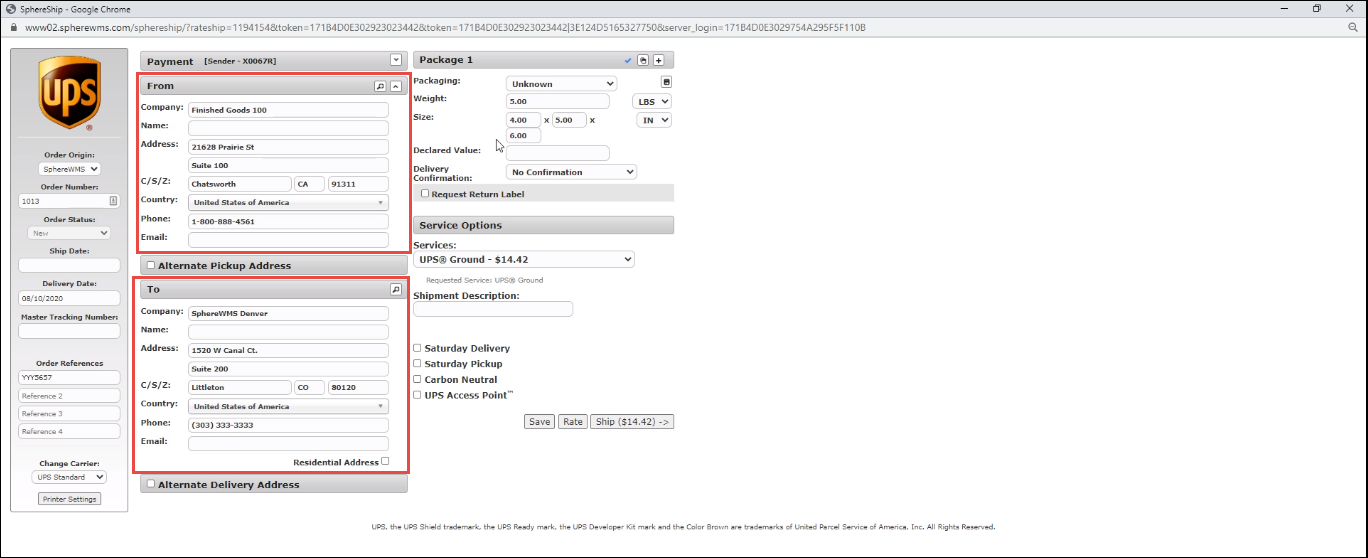
The From and To sections show the sender and recipient addresses of the shipment. The From and To addresses will be populated from the sales order.

5. Edit the values of the required fields in the From and To sections.
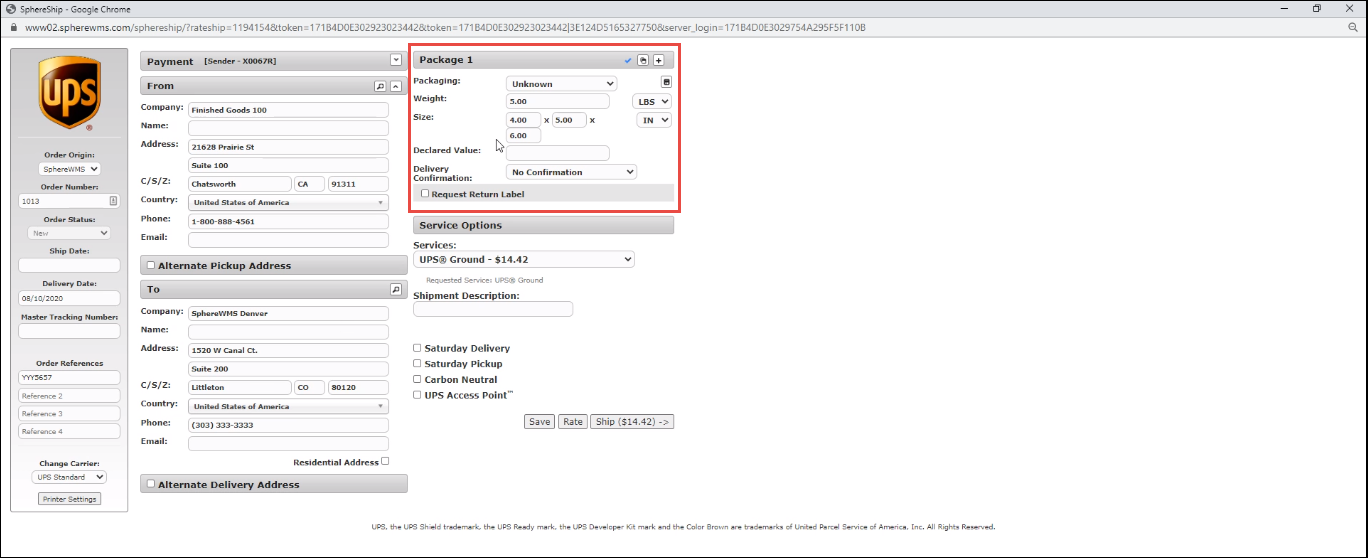
6. In the Package 1 section, you can enter the Weight and Size (dimensions) of the package.
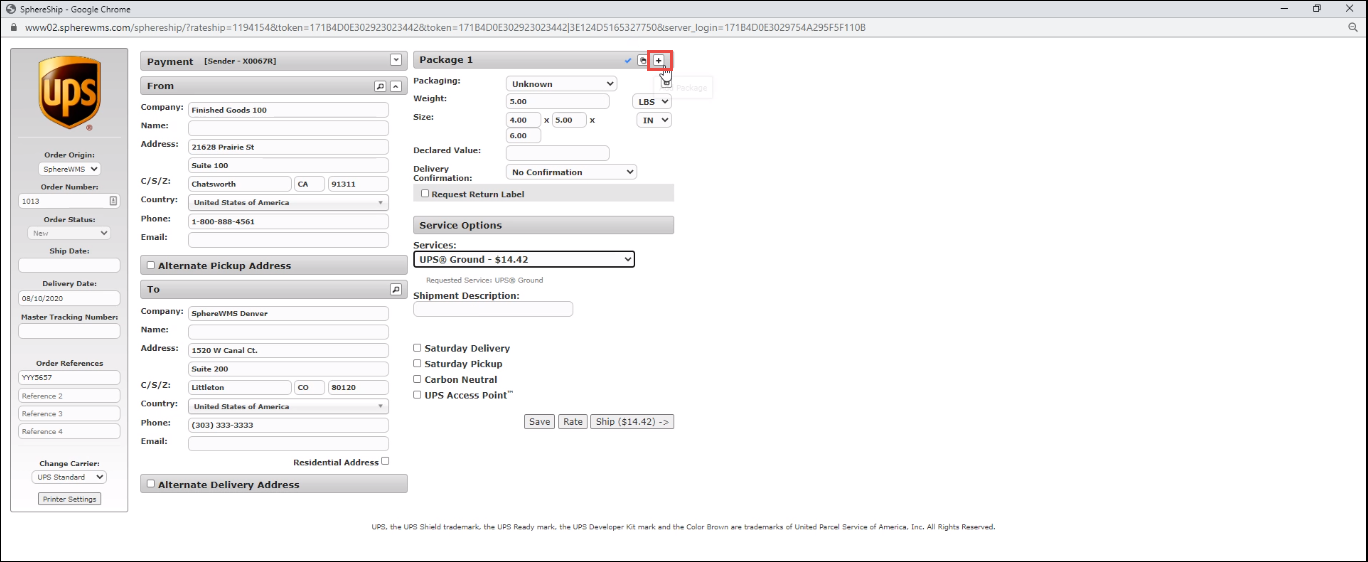
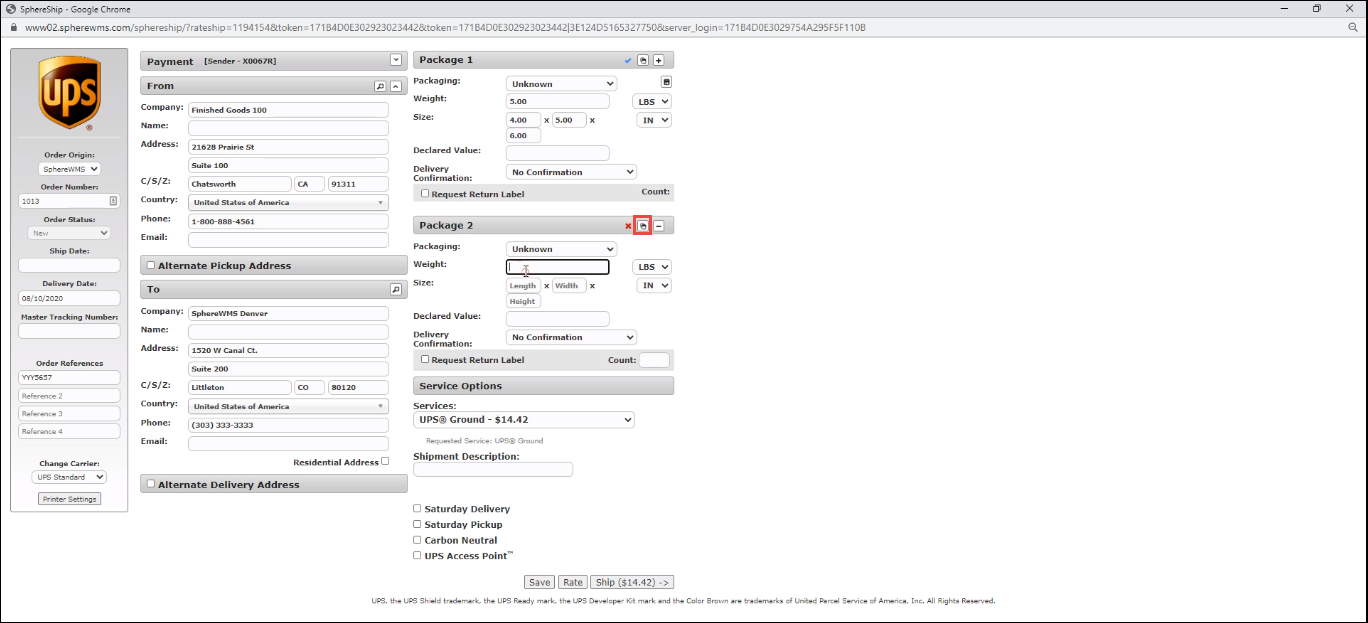
7. To add another package, click the Add Package icon.
A section to add details of another package will be displayed.
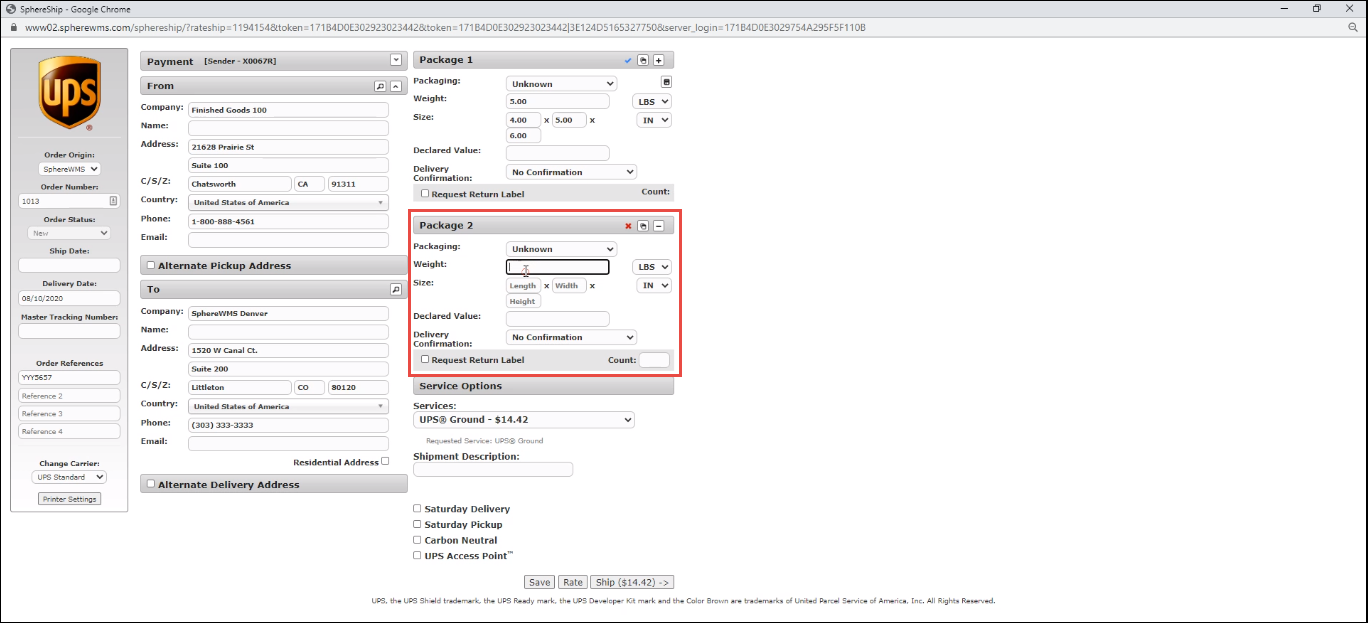
8. Enter/select the Packaging type, Weight, Size, Declared Value, and Delivery Confirmation.
9. If you want to request a return label, check the box for Request Return Label.
10. Enter the Count for the return label request.

11. If you want to clone an existing package, click the Clone Package icon. The cloned package will have the exact details as the original package. However, you can edit the details as per your requirements.

12. In the Service Options section, select the required service level from the Service drop-down list, enter the Service Description, and check the required additional service option(s).
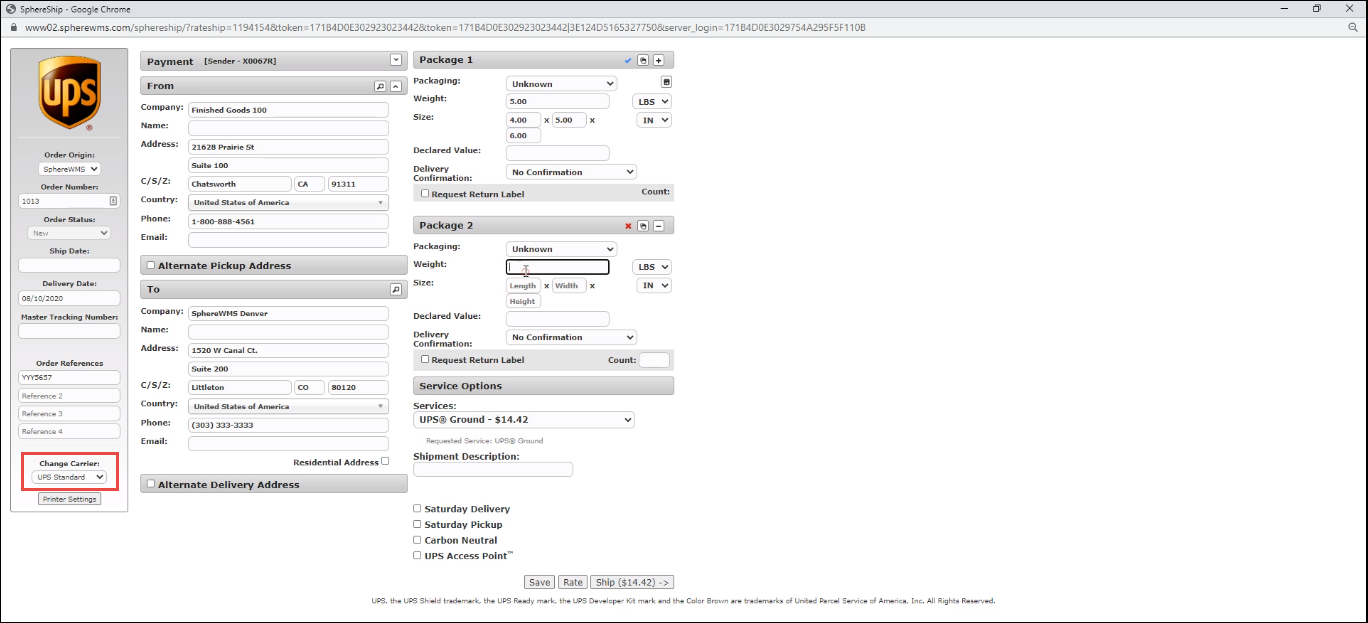
13. You can also change the carrier for the shipment. To do so, select the required carrier from the Change Carrier drop-down list.
The shipping details for the selected carrier will display.
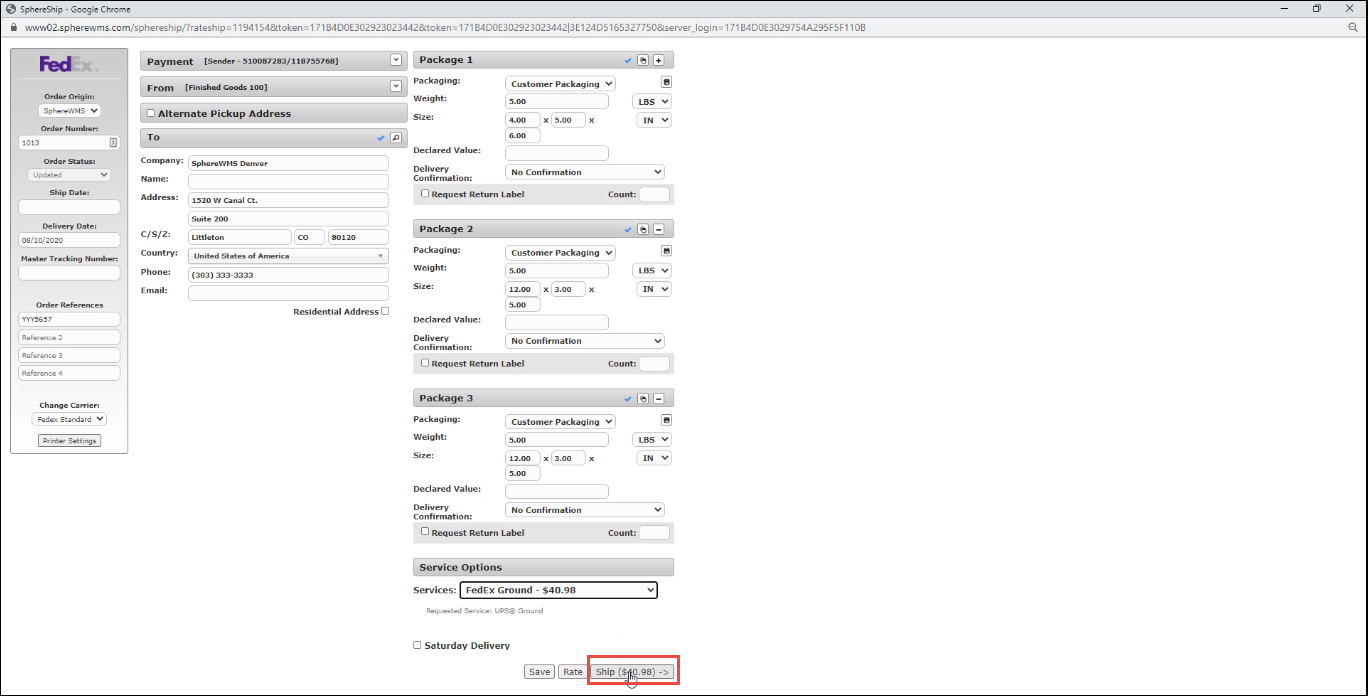
14. To print the shipping labels, click the Ship button.
Shipping labels, one each for the selected package, will be created.
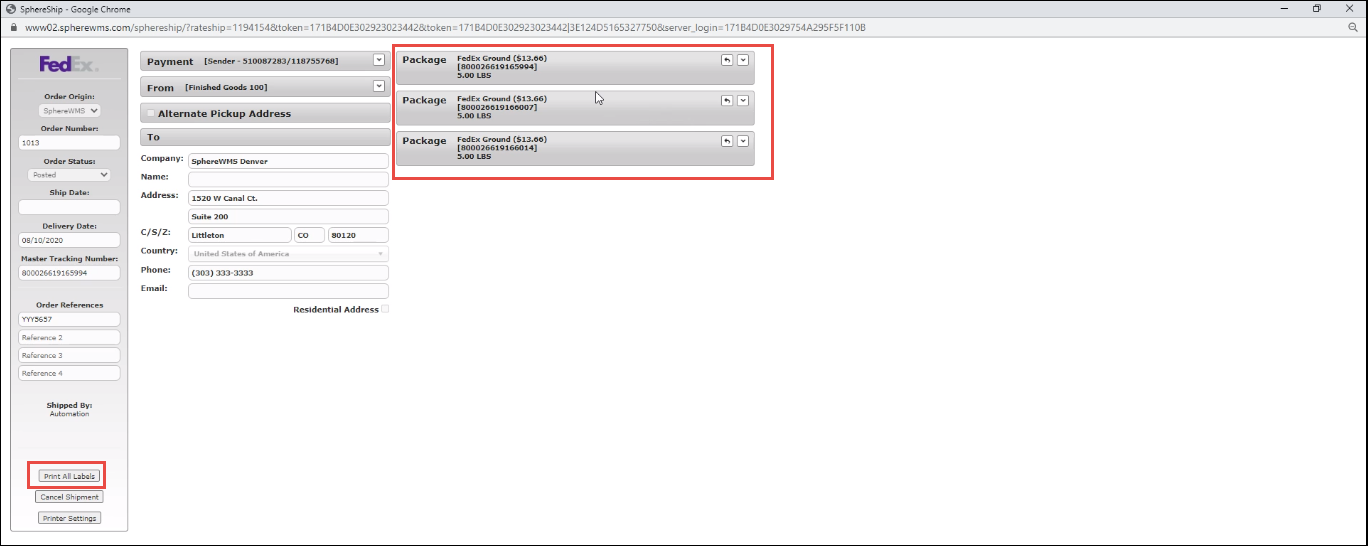
15. To print all the labels, click the Print All Labels button.
Print preview of all the labels will display.
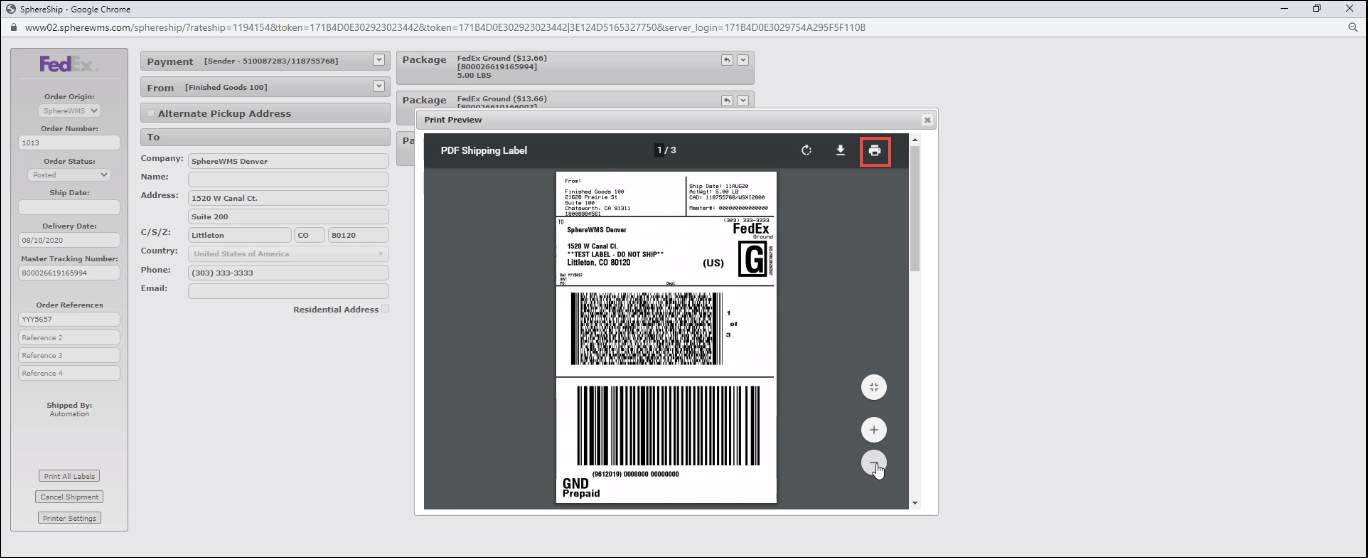
16. Click the print icon to print all the labels.
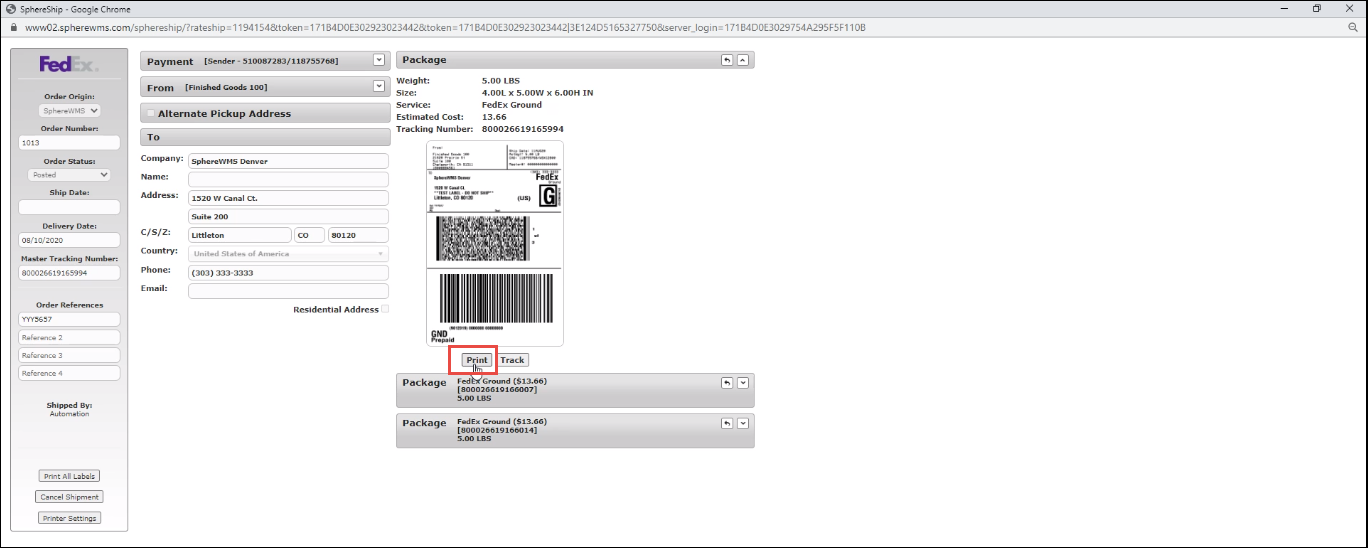
17. To print individual labels, expand the label which you want to print and click the Print button.