The Ad Hoc Reporting module can be used to create, save, and download custom reports.
Navigate to the “Ad Hoc Reports” from the Web Main Menu.
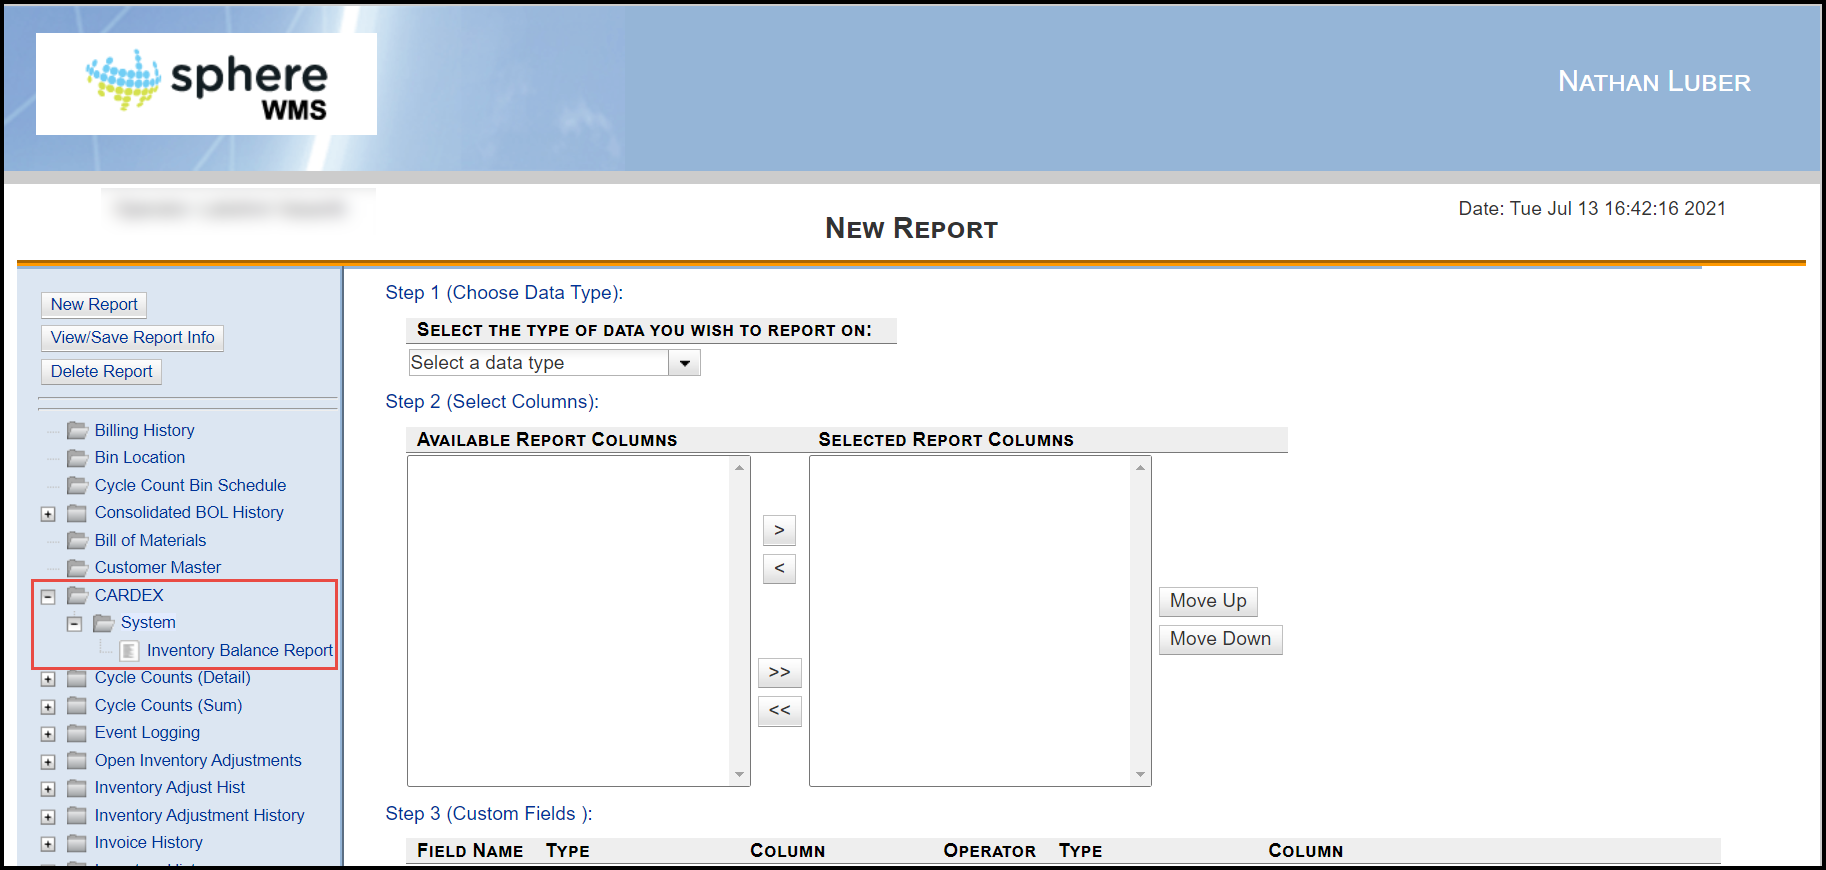
To create an ad hoc report:
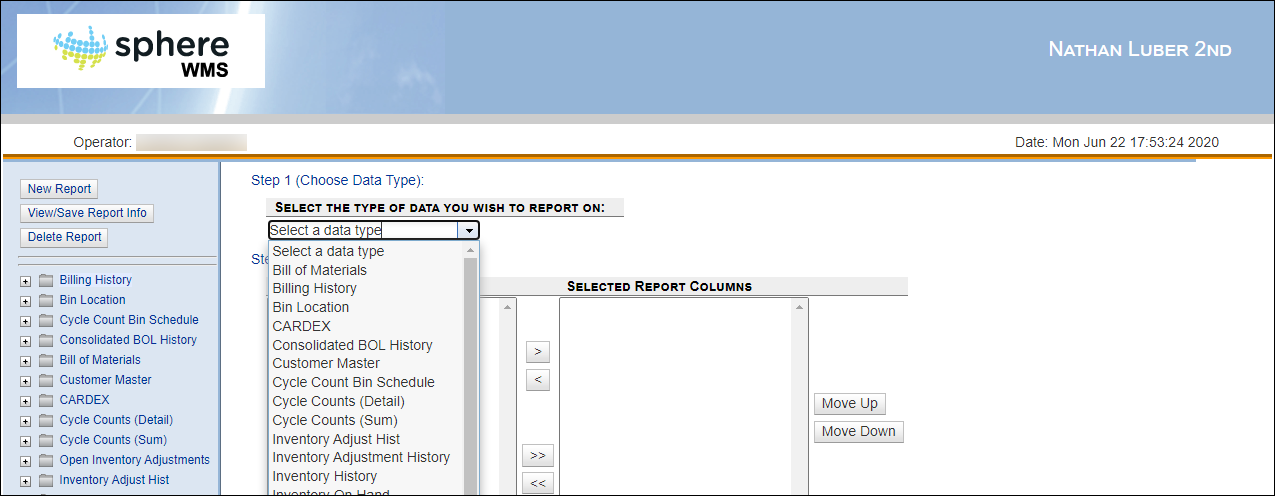
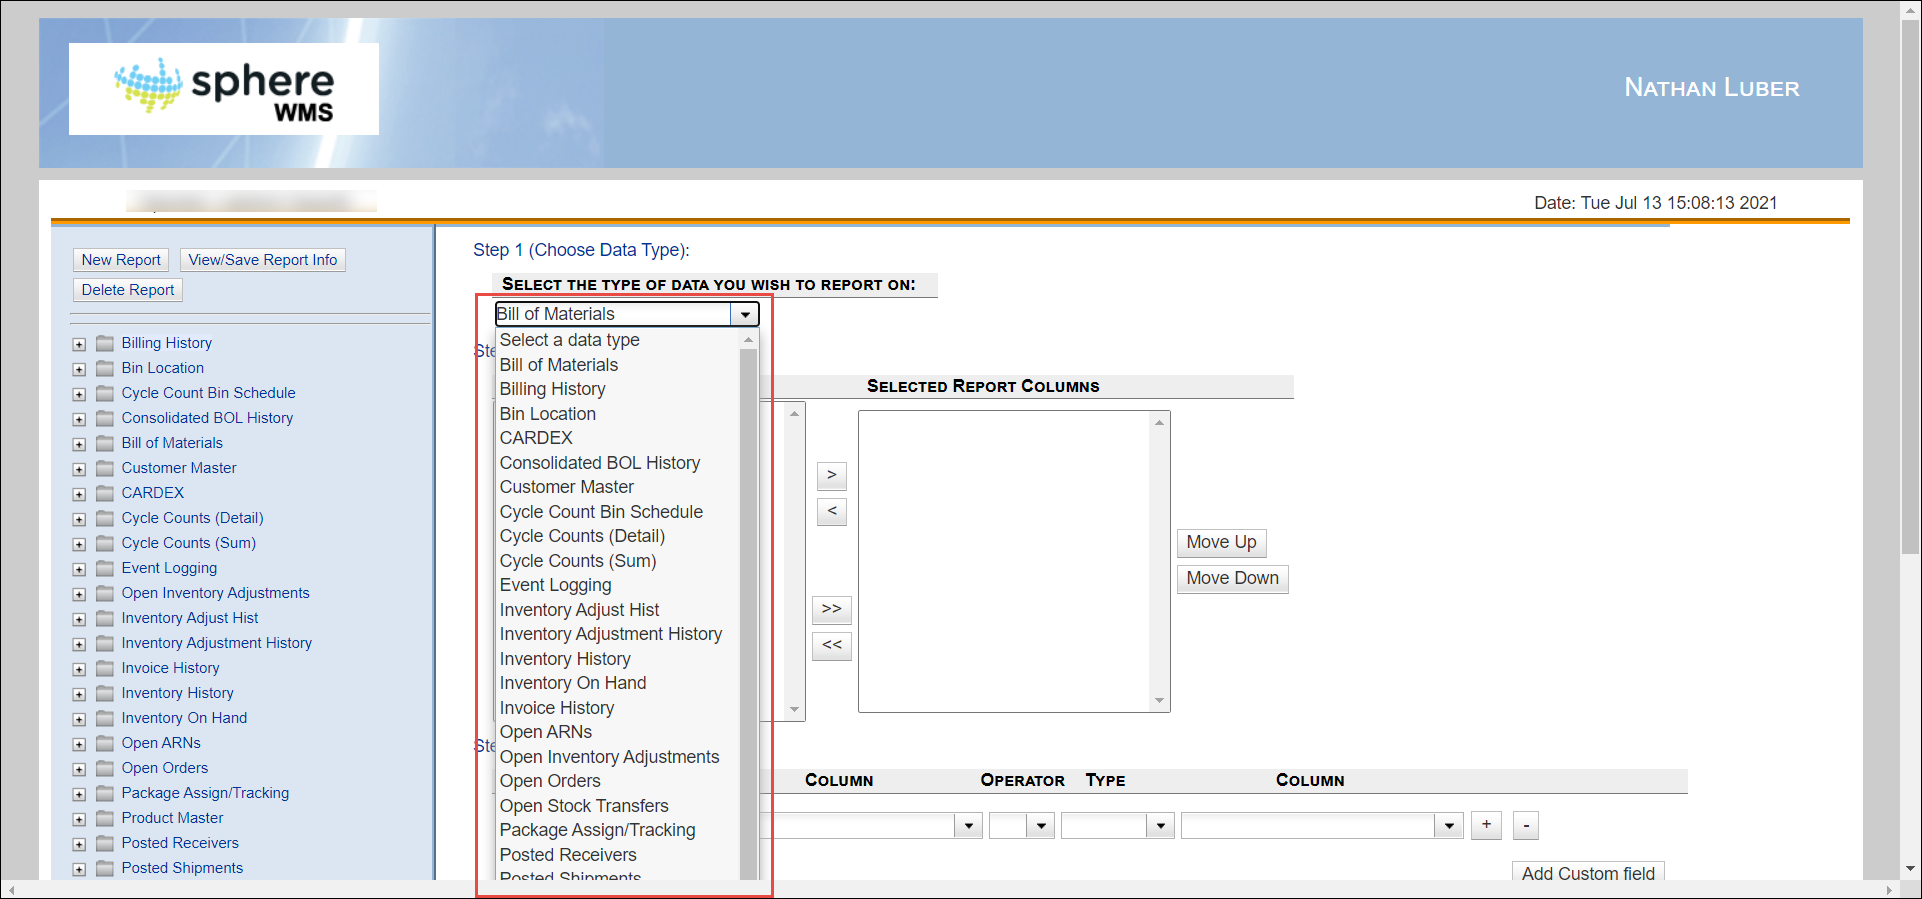
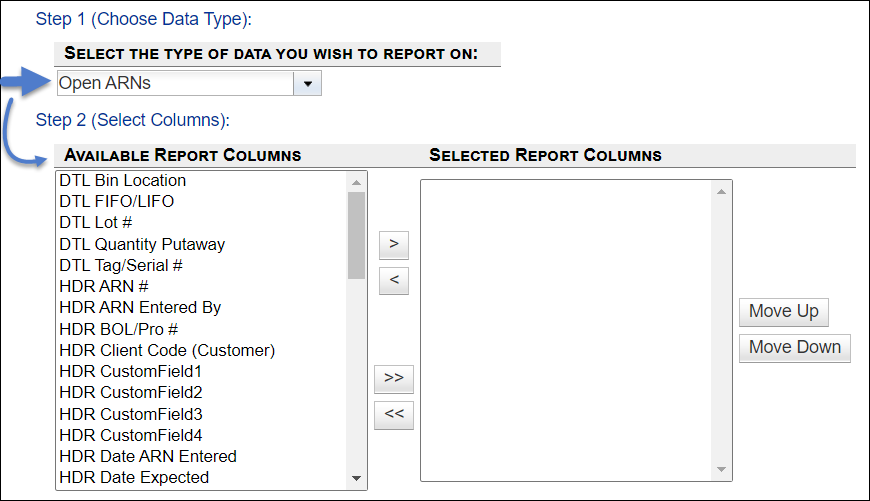
Step 1 (Choose Data Type)
Select a Data Type.
The standard data types are:
Bin Location Master
Inventory Adjust History
Inventory on Hand
Open Allocations
Open Orders
Open PO’s
PO Revision History
Posted Allocations
Posted Receivers
Posted Shipments
Product Master
Ship-To-Location (Pick Seq)
Stock Transfer History
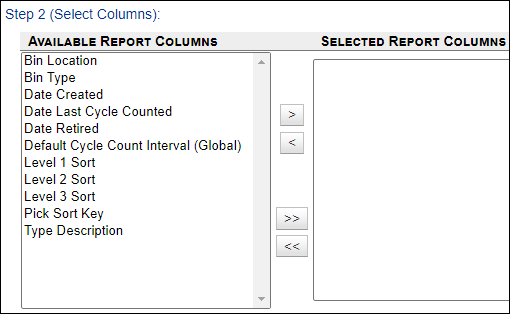
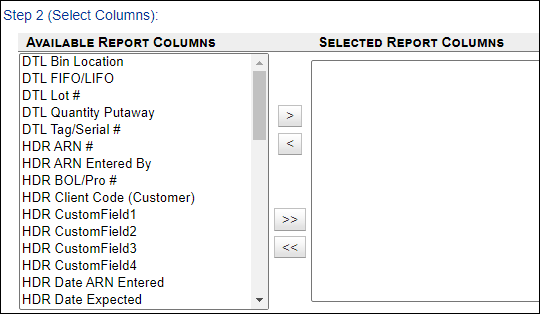
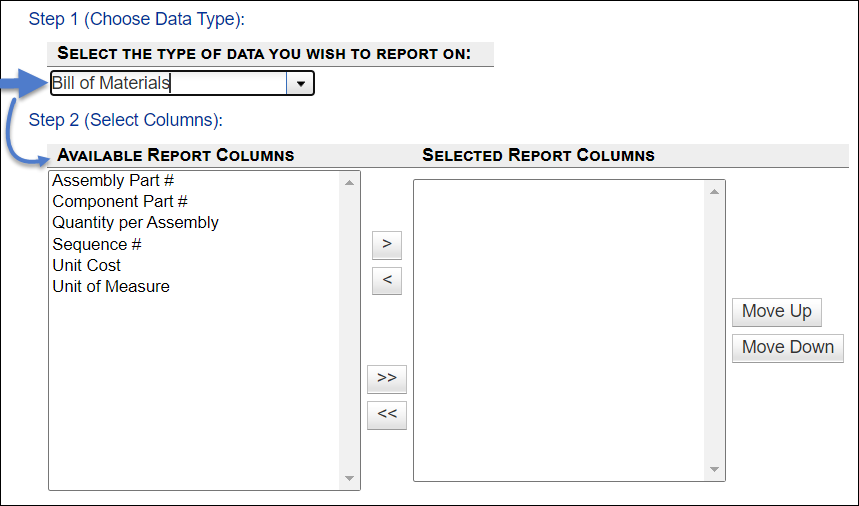
Step 2 (Select Columns)
Depending on what Data Type you select, different options will appear in the Available Report Columns.


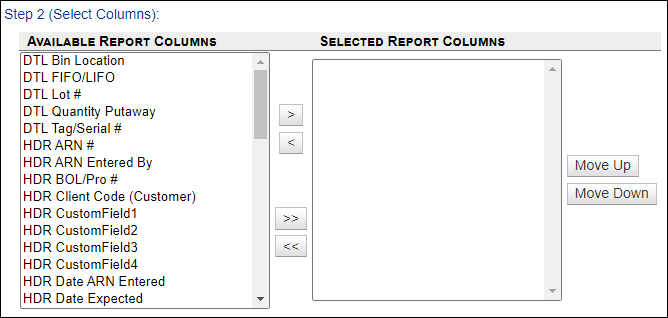
Select your options from the Available Report Columns and add them to the Select Report Columns list using the arrows between the two boxes.
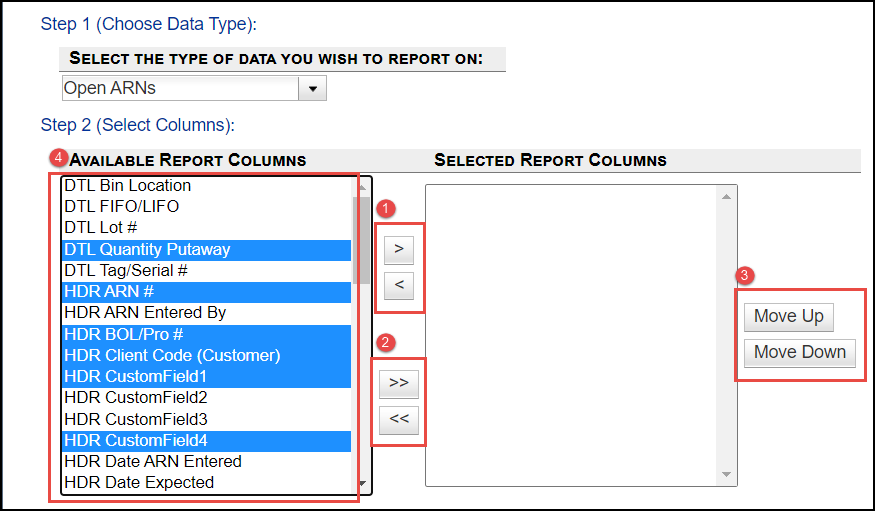
1. The single arrows move the selected item(s) from one column to the other.
2. The double arrows move the entire column to the other designated column.
You may also double-click on an item in one column to move it to the other.
3. Tips & Tricks: How to Multi-select
Use the Ctrl key to select multiple items or the Shift key to select multiple adjacent items.
4. Use the "Move Up" and "Move Down" buttons to rearrange the desired order in the Select Report Columns.
Continue defining your report, or you can go straight to Step 6 and run your report!
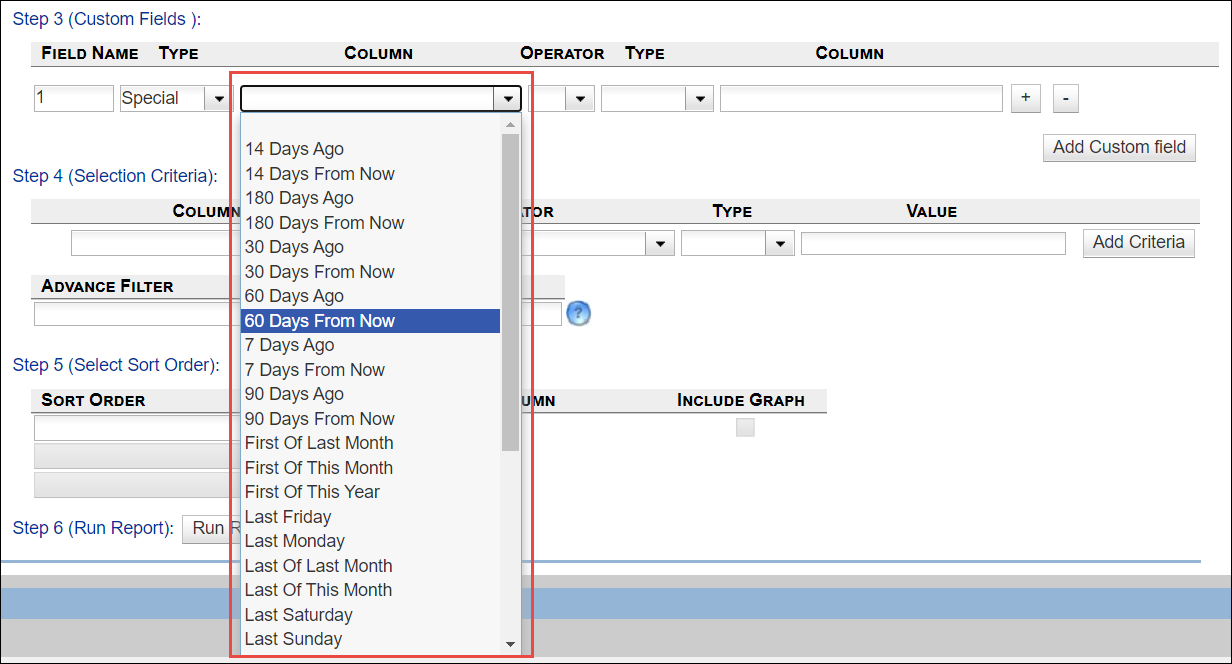
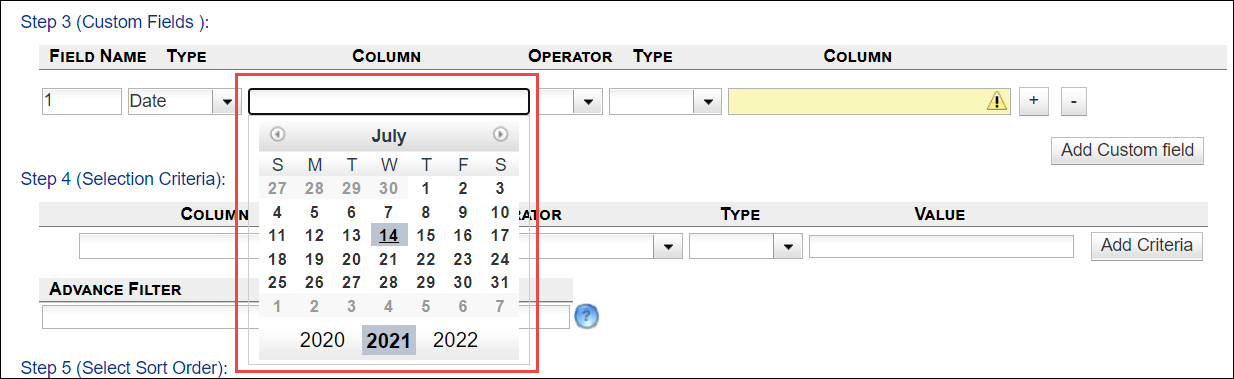
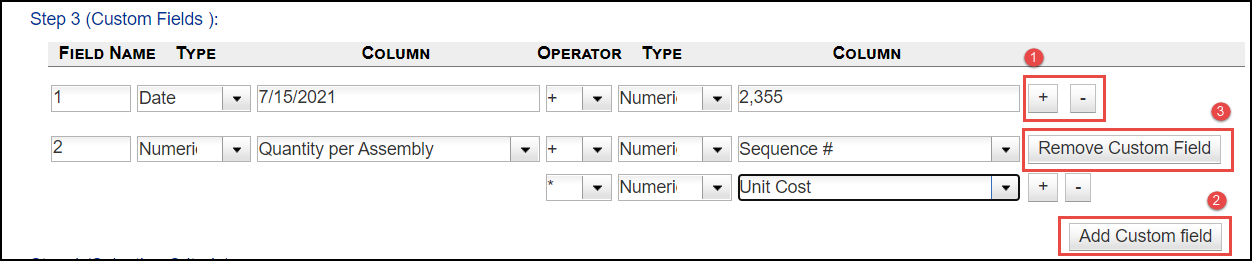
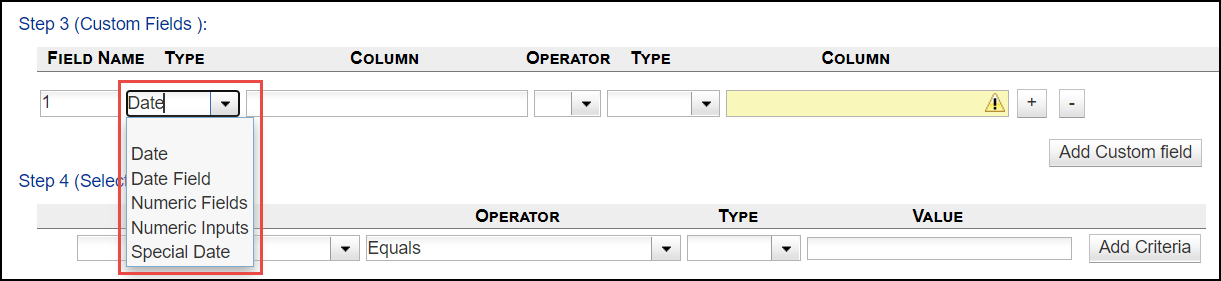
Step 3 (Custom Fields) – optional
This step allows the user to make calculations in the report based on custom fields.
Field Name:
Add any custom alpha-numeric name to the desired new custom field. (Allowed characters are A-Z, a-z, 0-9. No special characters or spaces) The name is also automatically listed in the Selected Report Columns above when the Field Name is filled in.
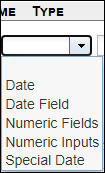
Type (1st):
Depending on the option picked from the drop-down arrow, you can select the type of calculation to contain in the report.

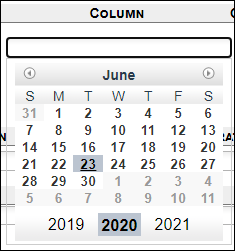
Column (1st):
Depending on the TYPE picked, you will have several options to choose from in the first COLUMN.
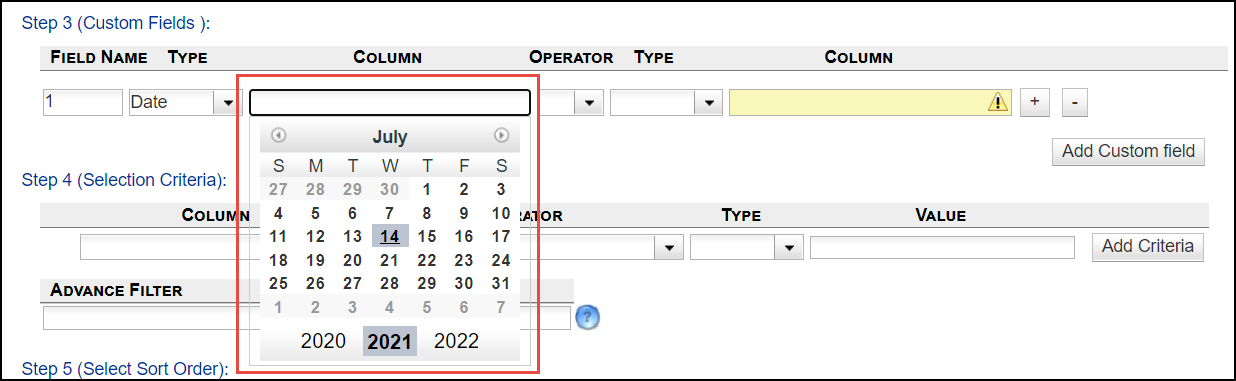
If TYPE = “Date”: when you click on the COLUMN field, a drop-down calendar will appear requiring a specific date.

You may also ignore the calendar and type a date using the DD/MM/CCYY format.
If TYPE = “Date Field” or “Numeric Fields”: click on the COLUMN field’s drop-down arrow, and corresponding option(s) will appear from the SELECTED REPORTS COLUMN above.

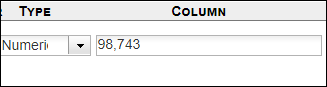
If TYPE = “Numeric Inputs”: you can input a direct number into the COLUMN field.

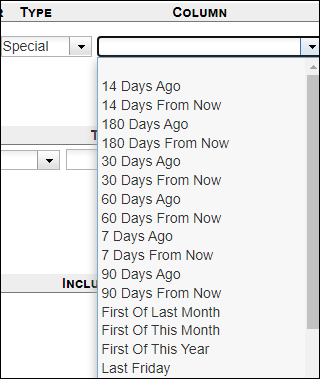
If TYPE = “Special Date”: click on the COLUMN field’s drop-down arrow, and a corresponding list of options appears. The date chosen corresponds to whenever the report is run. This option can be very helpful if this is a report used many times and you do not want to keep modifying the dates.
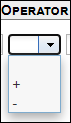
Operator:
Depending on the type of calculations you are doing, there are different options available from the drop-down arrow.

Type (2nd) and Column (2nd):
These two fields work and act just like their corresponding ones in this Custom Fields step.

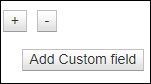
1. Plus and Minus Buttons:
If you want to continue the current calculation by adding more numbers, simply click on the Plus button. If you change your mind and you want to remove a calculation or part of one, press the Minus button.
2. Add Custom field Button:
If you want to add another calculation, press the Add Custom Field button.
3. If you change your mind and you want to remove a calculation, press the Remove Custom Field button.

Step 4 (Selection Criteria) – optional
This step allows you to filter the report based on certain criteria.
In this example, the report will contain products in any bin that start with SFO01 and have a FIFO/LIFO date between today’s date and the end of the current month.

You must click the "Add Criteria" button to filter the report.
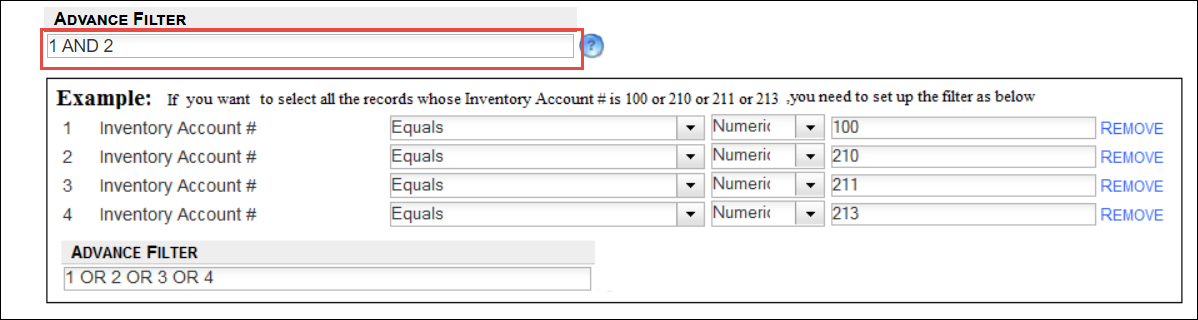
The Advance Filter:
The Advance Filter can tighten up your search by filtering the criteria by using the Boolean operators “AND”, “OR”, and “NOT”. You can also use parenthesis to separate the calculations by the advanced filter. Clicking on the “?” in the blue circle may help you if you encounter any problems.

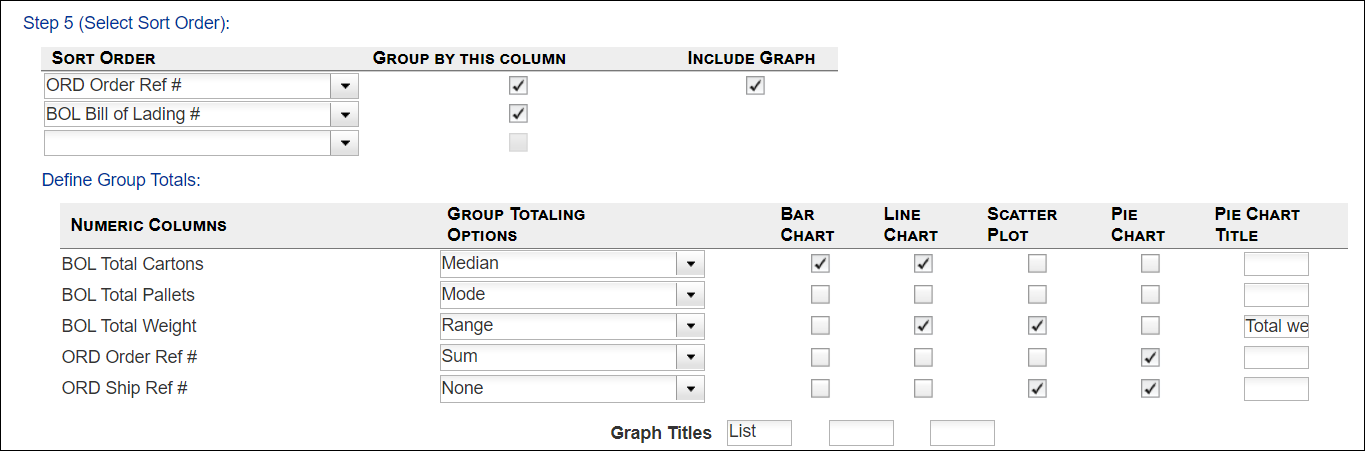
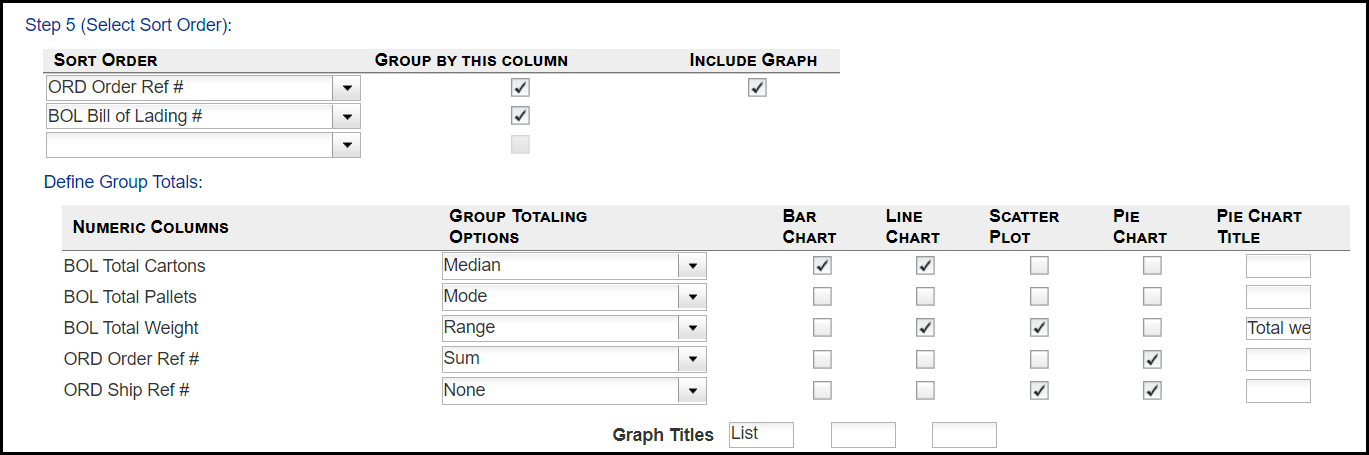
Step 5 (Select Sort Order) – optional
This step allows you to specify a sort order for the results. Multiple sort orders may be specified. When the “Group By This Column” option is selected, the Define Group Totals category becomes available, giving further options in how to calculate the sorted items on the report.
This step also gives the option to include four different types of graphs. You may title the graphs accordingly. The title input areas for the Bar Chart(s), the Line Chart(s), and the Scatter Plot(s) are located below the appropriate column of checkboxes. The title input area for the Pie Charts is to the right of each Pie Chart checkbox.

Tips & Tricks: Sort Order
Specifying the sort order may delay the display of the results. You may also sort, or resort, the report after it is created.
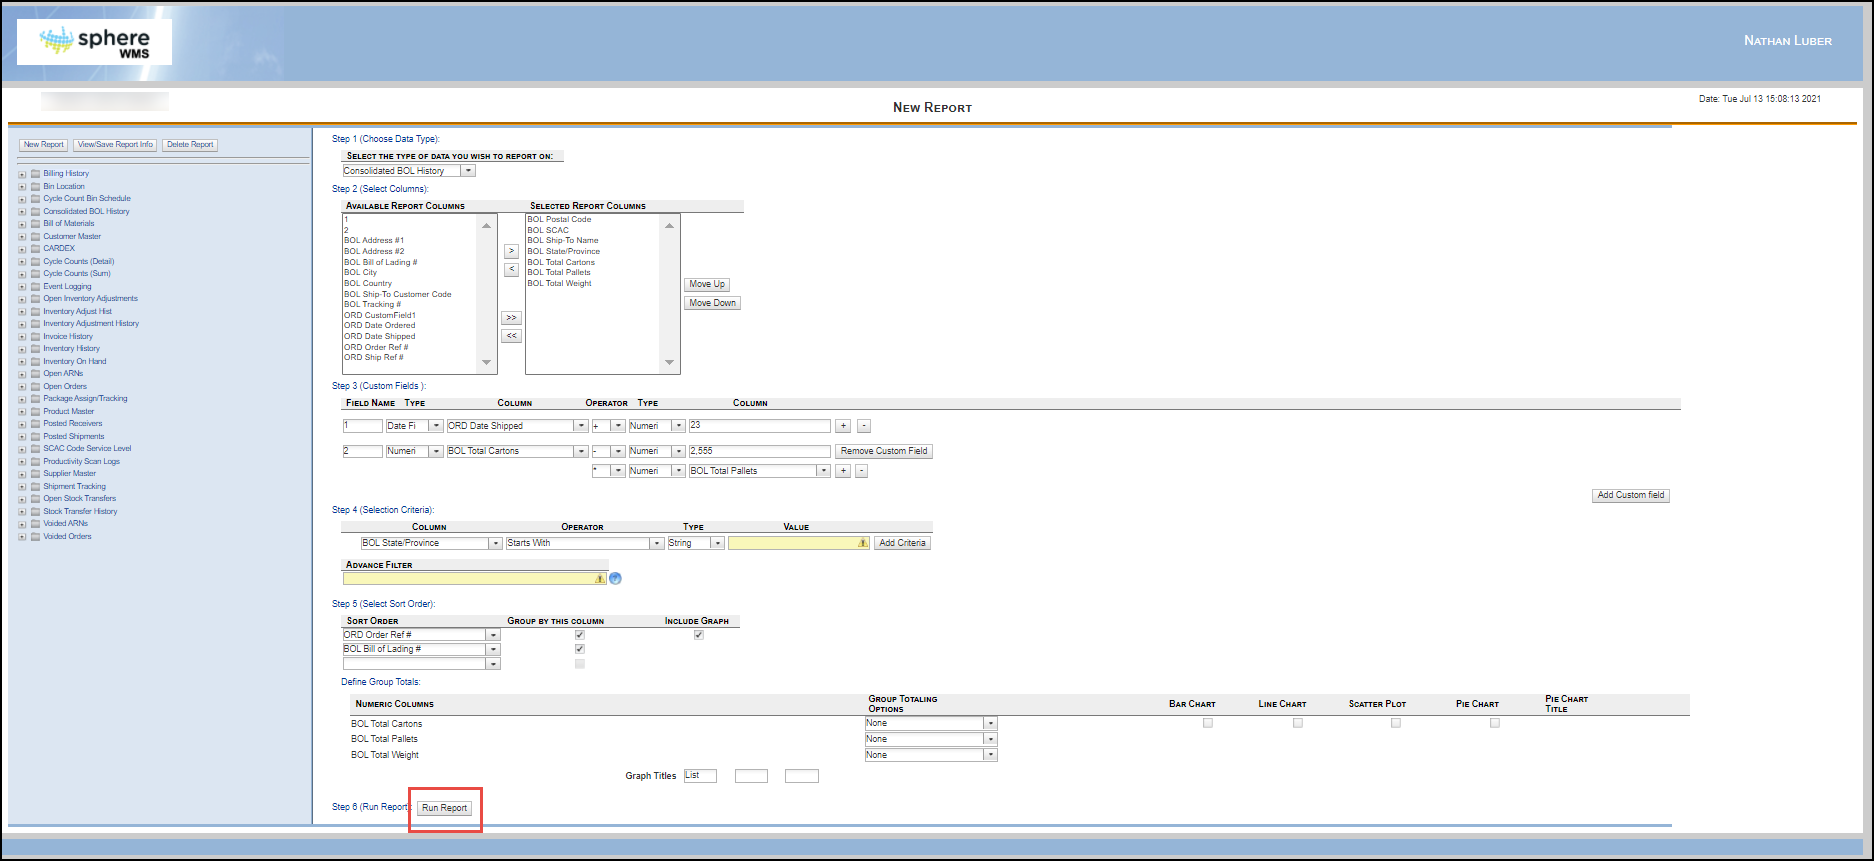
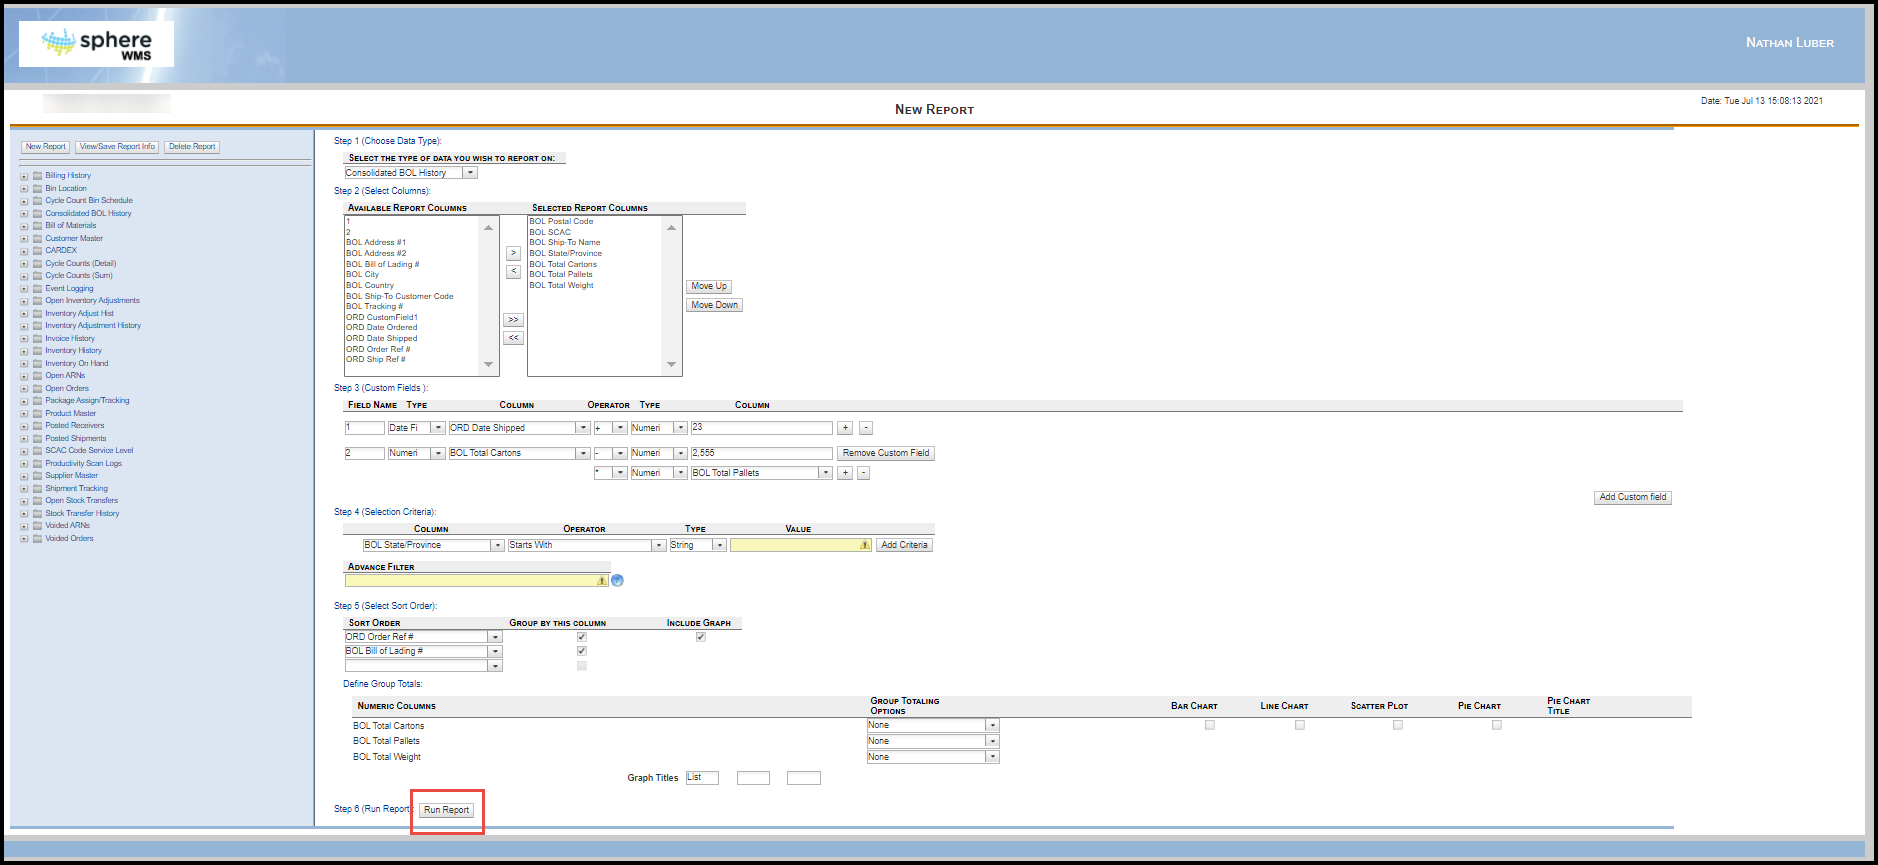
Step 6 (Run Report)
Click the "Run Report" button.
