The normal adjustment processing involves three steps - Adjustment Entry, Select Inventory, and FINAL CONFIRMATION & POST. The 1-Step Adjustment > Adjustment Entry/Post allows you to complete the adjustment process in just one step. To add inventory adjustment & post in one quick step:
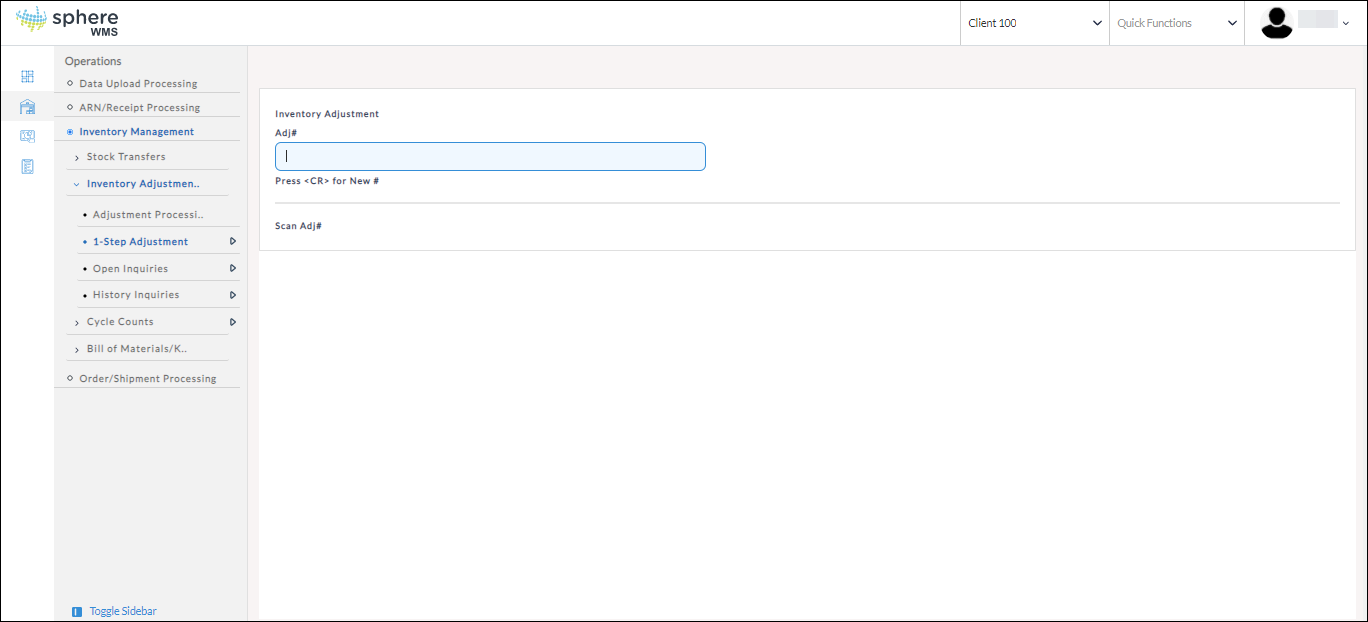
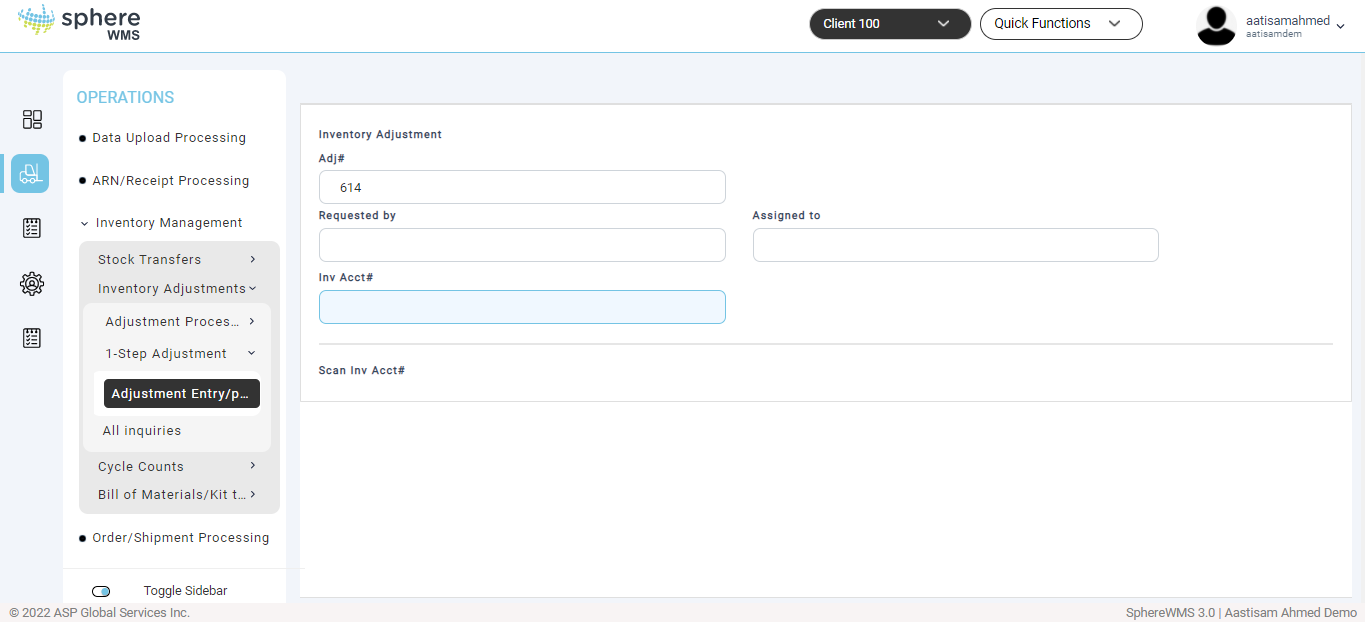
1. Navigate to Operations > Inventory Management > Inventory Adjustments > 1 Step Adjustment > Adjustment Entry/Post.
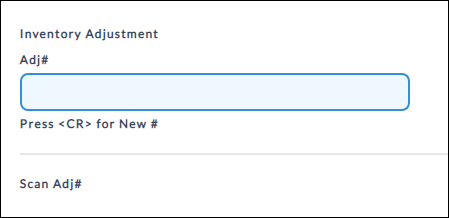
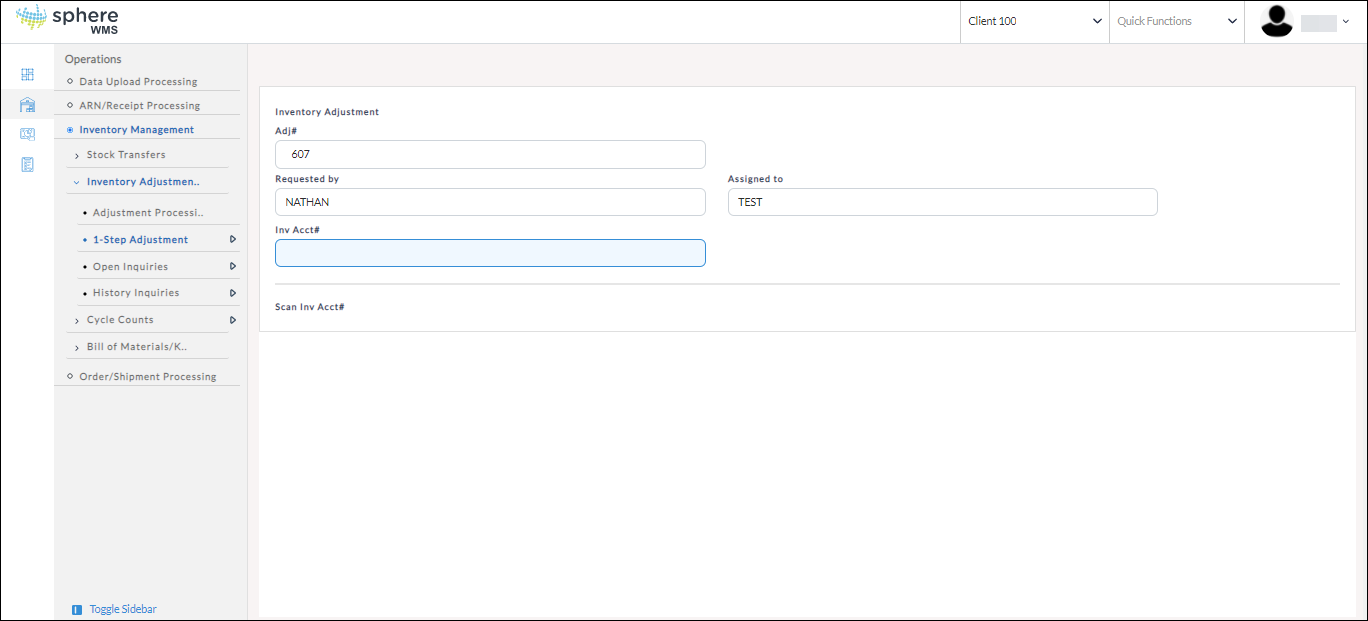
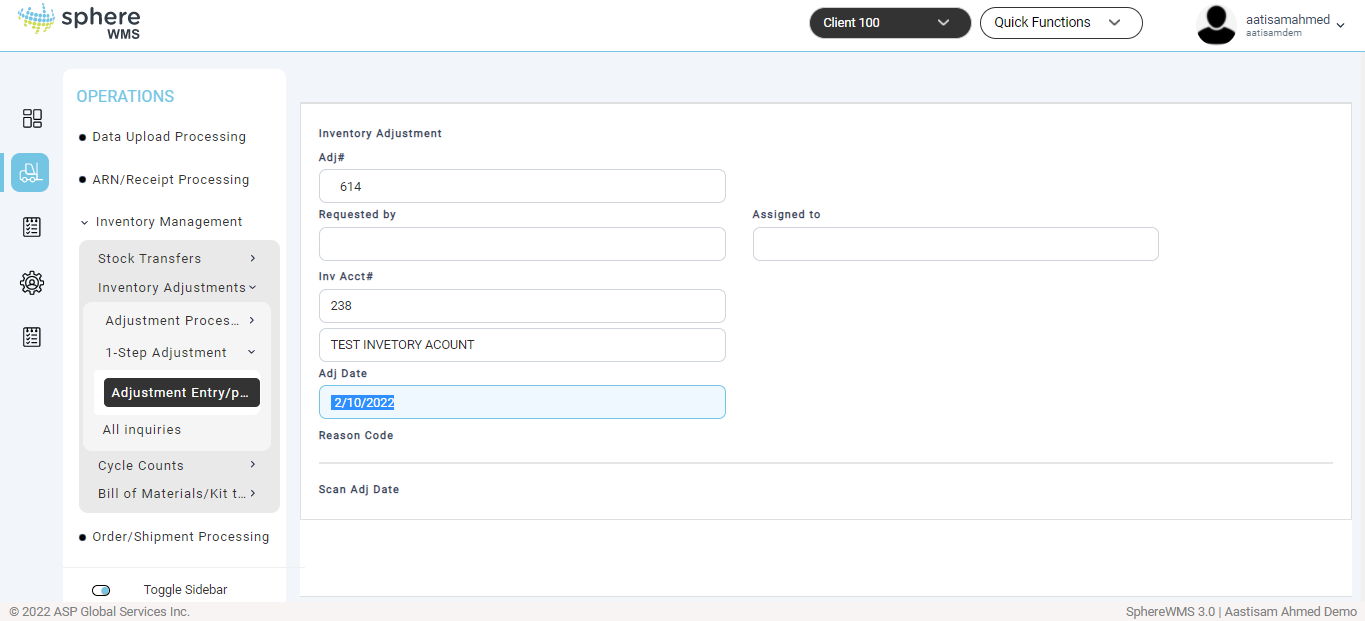
The Inventory Adjustment page will display.
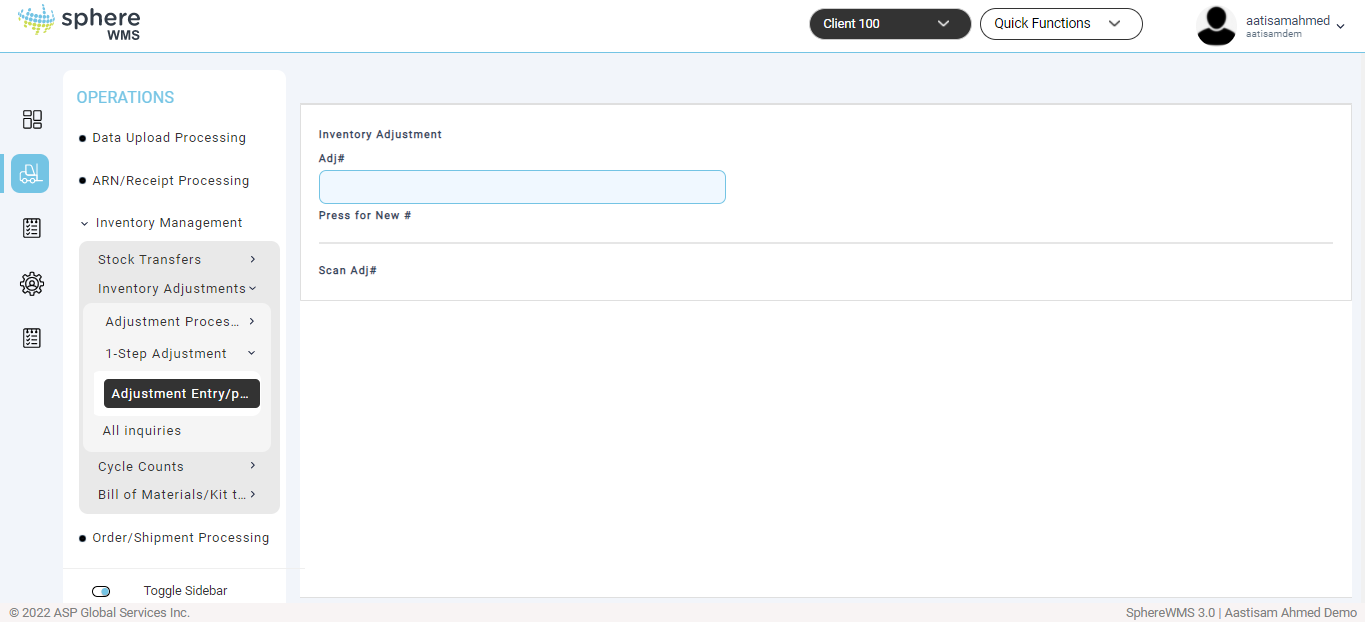
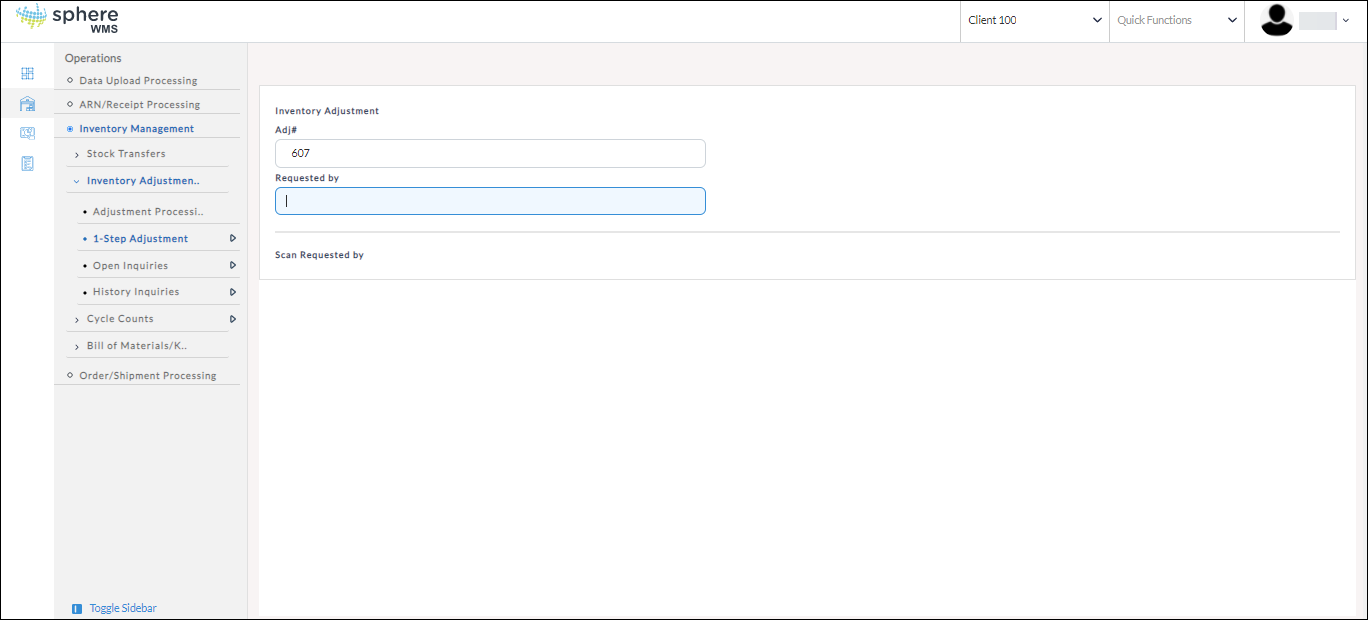
2. Enter an adjustment number for the new entry.
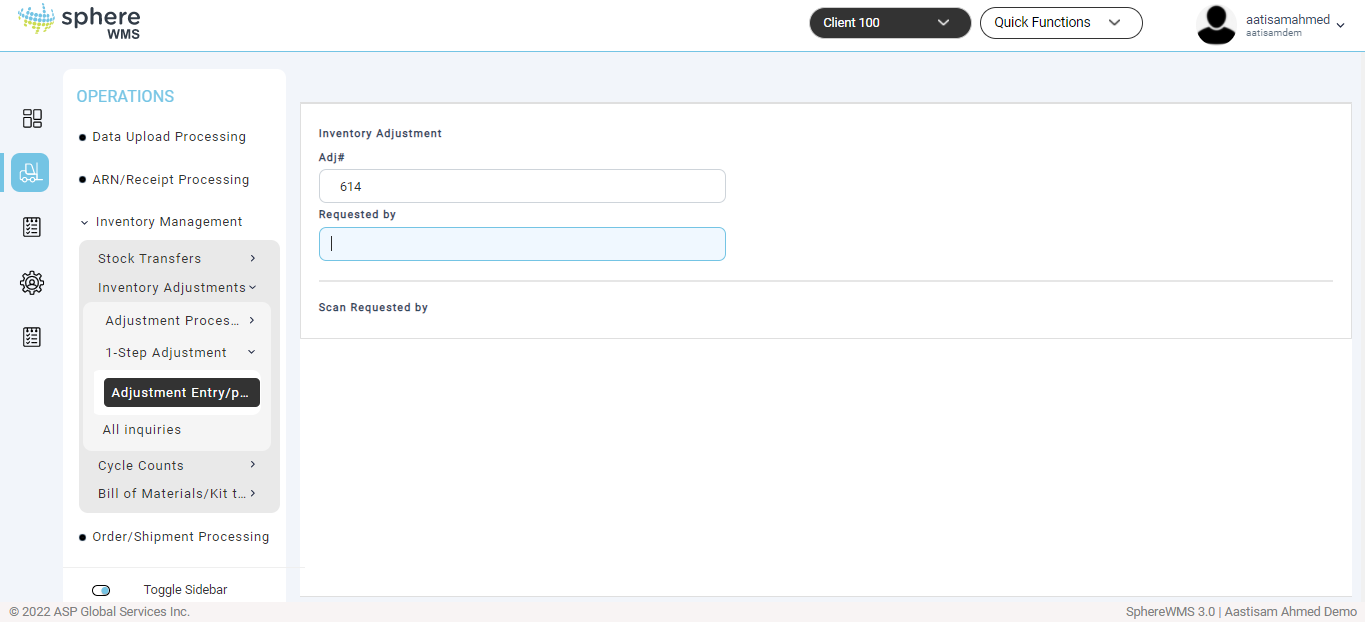
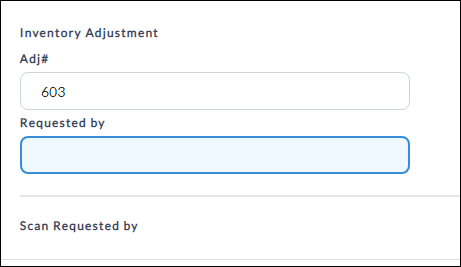
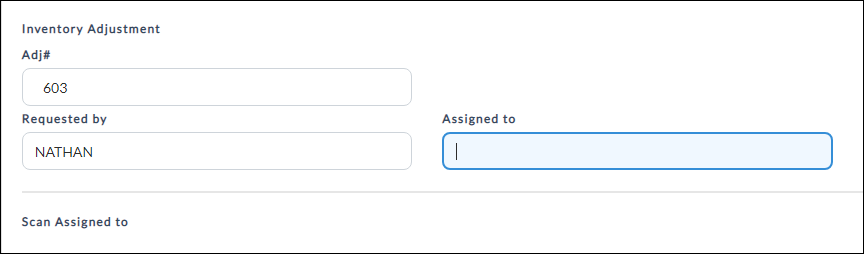
3. Enter the username that is requesting the inventory adjustment.

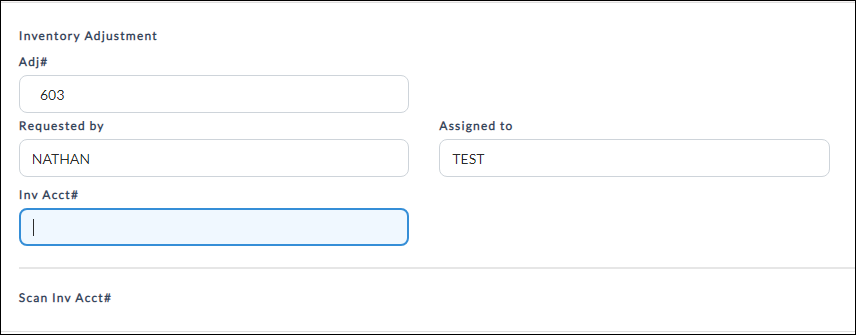
4. Enter the username to which the inventory adjustment is assigned.

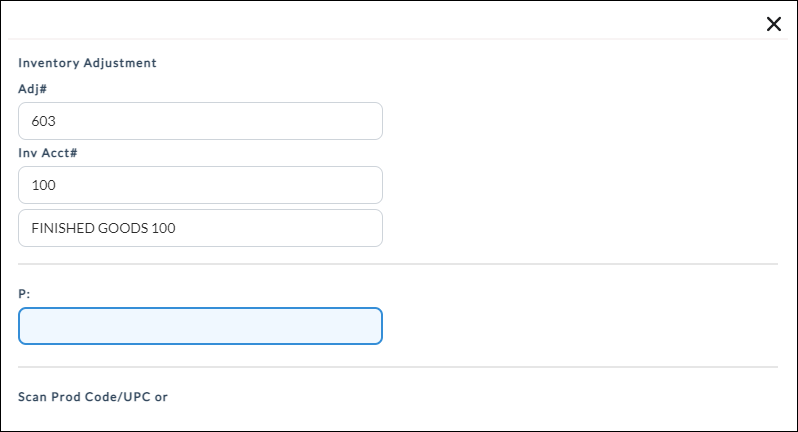
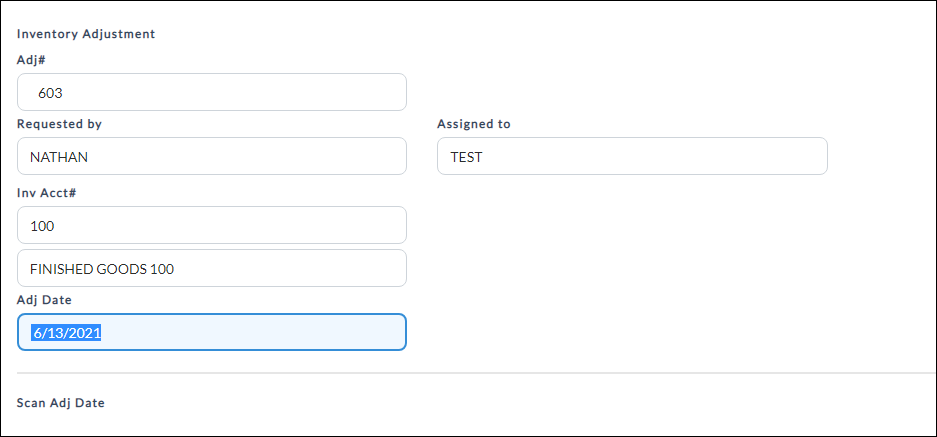
5. Enter the inventory account number. Or you can select from the lookup table.

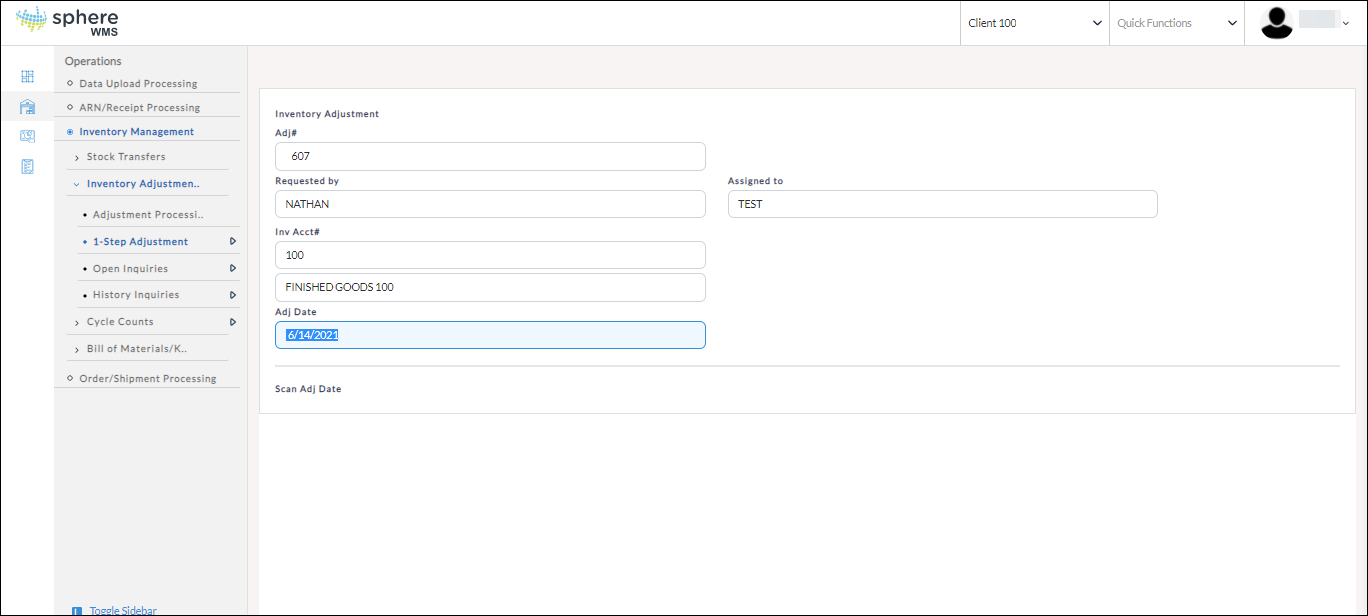
6. Enter the adjustment date. By default, the current day’s date will be loaded. You can edit it.

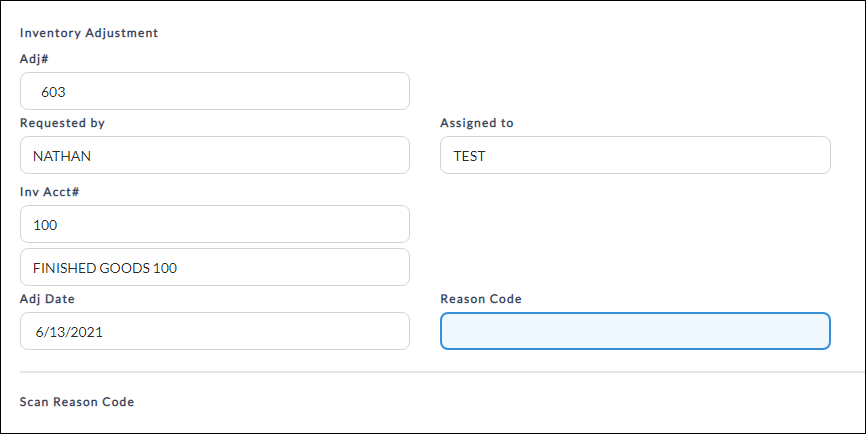
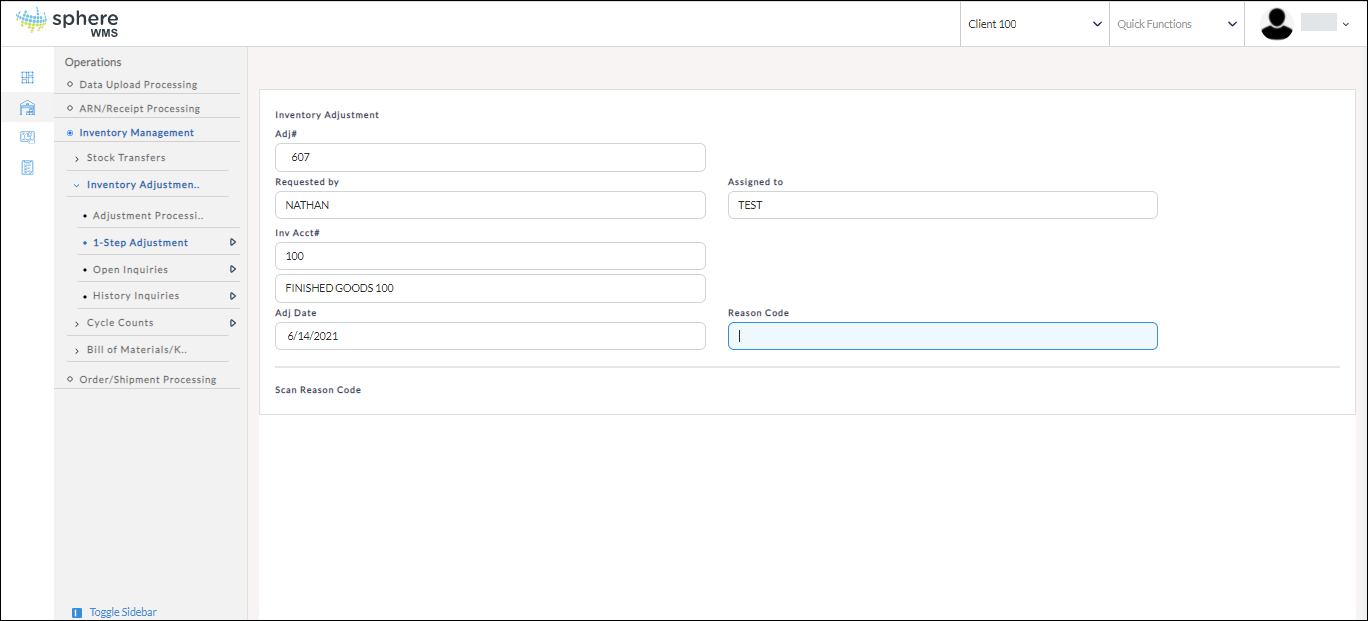
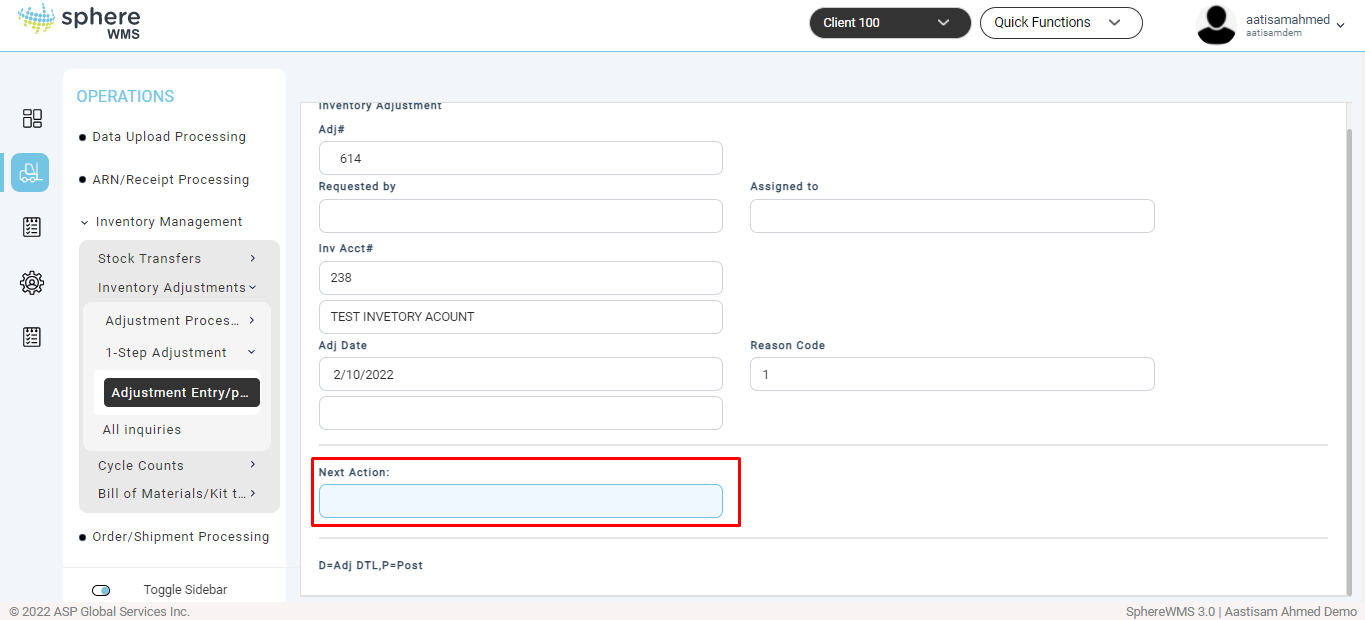
7. Enter the adjustment reason code.

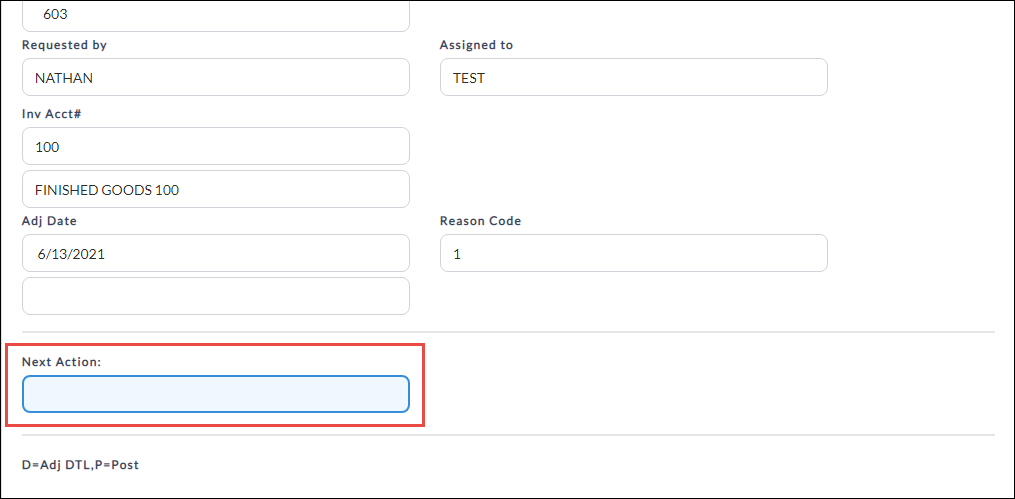
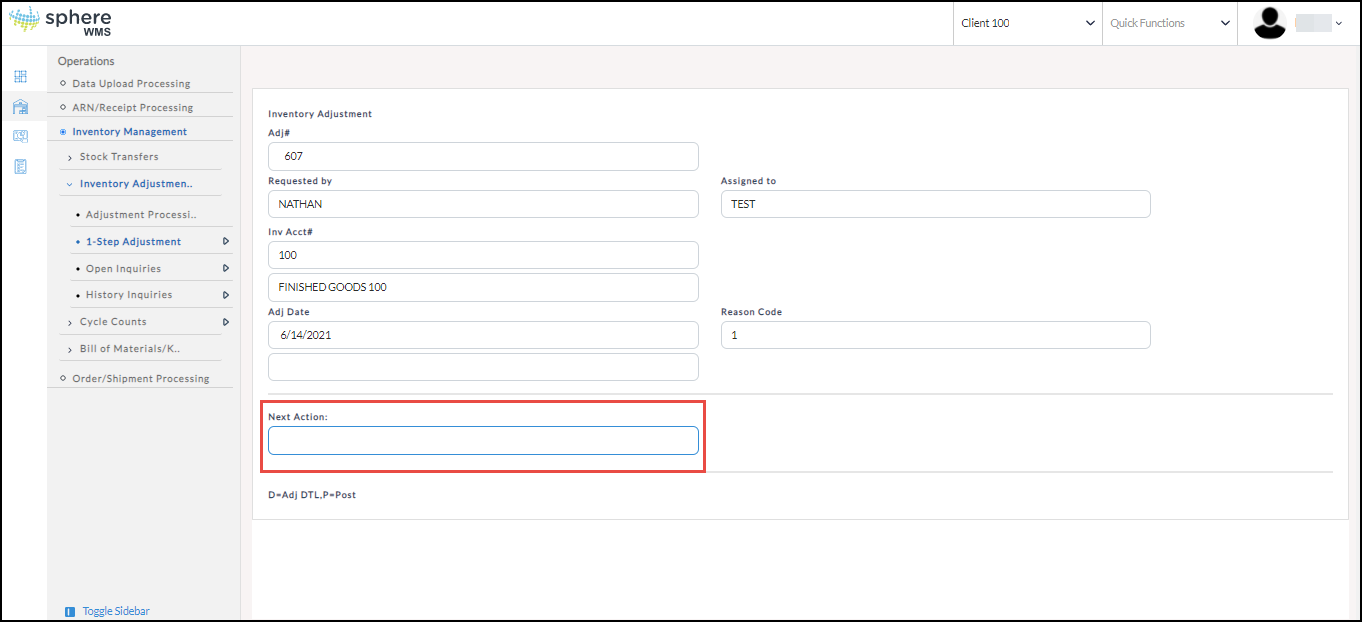
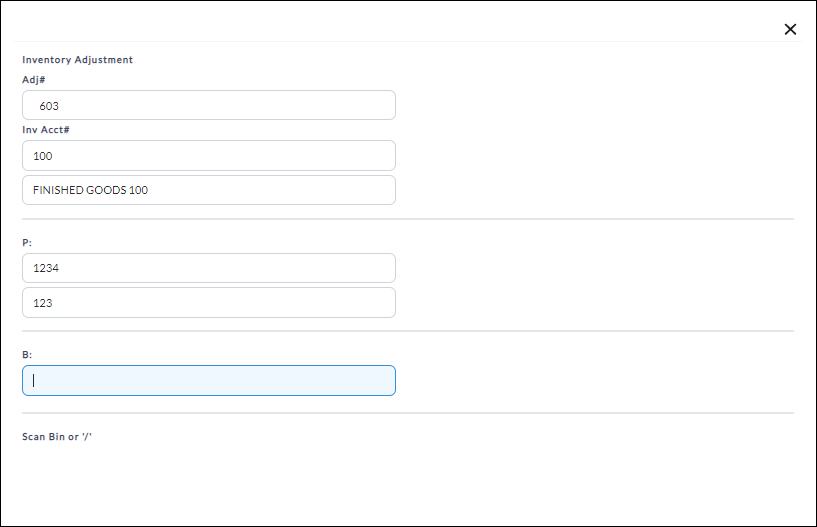
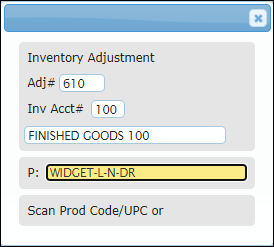
8. Next you will be prompted to enter receiving details or post the receipt. To enter the receiving details, enter D in the Next Action field.
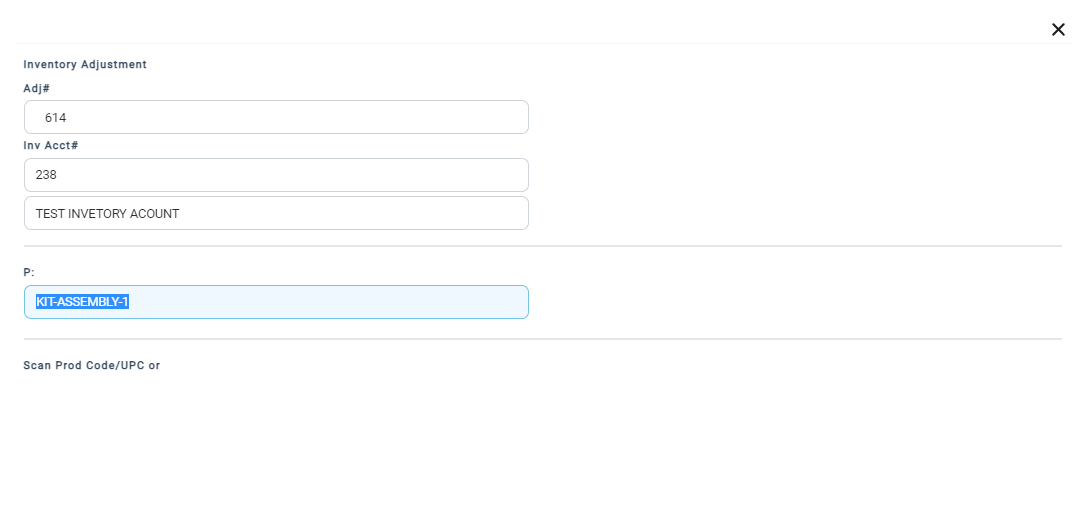
9. Enter the Product/UPC Code. If there are any open orders for the selected product code, it will be displayed.
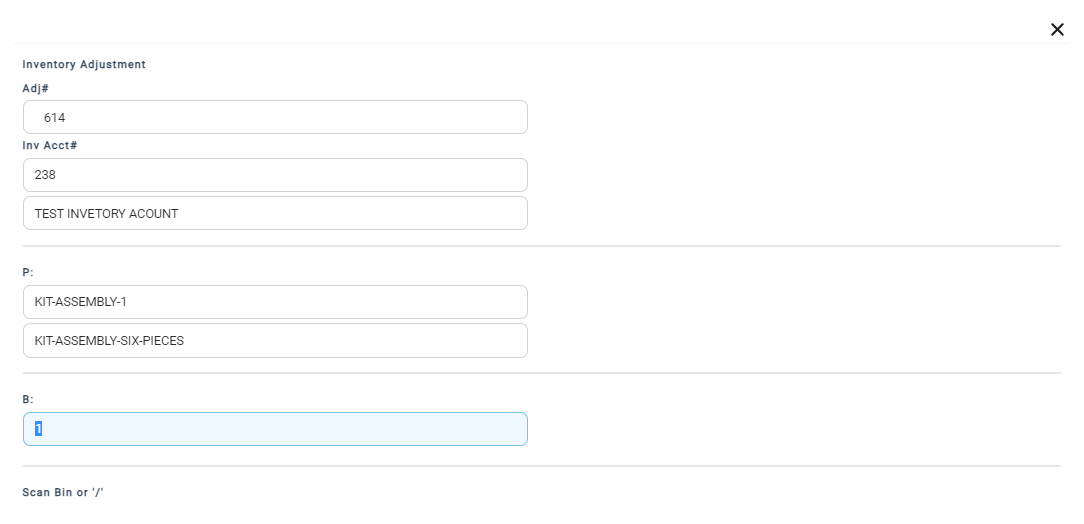
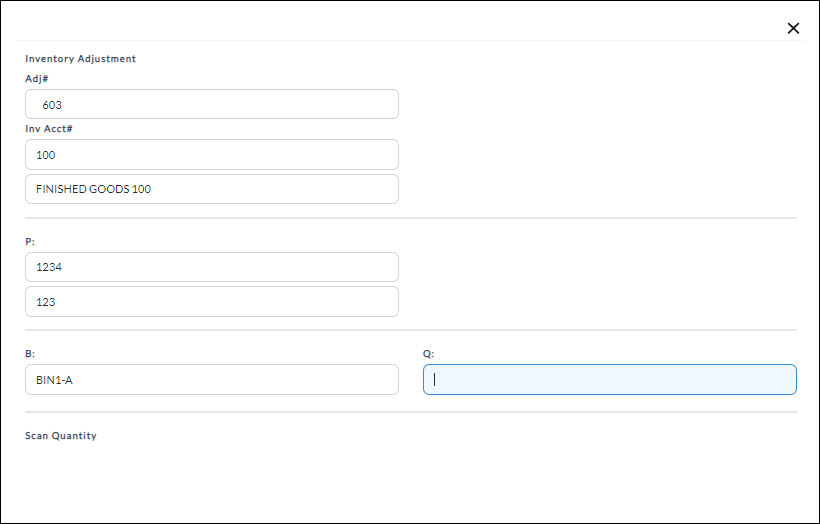
10. Assign a Bin Location.

11. Enter the quantity to be adjusted.
Then the system will go into a loop.
12. Repeat steps 9 through 11 for all the products that you want to adjust.
13. Once you have entered all the product adjustment details, press Esc on your keyboard.
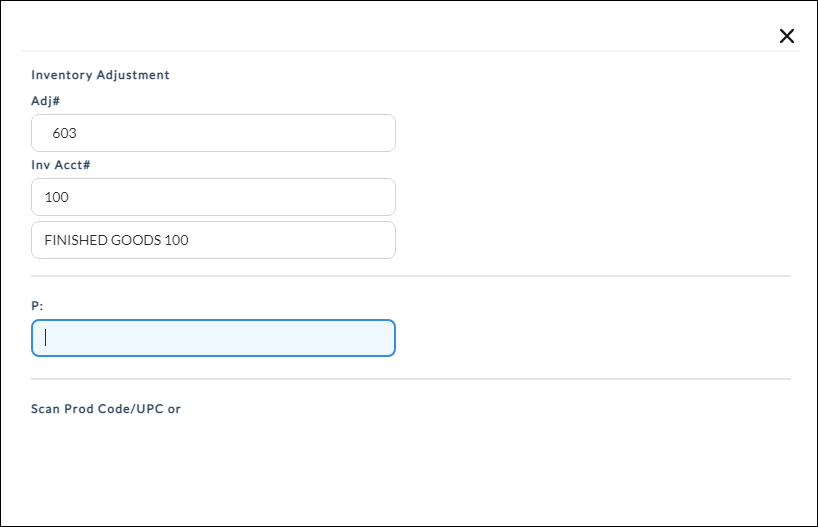
The Inventory Adjustment dialog will display.
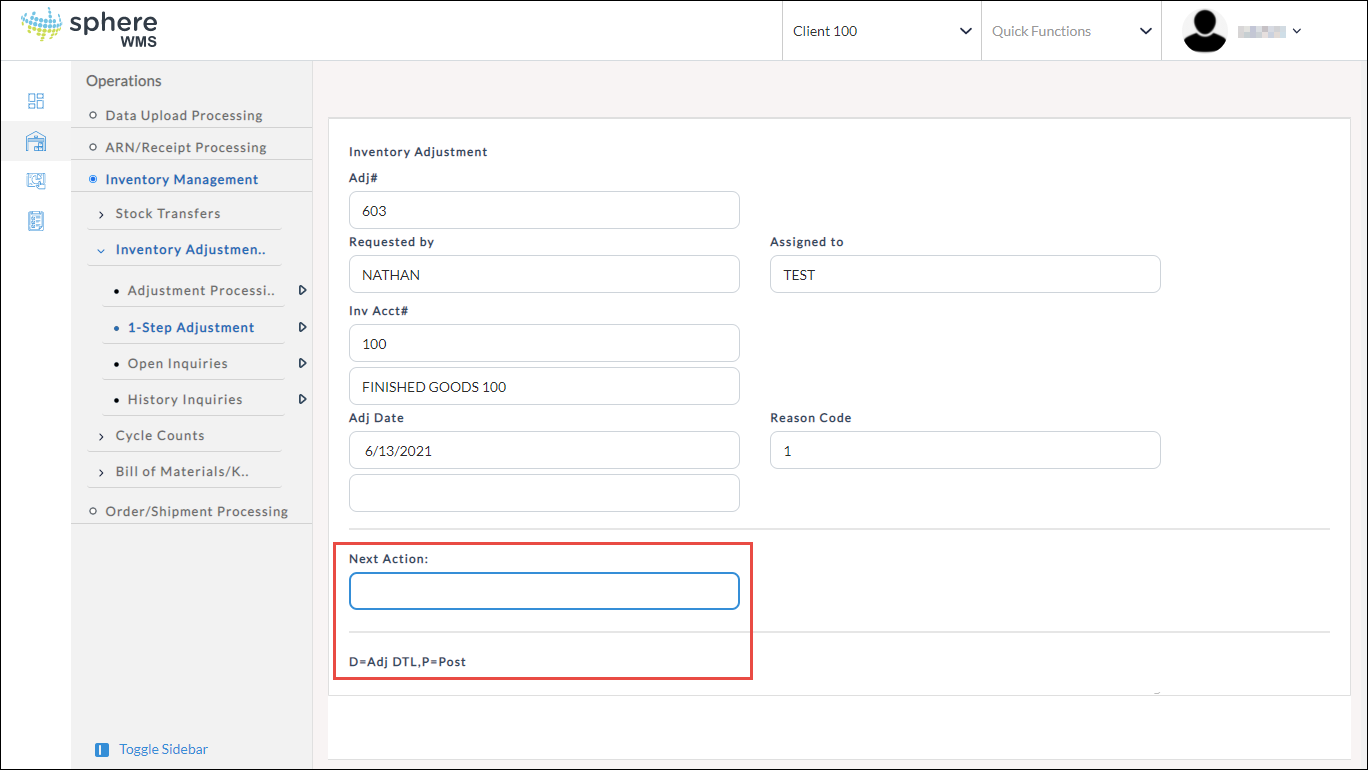
14. The final step is to post the adjustment. Enter P in the Next Action field and press Enter.
The adjustment will be posted.